Showing posts with label Fruit. Show all posts

Thursday, 19 September 2013

Caramel Apple Cake.


Uh oh...here come the apples. It's all over. I love apples, I do, but what I don't love is how they signal that it's all down hill from here....no more strawbs, no more watermelon, raspberries are just a figment of the imagination....until it's time for rhubarb kicks in in spring....and I don't even like rhubarb.


Yes, of course, there's pears too, which are yummers, and all the sticky dried fruits of the festive season, but I proper LOVE fruit, and having no choice for half the year is not my fav.


The cheer up answer? Caaaake...OBVS. I'll just have to spend the dark months concocting all sorts of non-boring apple delights to keep the fruit excitement....seems like a plan. And here seems like a good place to start...and it's not just cake, ohnono...here we have appley sponge, plus buttery apples, plus creamy yoghurt PLUSPLUPLUS the most velvety caramel there ever was. Perhaps we'll make it through the apple season after all. With Love and Cake.


Caramel Apple Cake.
Adapted from a delicious. magazine recipe

A few notes:
  • This recipe is for a THREE LAYERED CAKE. I stole away one of the layers to take to a friend and kept the too other layers to show all you lovely peeps (thought she wouldn't appreciate a slice already hacked out of the cake I was to hand over), but I will keep the recipe written as for 3 layers because that's how I made it and you don't want to be faffing around dividing eggs and such malarky. 
  • Here's how the cake is layered (I sometimes find it easier to comprehend a recipe when you know basically what your making....)
caramel
sponge
caramel
apples
yoghurt
sponge
caramel
apples
yoghurt
sponge

You will need

3 x 20cm loose based cake tins, greased and bottoms lined

For the sponges
4 eating apples (I used cox), peeled, cored and chopped roughly
390g caster sugar
375g butter, at room temp
5 eggs
385g self raising flour
1 tsp baking powder
pinch salt

For the filling
4 eating apples (again, I used cox), peeled, cored and sliced
50g caster sugar
70g butter
350ml thick yoghurt

For the caramel
75g butter 
50g soft light brown sugar 
50g caster sugar
50g golden syrup
20g icing sugar
220ml double cream
big pinch salt

  • First we'll make the sponges, and to start off we make a purée out of the apples. Pop the chopped apples in a small saucepan with 50g of the caster sugar and 100ml of water.
  • Heat over a high heat until they've broken down to a fairly smooth purée, hopefully this'll take about 15 minutes.
  • Remove the apples from the pan and leave to cool completely.
  • Preheat the oven to 170˚c.
  • In a mixing bowl, beat the butter and sugar with an electric hand whisk until pale and creamy.
  • Beat in the eggs one at a time followed by the cooked apple.
  • Sift over the flour, baking powder and salt then fold in gently.
  • Divide the mixture evenly between your cake tins and bake for 30 minutes or until they are bronzed and firm in the centre.
  • Leave to cool in the tins until cool enough to handle, then turn them out and leave to cool completely...and I mean completely.
  • Now we make the filling. Heat a frying pan over a medium heat and throw in the apples, sugar and butter.
  • Cook, stirring regularly, for around 15 minutes, or until the apples are soft and shiny and just starting to properly caramelise around the edges.
  • When they're done, remove the apples from the pan with a slotted spoon and set aside to cool.
  • Now we make the caramel. Put all the ingredients in a saucepan and heat gently to melt the butter and dissolve the sugar. 
  • Bring to a simmer and let lightly bubble away for 7-8 minutes so it turn a proper toffee colour.
  • Pour the caramel into a bowl to allow to cool.
  • When everything is at room temperature, it's assembly time. Place one sponge layer on your serving dish and top with half of the yoghurt, then half of the apples, then drizzle over a tablespoon or so of caramel.
  • Set the next sponge layer on top and top that with the rest of the yoghurt, apples and another drizzle of caramel.
  • Finally add the last sponge layer and pour over the rest of the caramel, allowing to to dribble down the sides. 
  • Oh My....


Wednesday, 11 September 2013

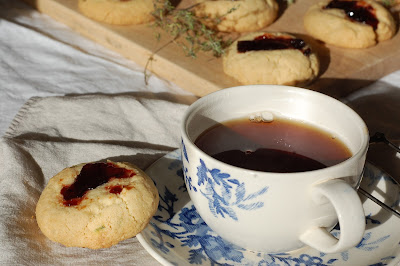
Blackcurrant and Thyme Thumbprint Cookies.


Did I tell you that this summer has been the summer that I've got excited about gardening? Last year I had a dabble and produced the odd strawberry and a haul of tomatoes that didn't ripen....but this year, THIS year, I've sewn the seeds, filled watering can after watering can, bought one of those plastic mini greenhouse thingies and have even got Gardeners' World set on series record. I love Monty.


Little sister thinks it's hilarious and has spent most of the summer sarcastically asking how my hanging basket is doing while sniggering down the phone. THANKS for the support.


It's a bit of a weird and scary hobby for me though, because it's not like cooking and baking which I've done forever and know a whole heap about and understand enough to know when recipes need to be followed exactly and when I can tweak and twiddle and know that as long as I follow the fundamental rules all will work out in the end. This is all new and scary and even when I think I'm following all the rules I find out more rules that I didn't know about or I do do all the things I'm supposed to and things still go wrong and my squash gets mildew. Nightmare.


I guess it's all good and about learning and exploring like I must have done in the kitchen in the beginning...it just takes a while longer in the garden because you've got to wait around for seasons and such like. Anyway, one of the things I learnt from a recent Gardeners' World (I feel like I should take notes there's so much information...is that what watching cooking shows feels like to new cooks?) was that I should cut back my thyme so it makes new, non-woody growth which is preferable for cooking....and like a good little new gardener I did what I was told. This meant I had heaps of the stuff to use up though...hence these little beauties. Don't feel like you have to grown your own though, that magical supermarket place has done all the work for you. Enjoy. With Love and Cake.


Thyme and Blackcurrant Thumbprint Biscuits.
adapted from a recipe by My Darking Lemon Thyme

A few note:
  • The thyme I used was freshly dried...as in, I left the bunch I cut from my garden hang around on a plate for a week or so...you could happily use fresh from a packet or pot from a supermarket or your garden...just don't use the jarred dried stuff.
  • You could actually not even use thyme at all, or maybe you'd like to experiment and mix it up with rosemary and marmalade or whatever other combination floats your boat.
  • These whizzed up in my food processor in no time, but feel free to cream the butter and sugar by hand or with an electric whisk and stir the rest in with a spoon.
Makes 10-12
You will need

1 x baking sheet, greased

125g butter, at room temperature
50g caster sugar
2 tsp thyme leaves
1 tsp vanilla extract
105g plain flour
50g cornflour
1/2 tsp baking powder
35g ground almonds
about 2 tbsp blackcurrant jam

  • Preheat the oven to 180˚c.
  • Cream together the butter, caster sugar, thyme and vanilla until smooth and creamy.
  • Add the flour, cornflour, baking powder and ground almonds and bring together to a crumbly dough.
  • Pull off about 1/2 tablespoonfulls of dough at a time and shape into balls.
  • Press lightly onto your prepared baking sheet.
  • Flour your thumb and press into the middle of each biscuit, leaving a slight impression.
  • Fill each little hole with a teaspoon or so of jam.
  • Bake for 15-20 minutes until just starting to darken around the edges.
  • Leave to firm up on the baking sheet for 5 minutes before transferring to a wire rack to cool completely.


Wednesday, 7 August 2013

Chocolate Truffle and Strawberry Pie.


I went Pick Your Own-ing last week. On maybe the rainiest day of July. It's a gooood job those strawbs grow undercover or I think you'd have to front crawl down the lanes of plants. My plan was jam, stash some in the freezer for smoothies, and this beast of a pie.


I'm always fairly conservative when I'm PYO-ing...I always think it seems like you've got SO MANY berries in your basket and that it might be really embarrassing when you get to the til and they're like 'that's £50bajillion pounds please' and then you take them home and they spontaneously combust into a pile of mould in under half an hour.


But then what always happens in real life is that they say 'that'll be 53 pence please' and I'm all 'uuuurrrm are your sure' and then I get home and think, yep, could easily have handled double the amount, dammit. MUST remember that for next year....


What I must also remember is that things that are best chilled before eating are also best chilled before photographing. You see I got ahead of myself and photied this luscious lady of a pie before she'd had her chill time and it means you don't get a good enough sense of the chocolate velvetyness that's shining beneath all that cream and fruit. You'll have to take my work for it though....my word is MAKE THIS PIE. With Love and Cake. 


Chocolate Truffle and Strawberry Pie.
Adapted from a Bakers Royale recipe

A few notes:
  • Eat ASAP...I mean, why wouldn't you.
  • You could just throw a lovely layer of fresh strawbs on top rather than cooking them up...I did both.
Serves 8
You will need

1 x 18cm tart tin or pie dish


For the pastry
175g plain flour
25g cocoa powder
50g icing sugar
100g butter, cold from the fridge, cubed
1 egg yolk
2-3 tbsp cold water

For the chocolate filling
170g dark chocolate
1 tbsp butter
225g cream cheese, at room temperature
30g icing sugar

For the top
250ml double cream, lightly whipped
350g strawberries, halved or quartered
75g icing sugar 
2 tsp cornflour 

  • First we must make the pastry. Pulse together the flour, cocoa and sugar in a food processor (or sift into a bowl).
  • Then add the butter and pulse until the mixture looks like fine breadcrumbs (or rub in with your finger tips).
  • Add the yolk and 2tbsp of cold water and pulse until a soft dough forms, adding more water if necessary.
  • Remove the dough from the processor and gently form into a disc. Wrap in clingfilm and rest in the fridge for around 15 minutes.
  • Next, roll the pastry out to about the thickness of a pound coin on a floured surface. I used the cling film it was wrapped in to cover the pastry as I rolled, to stop the rolling pin sticking, which worked well.
  • Line your prepared tin with the pastry without trimming the edges, just let the excess overhang. Gently prick the base with a fork and chill in the fridge for 20 minutes.
  • Preheat the oven to 200°c.
  • Blind bake the pastry case by lining it with a scrunched up piece of baking paper and filling with baking beans, or uncooked rice or dried beans (save them to continue to use for the same purpose, just don't cook them to eat).
  • Place the tart tin on a baking tray and bake for 20 minutes.
  • Remove the beans and paper and bake for a further 10 minutes.
  • Remove from the oven and leave to cool and crisp up while you get on with the filling.
  • Melt the chocolate and butter gently in a saucepan.
  • Stir in the cream cheese until well combined and then remove from the heat.
  • Beat in the icing sugar.
  • To get the pastry prepared, gently slice off the excess before pouring in the chocolate filling.
  • Leave to cool while you get on with the strawbs.
  • Combine the strawberries with the icing sugar and let them stand for about half an hour.
  • Then drain the liquid off, saving the lovely ruby juice.
  • Pop the juice into a little saucepan and add the cornflour.
  • Heat the juice gently to a bubble so that it thickens and becomes syrupy, then remove from the heat and leave to cool completely.
  • Mix the cold syrup back into the strawberries.
  • Now you're ready for the final assembly...spread the whipped cream over the chocolate layer and tumble over the strawberries. 
  • Chill in the fridge for at least half an hour before turning out of the tin and serving. 


Wednesday, 17 July 2013

Watermelon and Strawberry Ice Lollys.


So this heatwave thing is getting serious then. For quite a number of weeks I kept coming across articles and blog posts entitled something on the lines of 'how to beat the heat'...you know, as a runner. I always skipped them "hahahaaa" I would sarcastically laugh in my head, "(un)fortunately for me it's not South California that I reside, it's Scotland for me, and I don't need no 'get up early to run before the heat sets in' advice thanks".


Turns out this is the best thing ever to be wrong at. Well, not best when you're running midday and it's a long one and you get kind of lost and you're not carrying any provisions and your mouth starts to gum up and the story of the sinking of the Essex comes into your head....waterwater everywhere but not a drop to drink (I know, drama queen much, but I was by the sea and such thoughts seemed appropriate at the time)....no, being correct and prepared would have been best then.


 But for the rest of the time, when you can wander in the evening sun and feel it on your back and run your hands through the grasses at the side of the path, or when you can still put washing out at 5pm, or when the most pressing question is which tan line to work on today...yeah being wrong is pretty darn grand.


Se here's a super swift, super healthy (no honestly, not even in a 'there's oats next to the kilo of sugar soooo, your doc would probs say it was fine' kind of way, this is full on good for you) treat to celebrate the whole being warm thing. Man I could have done with these on that run yesterday...does an Ice Lolly Belt exist? With Love and Cake.


Watermelon and Strawberry Ice Lolly.

A few notes:
  • This is not really a recipe as such...more of a to do list. Sizes of melons vary, as do lolly makers, so a tweak here and there may be in order...but it's sunny, no one wants strict right?
  • Don't worry about the melon seeds, they pretty much get whizzed up. Extra fibre.

Makes 4 lollys
You will need

1 x lolly maker, mine is just like this

about a quarter of a small watermelon, flesh removed from rind and cubed
5ish strawberries, hulled and quartered

  • Whizz the watermelon in a blender, it shouldn't take 2 secs for it to turn into lovely pink juice.
  • Divide the juice between each section of your lolly maker, though don't fill them right to the top, you need space for the strawberries.
  • Speaking of which, poke a few pieces of strawb into each lolly.
  • Pop the tops on and freeze for a good few hours.
  • To remove, just dunk the lolly maker in a bowl of freshly boiled water. I found these way easier to get out than my last foray into lollys, they popped out really easily.


Wednesday, 10 July 2013

Strawberry Biscuits.


I know, I know, I'm so very behind on the whole strawberries and cream thing. Mr Murray did that whole winning thing agggggessss ago. But for me that was kind of the point. You see what happened was...my tennis club (read: friends that live near by and collectively have nothing better to do that get together for chats and dress it up into clubs so we sound useful....book club, tennis club etcetc, there was no actual tennis achieved on our part) and I had planned a Pimms Party to accompany Sunday's Wimbledon finale (yes finalE).


Turned out one half of tennis club (yes there are pretty much only 2 members, myself included...let me finish my STORY would you) had double booked, and you can't reschedule the Wimbledon final.


Turns out you can though, or at least you can reschedule a Pimms Party and, would you credit it, my TV does this new fangled thing where you can record things and watch them another day. So Sunday was spent, surrounded by strawberries, in complete radio silence. I was NOT going to find out the result if it meant digging a hole and sleeping in it for 24 hours.


It was worth it for me, Pimms Party a day late was brill....but I'm sorry I didn't get this recipe to you in time for me to force you to have your own Pimms Party on Sunday. Ahhh well, I don't think a Wimby final is 100% necessary...you could probably have one next weekend without the police getting involved, the celebrations of the win will probably still be going. With Love and Cake.


Strawberry Biscuits.
adapted from a smittenkitchen.com recipe

A few notes:
  • These are biscuits in the American sense....us Brits would more readily call them scones. So do split and butter or clotted cream them if you fancy...though I would highly recommend keeping a vat of Eton Mess nearby so you can combine the two.
  • Treat these like you would scones in the making process too; as in, as little pressing and pushing and working as poss. I used my food processor, until the part where you add the strawberries, to help with this.
Makes 9
You will need

1 baking sheet, greased

280g plain flour
1 tbsp baking powder
50g granulated sugar
pinch salt
85g cold butter, cubed
about 130g ripe strawberries, large ones quartered, littler ones halved
milk

  • Preheat your oven to 220°c.
  • Combine the flour, baking powder and salt, either in a bowl or by pulsing in your food processor.
  • Rub in the butter with your finger tips or by whizzing in the food processor, until it mostly looks like coarse breadcrumbs with a few pea sized bits of butter left floating around.
  • Sir in the strawberries...you don't want to use your food processor for this bit.
  • Then add milk, a tablespoon at a time, while gently bringing together to a soft dough. Stop at the point where everything has just come together, it's better that it's a bit straggly than you overwork it to a smooth shiny dough.
  • Transfer to a clean floured surface and gently shape into a square, about 2.5 cm in thickness...I think it's easiest and most gently just to use your hands here.
  • Cut into 9 squares, 2 cuts one way and two the other, and transfer each square to your baking sheet.
  • Bake for 15 minutes until golden and the strawberries have started to go leaky and sticky...mmmmm.


Wednesday, 3 July 2013

Pound Cake French Toast.


Soooooo French Toast....made.of.cake. I'm not really sure why, after eating this, one would ever think it a good idea to dip bread in egg and fry it in butter, when you can do the same WITH CAKE. This solves all my problems with French Toast; when you chew past the buttery egg layer, you're not greeted with soggy toast which makes you think 'mmmm I think someone's got this wrong....didn't we invent toasters?' but 'Oh good heavens, it's all sweet and buttery, with added sweet and buttery...this is CRAZY GOOD'.


It also means that when you make a fairly giant sized cake that is pretty much solely consumed by oneself, you feel less bad about it because French Toasting it turns it into a meal, an actual meal that you need, rather than an afternoon snack that you just plain because you're greedy.


Have you ever noticed how good I am at justifying the consumption of cake. I reckon that's a very particular skill....I should probably add it to my CV.


Justification #273: there is fruit, and it is very much fruit season in Fife and I can't get through it quick enough. There...turns out it's pretty much mandatory to make this....GO. With Love and Cake.


Pound Cake French Toast with Raspberry Compote.

A few notes:
  • A pound cake is the perfect sort of cake for soaking and frying, it's firm and sturdy so isn't going to disintegrate on you. I wouldn't suggest trying it with something delicate or crumbly.
  • You could quite happily sub frozen raspberries or in fact any berries you fancy.
Serves 2 greedies
You will need

For the compote
100g raspberries
1 tbsp icing sugar

For the French toast
1 egg
1 tsp vanilla extract
1/2 tbsp icing sugar

  • First make the compote by mixing the raspberries and icing sugar in a small saucepan and heating gently until the raspberries have broken up, bubbled a bit and you're left with a thick crimson sauce.
  • Whisk the egg, vanilla and icing sugar together in a shallow dish.
  • Soak the slices of cake in the egg mixture for a minute or so on each side.
  • Meanwhile heat a medium frying pan on a medium heat and add a big fat knob of butter to it.
  • Fry the cake a couple of minutes each side, until golden and crispy.
  • Serve topped with the compote and dusted with icing sugar.


Wednesday, 22 May 2013

Black Forest Cupcakes.


Did you watch Eurovision? I did...for the first time in a few years. It was BRILLIANT, we had score cards, comment boxes and took our marking mighty seriously...obvs. I was SO rooting for Greece. If you didn't see their entry, sod this reading about cake malarky and look them up on YouTube IMMEDIATELY. That is an order.


We also had themed food...again, obvs. These cakes were my German entry, but were not neeeearly as impressively researched as our savoury offerings which were a significant nod to Azerbaijan. Ever had plov? I would recommend it.


I can't even remember the German musical entry...oh no, yep yep I do...it was Cascada. In a very VERY ugly dress, and no, not even in a 'hey it's Eurovision, let's make a dress out of turtles' crazy fun type way, just in a boring ugly way. 


They should have entered these cakes instead because, while they aren't exotic and Azerbaijani, they are mighty tasty, and squodgy and rich and WAY easier than they look...the perfect party cake formula. But don't wait til next year to make them...or plov. Oh I wish Eurovision was once a MONTH...then we can all prove to Nigel Farage that we are all friends and that he should SHUUUSSSH. With Love and Cake.


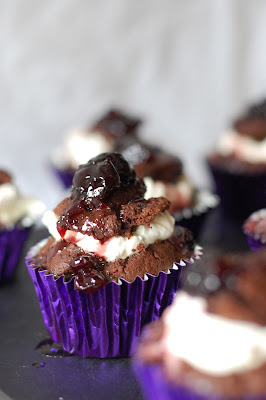
Black Forest Cupcakes.
adapted from a BBC Food recipe

A few notes:
  • These are not light and airy sponges, but dense and aaaalllmost gooey cakes, so don't be sad if they sink a bit, it's just what they do.
  • If you don't have black cherry jam, you could use a jar of those lovely cherries in kirsch or brandy and  boil them with a bit of cornflour to thicken; keeping some of the alcohol aside to soak the cakes. 
  • I used the liquor I had left over from these bad boys, hence the specification for cherry brandy, but you could happily use kirsch, or perhaps just plain brandy.
Makes 12 
You will need

1 x 12 hole muffin or cupcake tray, lined with cupcake cases

For the cakes
125g butter, softened
175g caster sugar
2 eggs
200g self-raising flour
2 tbsp cocoa powder
125ml milk
100g dark chocolate, melted

For the filling
300ml double cream, lightly whipped
1/2 medium jar black cherry jam
8 tbsp cherry brandy

  • First we make the cakes. Preheat the oven to 170°.
  • Beat the butter and sugar together until pale and fluffy.
  • Beat in the eggs, one at a time.
  • Sift in the flour and cocoa powder and fold in until thoroughly combined.
  • Finally stir through the milk and melted chocolate.
  • Bake for 20 minutes until risen and fairly firm.
  • Leave to cool completely.
  • While the cakes are cooling, pop the jam and 3 or 4 tablespoons of the cherry brandy in a small saucepan and heat gently until it starts to boil.
  • Let it bubble for a few minutes; until the liquid turns to a syrup. Set aside to cool.
  • When you're ready to assemble the cupcakes, all you need to do is slice or scoop the top off each cake, leaving a little well.
  • Spoon a teaspoon or so of cherry brandy into each well, followed by a good dollop of the whipped cream.
  • Pop the little round of cake that you cut out on top of the cream and spoon over some of the cherries in syrup.
  • Serve as soon as poss, or chill in the fridge if you want them extra fudgy.

Saturday, 20 April 2013

Lime and Blueberry Cheesecake.


When I told the Mr the flavour of the cheesecake I was offering him for pud, he scrunched his face up.WHO scrunches their face up at CHEESECAKE...I might as well have said 'it's dead man's toe and dried worm cheesecake darling'.


Lime and blueberry cheesecake....ok, it's not chocolate fudge and salted caramel cheesecake (must make this the next project!), but don't screw you FACE UP, it's CHEESECAKE.


So anyway, I gave him a teensy sliver because, by then I think he might have felt a bit bad and knew that he does actually cheesecake really and also probably shouldn't be rude to the person that facilitates the whole eating thing in our house, so he pretended to want to try it.


Turns out he liked it a lot (eeeer obvs, it's light, creamy, lime-sharp cheesecake, on a coconutty base with a sweet blueberry topping....only a mentalist would not like that) and went back all by himself for another, more proper sized piece. The moral of the story people, is to never judge a cake by it's flavour, it's cake after all, and never eeeeeever screw your face up when food, very yummy, sugary home cooked food, is being offered. Got it. With Love and Cake.


Lime and Blueberry Cheesecake.
Adapted from a Nigella recipe, found in Nigella Bites.

A few notes:

  • The blueberry part of the cheesecake is a blueberry jam layer on top. I used this lovely 'extra jam'; the 'extra', I think, refers to a higher than normal percentage of fruit, but you could use any that you fancy, or even maybe make your own compote like I do for my breakfast pancakes.
  • Like all cheesecakes, this benefits from a night in the fridge, so tryyyyyyyy to hold back.
  • I used leftover cake crumbs that I had in the freezer for the base, but you could equally yummily use digestive biscuits (if you remember to buy them when you're at the supermarket that is....ahem...no that was NOT me....probs).
Makes 1 medium cheesecake
You will need

1 x 20cm springform tin

For the base
120g leftover cake
50g dessicated coconut
50g butter, melted

For the cheesecake layer
750g cream cheese, at room temperature
200g caster sugar
4 eggs, plus 2 extra yolks
juice of 4 limes

  • First job is to set up your cake tin. Place a big bit of foil over the base of your tin, then attach the outside ring so the foil covers the base inside the tin then comes up around the sides on the outside.
  • Put the whole thing on another big piece of foil and scrunch that up around the sides too.
  • Now to make the base, pop the cake, coconut and melted butter in a food processor and whizz to sandy crumbs.
  • Press the crumbs into the bottom of your cake tin to form a firm layer.
  • Pop in the fridge to set.
  • Preheat the oven to 180°c.
  • Now we make the cheesecake part. Beat the cream cheese until nice and smooth.
  • Beat in the sugar, then the eggs and yolks and finally the lime juice.
  • Pour the mixture into your cake tin over the cakey base.
  • Place the cake tin in a roasting tin and boil the kettle...you're going to bake the cheesecake in a bain-marie.
  • Pour hot water from the kettle into the roasting tin so it comes about halfway up the side of the cake tin.
  • Carefully transfer the whole thing to the oven and bake for 50 minutes.
  • At this stage, just have a little peak and a little wobble...if you think the wobble is excessive; as in it wobbles all over, rather than just in the middle, give the cake another 10 minutes in the oven, otherwise, remove everything from the oven.
  • Take the cake out of it's water bath, take off the outer layer of foil and peel away the sides of the under layer.
  • Set the cake on a wire wrack and leave to cool completely in the tin.
  • When cool, leave to chill in the fridge before serving.


Tuesday, 9 April 2013

Breakfast Smoothie.


My friends quuuuuite often ask who eats all the things that I make....I think they get confused because here I am, documenting all the (fat and sugar laden) treats that do indeed emerge from my oven, and they see me, not exactly obese, and actually quite a health-obsessed-bean. 


And I shall tell you, that I probably eat moooost of what I cook. See I live with a boy who'd rather have a plate of steak than a plate of biscuits and would rather have a second helping of main course than save room for the dessert and only someone obsessed with cake, both the baking and eating, would write a blog all about cake. I like to eat cake.


But because I bake all the time, I don't do the things that I imagine people that don't bake as often, imagine that I do (does that make sense). What I mean is, baking is an everyday thing for me (in the BEST way), so I don't get over excited and eat all the mixture before it's gone in the oven, or nibble away at all the biscuits sitting on the cooling rack. And I am quite often baking foooor something...a birthday, where I can share stuff, or a time of day that I really need to eat and can tailor my baking exactly to it (see my special spinning bars). I have pudding after dinner most days...but because I know that that's what I want to do, I make allowances when it comes to how much of the savoury stuff I eat.


Plus....a day of mine is not complete without a good sweat; mostly in the form of pounding out the miles on two legs. If I'm going somewhere and I can run there, I will. And finally, not eeeeevry day of mine starts with pancakes....and I thought I should show you one of my favourite non-usually-bloggy breakfasts. P-P-P-Packed with good stuff and easy to digest if you've got a hardcore sweating sesh planned. Hope that solves the mystery. With Love and Cake.


My Favourite Breakfast Smoothie.

A few notes:
  • I'm afraid I've made this so many times that I don't really do any weighing, and who wants to get the scales out before breakfast anyway...not me. So I hope you don't mind the vagueness of the quantities here.
  • While this is my fav combination of stuff, think of it as a blue print; change berries, change liquid, change protein...it's up to you.
  • I have decided that I will, from now on, never buy fresh spinach again; I don't love it as a salad leaf anyway and I just end up throwing half the bag away because it's gone bad before I use it....hence the frozen stuff here...and as long as your blender's good and powerful enough to cope with ice, all will be well.
  • If you're blender is sub-par however, I'd suggest partially thawing out the frozen stuff, either by getting it out the freezer half an hour or so before you blend, or by a quick stint in the microwave.
Serves 1
You will need

a blender, definitely a blender

frozen blueberries, a good handful
frozen spinach, 3ish pellets (or a large handful of the fresh stuff)
1/2 frozen banana
milk 
1 tsp honey 
1 heaped dessertspoon smooth, natural peanut butter.

  • Put the berries and spinach in your blender and just about cover with milk.
  • Blend for a few minutes until everything seems pretty smooth.
  • Add the honey and peanut butter and a splash of water if it looks like you'd like the texture a little looser.
  • Blend again to combine.
  • Pour into a big glass and feel suuuuuper.


Saturday, 6 April 2013

Banana Bread French Toast and Peanut Butter Caramel.


So remember last, time when I was all like "here have something norrrrrmal and traditional, let's take a holiday from crazy-town cake fun"? Well, yeah, it was fun while it lasted and I do promise it really is very lovely banana bread, but ya knoooow, it's fun to have fun....so here it is again...just a little more mixed up.


As you may have assumed, I tottttally am ok with cake for breakfast. I mean, not everyday of course, and probably not the kind with 17 layers of buttercream, but at the weekend maybe, or as a celebration of the fact that you, I don't know, managed to get a load of washing on, I am fully supportive of cake at the breakfast table.


Banana bread if perfect breakfast cake because you can kid yourself into thinking that it's one of your five a day and that because it's brown, it deffo counts as some sort of health food.....but here's a way to make cake into ACTUAL breakfast that you don't even neeeeeed to justify....just make it into French Toast.


See, French toast has 'actual breakfast status' and therefore is not questioned....who cares that it's drizzled in peanut butter caramel....it still counts. So slice it, dunk it in egg and fry it in butter, drizzle it in the good stuff and serve yourself cake for breakfast...cake becomes an actually breakfasty breakfast. Thank me when you're plate's clean. With Love and Cake.


Peanut Butter Banana Bread French Toast.

A few notes:

  • You could actually use any sort of fruity, dense loaf cake here...but I do think banana bread feels most appropriate somehow.
  • Serve with fresh banana and you're winning even mooooore....I just had used all mine in the actual cake part.
  • You will have some peanut butter caramel left over....ice cream syrup anyone?


Serves 2
You will need

For the peanut butter syrup
1 tbsp smooth peanut butter
2 tbsp golden syrup

For the French toast
1 egg
1 tsp vanilla extract
pinch salt
2 x slices peanut butter banana bread
butter for frying

  • First, let's make the syrup. Pop the peanut butter and golden syrup in a small saucepan, heat gently and whisk to a smooth and fairly pour-able syrup.
  • Now get your fav frying pan on a medium heat ready for the 'toast'.
  • In a shallow dish, gently whisk together the egg, vanilla and salt.
  • Dunk the banana bread slices into the egg, leaving each side to soak for a minute or two.
  • Now fry each side, just like normal French toast, of the banana bread in butter in your hot frying pan until golden and tinged.
  • Serve with creme fraiche and a drizzle of the syrup.


Tuesday, 2 April 2013

Peanut Butter Banana Bread.


It has come to my attention that in my last few posts I have been ranting on like a raving luny...it's ok, I do that most days, it's just that I WANT you to visit here. Usually the people that I am a raving luny around, have no choice....my parents made me after all, they can't very put the phone down on me, sister HAS to read a blog basically dedicated to her, we're bound by genetics...and the Mr, well he must even LIKE me being a crazy because he chose me. But you chaps...well you can click away in an instant


So here is a nice and soothing and normal banana bread recipe to distract you from my crazy-pants and to remind you that there is more to my repertoire than chocolate based spreads. I already have one banana bread recipe tucked away in the archives for you, but I think it's the sort of cake that you can't have too many recipes for and this one is particularly simple and speedy.


Of course I am MEEEE so can't just give you another plain banana bread, there has to be sooomething about it to make it fun...and that thing comes in the form of peanut butter chips. But that's not too mental....just good sense.


So let's all light some scented candles, run a hot bath, take a big deep relaxing breath and cut ourselves a fat slice of good old, traditional-ish banana bread and ready ourselves for the next crazy cake craze around the corner. With Love and Cake.


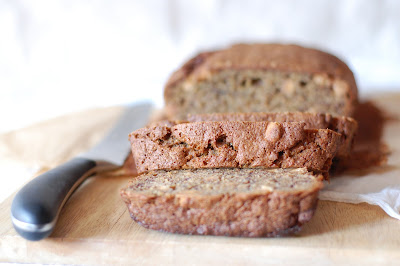
Peanut Butter Banana Bread.
Adapted from a recipe in one of my most loved cookbooks; Miss Dahl's Voluptuous Delights by Sophie Dahl

A few notes:
  • So yeah, I'm afraid peanut butter chips are not exactly UK friendly, you can get them online and in American caaaaandy stores but they are fairly expensive. The best thing to do though, I say, is to get a friend who is half Canadian and does the transatlantic trip especially to pick up goodies for you (and see family), but do substitute chocolate chips if you can't find one of those, or just leave them out entirely.
Makes 1 large loaf
You will need

1 large (2 pound) loaf tin, greased and lined

4 x very ripe bananas
75g soft butter
200g soft brown sugar
1 egg, lightly beaten
1 tbsp vanilla extract
1 tsp bicarbonate of soda
pinch salt
170g wholemeal flour

  • Preheat the oven to 180°c.
  • Mash your bananas, in a big mixing bowl using a fork to as fine a paste as you can manage.
  • Now easypeasily, just throw in the butter, sugar, egg and vanilla and give everything a good beat with a wooden spoon to get it all combined.
  • Add the bicarb, salt and flour and fold in gently.
  • Pour into your prepared loaf tin and bake in the centre of the oven for 1 hour until bronze and firm.
  • Leave to cool in the tin for a good 10 minutes before turning out and allowing to cool completely on a wire rack.