Showing posts with label Biscuits. Show all posts

Sunday, 22 September 2013

Coconut Oil Chocolate Chip Cookies.


I'm having one of those annoying days today where I feel tired and grumpy for absolutely no reason whatsoever...I slept good and I just did a clever internet thing where I downloaded an update for my digital radio which I've been meaning to do for aaaaaaages....you see, life is good, but all I really want to do is sit in a ball and watch Gilmore Girls all day long with a hot water bottle on my knee (though I won't lie I am doing the hot water bottle thing right now anyway).


It's probs because of the poopey weather we've had this week which has got in the way of my total denial that summer is over. HOWEVER, I've just realised that I've already waffled on about the weather for multiple posts already and it's still only September so I really should just shut up and accept that I live in Scotland or move to somewhere in the Indian Ocean.....I'll decide later.


In the mean time I think the answer is cookies. Chocolate chip cookies of course because what else is more cheering? And please don't get me wrong with the whole coconut oil thing...I am nooooooot putting it in biscuits because I've decided it's time to join a commune and grow my own hemp...I'm using it because I bought a big jar of it a while ago to play with and I've mostly been slathering it on my poorly feet when they're angry at me for making them run too far....turns out that doesn't actually use a huge amount, so I thought I'd give it a go in the kitchen. Using it as a butter substitute, as in spreading on toast, doesn't seem right because I LOVE BUTTER and why would you want to meddle with the alchemy of melty butter on toast, but I did fancy having a go at adding the subtle coconutty scent to a spot of baking.


Turns out it's not so subtle and those who are lucky enough to get offered one of these delights will know your ploy before they've even tasted it...but I like it...and if it helps you to go down the hemp route you can definitely convince yourself that you're saving our health by eating the cookies. So if you've got the blues, weather induced or not, make these...or move to Mauritius. With Love and Cake.


Coconut Oil Chocolate Chip Cookies.
adapted from lots o' different recipes for the internets

A few notes:
  • If you don't have any coconut oil and don't fancy purchasing then just replace it with butter or hop over to this recipe which are the best chocolate chip recipes evs.
  • You could also twiddle and fiddle with the chocolate here...I use chopped chocolate rather than chocolate chips because it's better chocolate but you use what ever you fancy...white chocolate would be fabby I'm sure.
Makes about 15
You will need

2 x baking sheets, greased

150g coconut oil
190g soft brown sugar
90g caster sugar
2 eggs
1 tsp vanilla
295g plain flour
pinch salt
200g dark chocolate, roughly chopped

  • Preheat the oven to 180˚c.
  • Beat the coconut oil and two types of sugar until fluffy.
  • Beat in the eggs one at a time followed by the vanilla.
  • Fold in the flour, salt and chocolate so you have a stiff dough.
  • Dollop tablespoonfuls of dough onto your baking sheet, leaving a good couple of centimetres between each one for the cookies to expand.
  • Bake for 15-20 minutes, until bronze around the edges but still soft in the centre; don't worry about them being underdone, it'll mean they're nice and soft.
  • Leave the cookies to firm up on the baking sheet for 10 minutes before transferring to a wire rack to cool completely.  


Wednesday, 11 September 2013

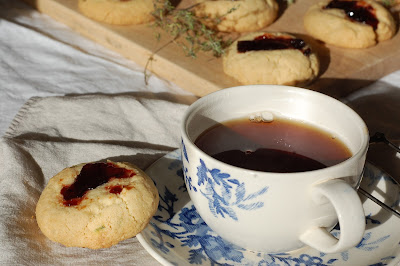
Blackcurrant and Thyme Thumbprint Cookies.


Did I tell you that this summer has been the summer that I've got excited about gardening? Last year I had a dabble and produced the odd strawberry and a haul of tomatoes that didn't ripen....but this year, THIS year, I've sewn the seeds, filled watering can after watering can, bought one of those plastic mini greenhouse thingies and have even got Gardeners' World set on series record. I love Monty.


Little sister thinks it's hilarious and has spent most of the summer sarcastically asking how my hanging basket is doing while sniggering down the phone. THANKS for the support.


It's a bit of a weird and scary hobby for me though, because it's not like cooking and baking which I've done forever and know a whole heap about and understand enough to know when recipes need to be followed exactly and when I can tweak and twiddle and know that as long as I follow the fundamental rules all will work out in the end. This is all new and scary and even when I think I'm following all the rules I find out more rules that I didn't know about or I do do all the things I'm supposed to and things still go wrong and my squash gets mildew. Nightmare.


I guess it's all good and about learning and exploring like I must have done in the kitchen in the beginning...it just takes a while longer in the garden because you've got to wait around for seasons and such like. Anyway, one of the things I learnt from a recent Gardeners' World (I feel like I should take notes there's so much information...is that what watching cooking shows feels like to new cooks?) was that I should cut back my thyme so it makes new, non-woody growth which is preferable for cooking....and like a good little new gardener I did what I was told. This meant I had heaps of the stuff to use up though...hence these little beauties. Don't feel like you have to grown your own though, that magical supermarket place has done all the work for you. Enjoy. With Love and Cake.


Thyme and Blackcurrant Thumbprint Biscuits.
adapted from a recipe by My Darking Lemon Thyme

A few note:
  • The thyme I used was freshly dried...as in, I left the bunch I cut from my garden hang around on a plate for a week or so...you could happily use fresh from a packet or pot from a supermarket or your garden...just don't use the jarred dried stuff.
  • You could actually not even use thyme at all, or maybe you'd like to experiment and mix it up with rosemary and marmalade or whatever other combination floats your boat.
  • These whizzed up in my food processor in no time, but feel free to cream the butter and sugar by hand or with an electric whisk and stir the rest in with a spoon.
Makes 10-12
You will need

1 x baking sheet, greased

125g butter, at room temperature
50g caster sugar
2 tsp thyme leaves
1 tsp vanilla extract
105g plain flour
50g cornflour
1/2 tsp baking powder
35g ground almonds
about 2 tbsp blackcurrant jam

  • Preheat the oven to 180˚c.
  • Cream together the butter, caster sugar, thyme and vanilla until smooth and creamy.
  • Add the flour, cornflour, baking powder and ground almonds and bring together to a crumbly dough.
  • Pull off about 1/2 tablespoonfulls of dough at a time and shape into balls.
  • Press lightly onto your prepared baking sheet.
  • Flour your thumb and press into the middle of each biscuit, leaving a slight impression.
  • Fill each little hole with a teaspoon or so of jam.
  • Bake for 15-20 minutes until just starting to darken around the edges.
  • Leave to firm up on the baking sheet for 5 minutes before transferring to a wire rack to cool completely.


Wednesday, 4 September 2013

Coconut Shortbread.


I'm having a bit of a coconut thing. Forgive me, I know it's not everyone's cup of tea, in fact I think of it as something that is quite divisive, but I love it's chalky texture and mellow taste and I think it's the time of year that is meaning it's making more of a appearance in my kitchen than is regular.


You see, it's dark by 9 o clock now, and it's time to plant bulbs and people start actually knowing how far away (or not) Christmas is. And while it a most beautiful day up here on the east coast of Scotland and I am in fact sitting under a layer of factor 15, I just know what is round the corner and how much I don't want it to be.


I therefore must be subconsciously filling my kitchen with summer for as long as possible before it gets to be allllllll about apples and cinnamon and not much else. And there is not much that feels more summery and holidayish than roasty toasty coconut...to me anyway. I mean...hellooooo palm trees.


So I'm sorry if it's not one of your faves...but if someone offers you one of these don't immediately turn it down, because the taste is not too in your face coconutty and the texture is really lovely and crisp. Aaaaand I promise that for the time being I only have one more coconut recipe left for you for now...you didn't think I was finished yet did you...but after that I'm done I promise....besides, I've run out of the good stuff. With Love and Cake. 


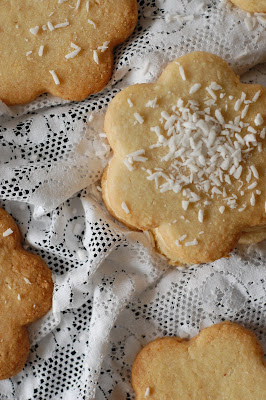
Coconut Shortbread.
adapted from the very pretty Eat Me!

A few notes:
  • I think these are best cooked until actually turning quite golden around the edges rather that keeping them snow white as you would traditional shortbread...it makes them extra crispy and they look more rustic and homey that way.
  • As usual, I did the food processor thing...and as usual if you can't or don't fancy dragging it out the cupboard, beat the butter and sugar with an electric hand whisk or wooden spoon. Then stir in the rest of the ingredients with a metal spoon before bringing it together gently with your hands.
  • Even with using 2 baking sheets I'm pretty sure you'll still have to bake in several batches...just a heads up.
Makes about 25 big biscuits
You will need

2 x baking sheets, greased

325g cold butter
pinch salt
150g icing sugar
75g ground almonds
75g desiccated coconut
325g flour
4-6 tbsp water

  • Preheat the oven to 160˚c.
  • Add the butter, salt and icing sugar to the bowl of your food processor and whizz to combine.
  • Pulse in the almonds, coconut and flour followed by the water, 1 tbsp at a time until the mix starts to clump together and form a dough.
  • Tip out onto a large square of clingfilm and form into a disc. Wrap in the clingfilm and chill in the fridge for about 30 minutes.
  • Roll out the dough to about the thickness of a pound coin and cut out biscuits with whatever shape you fancy really...just make sure it's about 15 cm across.
  • Transfer the shapes to your baking sheets, gather up the rest of the dough and repeat the rolling and the cutting until it's all used up.
  • Bake for about 15 minutes, checking and rotating around the oven at the halfway point.
  • When they're going golden around the edges remove from the oven and leave to firm up for 10 minutes or so before transferring to a wire rack to cool completely.


Sunday, 18 August 2013

Coconut Macaroons.


We've gone over the macaron/macaroon divide before...and here's some more confusion to throw on the fire. You see in Scotland a macaroon is more of a confection than a baked good...with a fondant centre (made of left over potato in times of yore) covered in chocolate and coconut (I knoooow but don't blame them, it's faaar to here, they didn't get the 'macaroon memo' in time).


THIS...is not that, but is perhaps, no definitely, my favourite incarnation of the M-word. A big puffy ball of damp coconut help together by magic and prayers....ok egg whites and rye flour, in this instance.


They're very old school English and would fit perfectly in an Enid Blyton tea time and while they look all pretty and delicate, they are actually fairly robust and therefore perfect picnic fayre.


I used rye flour because I'm a health nut and want to make everything gluten free I'd run out of ground almonds and thought I'd give it a go...it works darn well, and makes me feel very 'health food shop'. So there you have it, a biscuit to make you feel like you're wearing a hessian shirt to an Edwardian tea party and tasting bloomin' lovely...what more could you ask for. With Love and Cake.


Rye and Coconut Macaroons.
Adapted from a Nigella recipe; from How to Be A Domestic Goddess.

A few notes:
  • If you don't have rye flour and don't fancy investing, replace with the same amount of ground almonds.
  • If you happen to have it (and if you do, I LOVE you), replace the vanilla extract with coconut essence.
  • Nige was very specific about using shredded coconut here, which you'll often see in American recipes and is much damper that dessiccated, but I neeeever see it, and you can make your own by faffing about with soaking the dessiccated stuff but I just used it as is and relative to the ease the macaroons don't suffer I think.
Makes 8
You will need

1 x baking sheet, lined

2 egg whites
1/4 tsp cream of tartar
100g caster sugar
30g rye flour
pinch salt
1 tsp vanilla extract
250g dessiccated coconut

  • Preheat that oven to 170°c.
  • Beat the egg whites until they start to froth before adding the cream of tartar and continuing to beat until the soft peak stage is reached.
  • Continue to beat as you add the sugar, teaspoonful by teaspoonful until all is added and the egg whites are stiff and shiny.
  • Now fold in the rest of the ingredients gently.
  • Using 2 spoons, divide the mixture into 8 and make round clementine shape balls on your baking sheet out of each 8th.
  • Bake for 15-20 minutes, until they have turned a few shades darker and begin to turn deep golden in parts.
  • Leave to cool and firm up on the baking sheet for half an hour or so before transferring to a wire rack to cool completely...if you can wait that long.


Wednesday, 24 July 2013

Double Salted White Chocolate and Oat Cookies.


You may not think it from just a glance, but these, I think, are mighty fancy cookies. Like Coco Chanel, they've taken off their extra accessories at the door to allow their understated chic-ness to do all the talking. That's right...I just compared Coco Chanel to cookies.


Think of the salt ('double' because there's table salt IN the cookies and sea salt ON them) as diamonds and the white chocolate as pearls tumbling down their back a la Coco. And all the rest is a little black dress. Nothing frilly...just taste.


They're the sort of biscuits, no sorry cookies...because they're big and bendy...that you could serve for a dessert with coffee. If you're a dinner party type that is. 


Or if you're feeling less fancy you could do what I did last night and use them to make ice cream sandwiches...can't quite imagine a Parisian fashion Goddess doing as such but I live in Fife, it's not quite the same. With Love and Cake.


Salted White Chocolate and Oat Cookies.
From a smittenkitchen.com recipe

A few notes:
  • You could very happily change the chocolate here...super dark would be fab.
  • This makes a fair amount of cookies, and they spread out a lot on baking, so you'll need lots of space on your baking sheet. I therefore find it easiest to bake in batches...but you could use multiple baking sheets and swap their positions in the oven around half way through baking.
  • Use the best white chocolate you can justify...Green and Blacks is my fav.
Makes 20-24
You will need

a baking sheet, greased

200g butter, at room temperature
200g caster sugar

1 egg
1 tsp vanilla extract
130g plain flour
3/4 tsp baking powder
1/2 tsp bicarbonate of soda
1/4 tsp table salt
55g soft brown sugar
210g oats
180g best white chocolate, roughly chopped
sea salt

  • Preheat your oven to 180°c.
  • Cream together the butter and caster sugar until pale and fluffy.
  • Beat in the egg and vanilla extract.
  • Gently stir in the flour, baking powder, bicarbonate of soda, table salt and brown sugar until fairly well combined.
  • Tumble in the oats and and chocolate and stir in until evenly distributed....it will look like you're adding loads and that you'll never stir it all in, but keep going and you will.
  • Pull off pieces of dough, about 1 tablespoon at a time, and roll it into a ball in your palms.
  • Flatten a little as you place them on your baking sheet, leaving enough space for each one to at least double in size...for me this means baking in batches (see note).
  • Sprinkle each little patty with a good pinch of sea salt before baking for 13-16 minutes....look for them to reach a pale gold colour if you want them to remain a bit bendy when cooled. This will mean they are very soft straight out of the oven so leave them to firm up for a few minutes on the baking tray before carefully transferring to a wire rack to cool completely.


Sunday, 21 July 2013

Hobnobs.


HaHa...HobNOBS......ok moving on.


Hobnobs are undoubtedly the king of biscuits...you know, out of the ones you buy. Oh no wait, what about custard creams....oh I forgot fig rolls, and digestives are pretty unbeatable. OkOk they are in the top ten of all the biscuits.


A tweety chat the other day prompted the same train of thought regarding Springsteen songs....you could neverEVER choose a fave, too many winners. Same with books, does anyone actually have a top book...or film?


But homemade, wWOWzers, definitely in the top 5 biscuits I've ever made...yes probably definitely. And they are not one of those pale imitation homemade things...when you're like 'mmm yes homemade, well done me, *whispering* but why don't they taste as good as the shop's ones?'.  No these are winners, because they have the taste and crispness of proper Hobnobs but are bigger and sturdier and actually feel like food rather than sugary air that doesn't reach your tummy...which is how I always thing of shop bought biscuits. So go forth and bake...it's easier than shopping anyway. With Love and Cake.


Hobnobs.

A few notes:
  • You need to cook these a couple of minutes longer than feels right (to me anyway). You want them to go from pale gold to deep bronze for that crispyness to really set in.
  • When they first come out of the oven they will be all gooey and bendy, don't worry though, as long as you've got them deep bronze they will crisp up as they cool.

Makes 20-30, depending on how big you make them
You will need

a large baking sheet, greased

225g self raising flour
225g caster sugar
225g oats
225g butter
1 tbsp golden syrup
1 tbsp hot water
1/2 tsp bicarbonate of soda 

  • Preheat the oven to 180°c.
  • In a large mixing bowl combine the flour, sugar and oats.
  • Melt together the butter and golden syrup in a medium saucepan over a low heat.
  • Stir in the hot water and bicarbonate of soda.
  • Pour the golden liquid over the dry ingredients and mix to thoroughly combine.
  • Pull off balls of dough, about walnut sized, and squash into discs onto your baking sheet leaving plenty of space between each biscuit, I'd say they about double in size. You will likely need to bake in batches unless your baking sheet is huuuuge.
  • Bake for 20 minutes or until they've gone from the pale gold they'll be after about 15 minutes baking to a deep bronze.
  • Leave to firm up on the baking sheet for a moment or two before transferring to a wire rack to cool completely.


Wednesday, 10 July 2013

Strawberry Biscuits.


I know, I know, I'm so very behind on the whole strawberries and cream thing. Mr Murray did that whole winning thing agggggessss ago. But for me that was kind of the point. You see what happened was...my tennis club (read: friends that live near by and collectively have nothing better to do that get together for chats and dress it up into clubs so we sound useful....book club, tennis club etcetc, there was no actual tennis achieved on our part) and I had planned a Pimms Party to accompany Sunday's Wimbledon finale (yes finalE).


Turned out one half of tennis club (yes there are pretty much only 2 members, myself included...let me finish my STORY would you) had double booked, and you can't reschedule the Wimbledon final.


Turns out you can though, or at least you can reschedule a Pimms Party and, would you credit it, my TV does this new fangled thing where you can record things and watch them another day. So Sunday was spent, surrounded by strawberries, in complete radio silence. I was NOT going to find out the result if it meant digging a hole and sleeping in it for 24 hours.


It was worth it for me, Pimms Party a day late was brill....but I'm sorry I didn't get this recipe to you in time for me to force you to have your own Pimms Party on Sunday. Ahhh well, I don't think a Wimby final is 100% necessary...you could probably have one next weekend without the police getting involved, the celebrations of the win will probably still be going. With Love and Cake.


Strawberry Biscuits.
adapted from a smittenkitchen.com recipe

A few notes:
  • These are biscuits in the American sense....us Brits would more readily call them scones. So do split and butter or clotted cream them if you fancy...though I would highly recommend keeping a vat of Eton Mess nearby so you can combine the two.
  • Treat these like you would scones in the making process too; as in, as little pressing and pushing and working as poss. I used my food processor, until the part where you add the strawberries, to help with this.
Makes 9
You will need

1 baking sheet, greased

280g plain flour
1 tbsp baking powder
50g granulated sugar
pinch salt
85g cold butter, cubed
about 130g ripe strawberries, large ones quartered, littler ones halved
milk

  • Preheat your oven to 220°c.
  • Combine the flour, baking powder and salt, either in a bowl or by pulsing in your food processor.
  • Rub in the butter with your finger tips or by whizzing in the food processor, until it mostly looks like coarse breadcrumbs with a few pea sized bits of butter left floating around.
  • Sir in the strawberries...you don't want to use your food processor for this bit.
  • Then add milk, a tablespoon at a time, while gently bringing together to a soft dough. Stop at the point where everything has just come together, it's better that it's a bit straggly than you overwork it to a smooth shiny dough.
  • Transfer to a clean floured surface and gently shape into a square, about 2.5 cm in thickness...I think it's easiest and most gently just to use your hands here.
  • Cut into 9 squares, 2 cuts one way and two the other, and transfer each square to your baking sheet.
  • Bake for 15 minutes until golden and the strawberries have started to go leaky and sticky...mmmmm.


Sunday, 7 July 2013

Digestives.


These is really nothing special about these biscuits, but I don't mean that in a bad way. No, it's really the very point that they are nice and unassuming. They are a vehicle to a higher power....namely, in my case, that of my homemade Nutella.


See, I know you CAN eat it just plain with a spoon, and I would NOT judge others for doing so. But I am a laaaaady, and like to pretend that I could probably be Queen one day if the chance arouse, and I think that my chances would be scuppered if such behaviour was revealed.


So here is what I do....I bake biscuits....definitely Queenly behaviour, especially when they're digestives and all 'why would you ever make them when you can buy them for 17p' type biscuits, then I spread on Nutella and shut all the doors and close all the curtains and scrape it off with my finger straight onto tongue. 


Yes I realise this is WORSE than eating it with a spoon but it is NOT as bad as burning hundreds of people at the stake a la past Queenly behaviour...and I would absolutely promise I would NEVER do that...so that's fair I think. With Love and Cake.


Digestives.
Recipe from Hamlyn All Colour Teatime Favourites

A few notes:
  • Like the lazy fiend that I am, I knocked these up in my food processor, but don't worry if you don't have one, just combine the dry ingredients, run in the butter with your fingertips, then add the milk and bring together by hand.
  • Once you've made the dough, it will happily sit in the fridge, uncooked, wrapped in clingfilm, for a few hours.
  • If you're not making these just for dipping in Nutella, you could make them into chocolate digestives by melting about 150g of your fav chocolate and spreading over the biscuits.


Makes About 20
You will need

1 x baking sheet, greased

175g wholemeal flour
25g oatmeal
pinch salt
1 tsp baking powder
75g butter, at room temperature
40g soft brown sugar
2-3 tbsp milk

  • Preheat the oven to 190°c.
  • Pop the flour, oatmeal, salt and baking powder into your food processor and pulse to combine.
  • Add the butter and whizz until it looks like fine breadcrumbs.
  • Pulse in the sugar.
  • Add 2 tbsp milk and pulse so it starts to come together. Add the rest of the milk if you need to allow it to form a dough.
  • Tip the mixture out onto a floured surface and roll out so it's about 5mm thick.
  • Cut out rounds using a 6cm cutter or similar sized upturned glass.
  • Transfer onto your baking sheet, don't worry too much about gaps between them, they don't expend very much, and bake for 15-20 minutes, until deep gold.
  • Remove to a wire rack and cool.
  • Time for dunking.


Wednesday, 12 June 2013

Grasmere Ginger Shortbreads.


So Grasmere, for those that don't know...because that little map thingy that tells me where people are reading this blog from tells me that there's people from quiiiite far away stopping by sometimes...is a very lovely village in the very lovely Lake District of England...a, you know, district of lakes (and mountains).


As well as Wordsworth, the Lakes can lay claim, if somewhat controversially, to Sticky Toffee Pudding and, very un-controversially, Kendal Mint Cake. It's one of those places where each little nook has it's own strong sense of identity......and confectionery.


This Grasmere based chap though, hasn't quite reached the dizzy heights of fame as it's sticky pudding neighbour and it's kind of hard to work to out what it's actually supposed to be. I think, really, it's supposed to just be bought from the very old Grasmere Gingerbread Shop and not questioned any further, but unfortunately that's quite far away from North Fife...so I had to have a bash at creating it for my greedy self. Fingers crossed no one is overly offended.


And if they are, they can blame it on Delia because it is her guidance I followed, despite the fact that her recipe refers to it as a shortbread, which I imagine may be a bit cheeky....not sure if the Cumbrians or the Scots would really enjoy that. So anyway...Delia's version is like a cross between shortbread and flapjack and is very crumbly and buttery. There are other recipes around which I imagine would make for a more chewy and substantial biscuit. Please correct me if I'm talking nonsense...but either way these are very yummy...and go mightily well next to a mug of coffee. With Love and Cake.


Grasmere Ginger Shortbreads.
Adapted from a Delia recipe found in Delia's Cakes

A few notes:
  • So I am lazy and got my food processor out for this one. If you don't have one, Delia says you should coarsely grate the butter into the dry ingredients and then get your hands in there to run it all together so you get a sandy mixture before putting in your tin.


Makes 8-10 wedges
You will need

1 x 20cm loose based round cake tin, greased and base lined

110g plain flour
110g fine oatmeal
110g soft brown sugar
1 heaped tsp ground ginger
1/4 tsp baking powder
150g butter, chilled

  • Preheat your oven to 180°c.
  • Pop the dry ingredients into your food possessor (see note if you don't have one) and pulse to combine.
  • Cut the butter into small cubes and whizz into the dry ingredients until you have a consistent sandy texture.
  • Tumble the mixture into your cake tin and press it down lightly with your fingers or a spatula.
  • Bake for 35-45 minutes until deep gold all over.
  • Leave to cool in the tin for 5 minutes before gently removing the sides of the cake tin.
  • Leave to cool completely on the base of the cake tin before turning out and cutting into wedges.


Friday, 12 April 2013

Dark Chocolate M&M and Pretzel Cookies.


Friday = Spinning Day and Spinning Day = the implementation of two strategies; Operation 1. Not Die and Operation 2. Not get a Migraine. Both of these strategies include afternoon snacks and in this form, afternoon snacks = the beeeee's kneeeeeeees.


I know what you're thinking...you're all, cookies? Sports fuel? Reeeeallly? Well let me tell you...I got 70-something percent in the sports nutrition module of my Dance Science Masters therefore know allll about pre-fueling carbs and post-fueling protein and all the thing the cool kid athletes need....or at least I did once, and give these cookies a big fat thumbs up.


There's protein-ey carbs in the oats, and carb-ey carbs in the sugar and flour and there's salty carbs in the pretzels and there's protein and fun fat in the cream cheese and butter and egg and there's eeeven those clever little antioxidant things for recovery in the dark chocolate. So there.


They also taste bloomin' great so don't worry if Friday is not your spinning day....make them anyway. With Love and Cake.


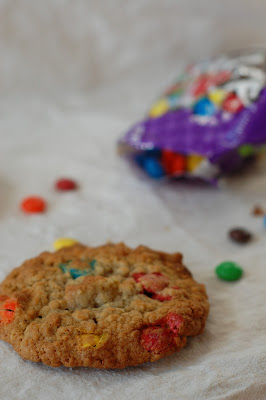
Dark Chocolate M&M and Pretzel Cookies.
Adapted from a recipe by Bakers Royale

A few notes:
  • I used dark chocolate M&Ms and bashed up pretzels, because, well, that sounded bloomin' GREAT to me, but feel free to use anything that sounds great to you, you could use actual 'pretzel M&Ms', or salted peanuts or, I don't know...jelly beans?
  • If you can't lay your hands on dark chocolate M&Ms, (get a friend that travels to the states often, thanks sis) they're similar to Smarties so maybe give those a go.
Makes a good 15-20
You will need

2 x baking sheet, lined (or bake in batches)

55g cream cheese, at room temperature
1 egg
100g caster sugar
110g soft brown sugar
1.5 tsp bicarbonate of soda
165g butter, melted
160g plain flour
130g oats
100g dark chocolate M&Ms
50g snack sized pretzles, chopped and bashed up a bit

  • Oven on....180°c.
  • In a nice big bowl, beat together the cream cheese, egg, caster sugar, brown sugar and bicarb until well combined.
  • Add the melted butter and then gently fold in the flour and oats.
  • Finally, stir through the M&Ms and pretzel pieces to evenly distribute.
  • Pop heaped dessertspoon-fulls of cookie dough onto your prepared baking sheet, leaving plenty of space for spreading between each one.
  • Bake the cookies 12-15 minutes, then have a peak. What you're looking for is bronzed edges and a non-wibbly centre....so pop them back in for a few minutes if you're not quite there yet, otherwise remove from the oven and let the cookies firm up on the baking tray for 5 minutes or so to, then transfer them to a wire rack to cool completely...or just enough to make gooey, mmmmm.