Tuesday 29 January 2013

Vanilla Bean, Brown Sugar and Brandy Shortbread.


Firstly, I don’t know if you read other foody-pants blogs, or if you open your eyes as you walk down the high street, but if you do, you will have been made very aware that Valentine’s day will be here soon. Now I don’t really do the whole ‘holiday themed’ stuff much around here, apart from at Christmas, because well, you know, I remember it’s Christmas befoooooore it’s too late to do the appropriate baking.


Second, I assume that most of you lovely folks that stop by here are of the female variety and therefore absolutely do not require, nor desire, any sort of reminder of this imminent day...but I just thought that even if only one chap stumbles across my twaddlings, it might be worth putting the message out there, in a pink-glitter-free way, you know, so he doesn’t get too scared and click away.....before I tell him that YES it IS a big day and however much you think that ‘oh no, we don’t really do Valentine’s day’, doesn’t mean sheeee doesn’t do Valentine’s day and that however little energy and time you have left, you absolutely MUST do something about it. Please, for hopeless romantics everywhere.


So here I am with my dowdy looking, but oh so special tasting, biscuits, in an attempt to save the section of womankind that care, from a disappointing February 14th , and to demonstrate that whatever it is that you do for your special one, it doesn’t have to be red and fluffy (there probably should be at least one heart shape involved though, and, well, there’s nothing wrrrooong with pink glitter).


So go forth and DON’T FORGET or ASSUME THAT, for some reason, YOU’RE OFF THE HOOK. And I promise not to mention the subject here again...until next year, when no doubt more reminding will be required, or until I want to use my superspesh vintage, from NYC don’t ya know, heart cutter again...whichever comes first. With Love and Cake.


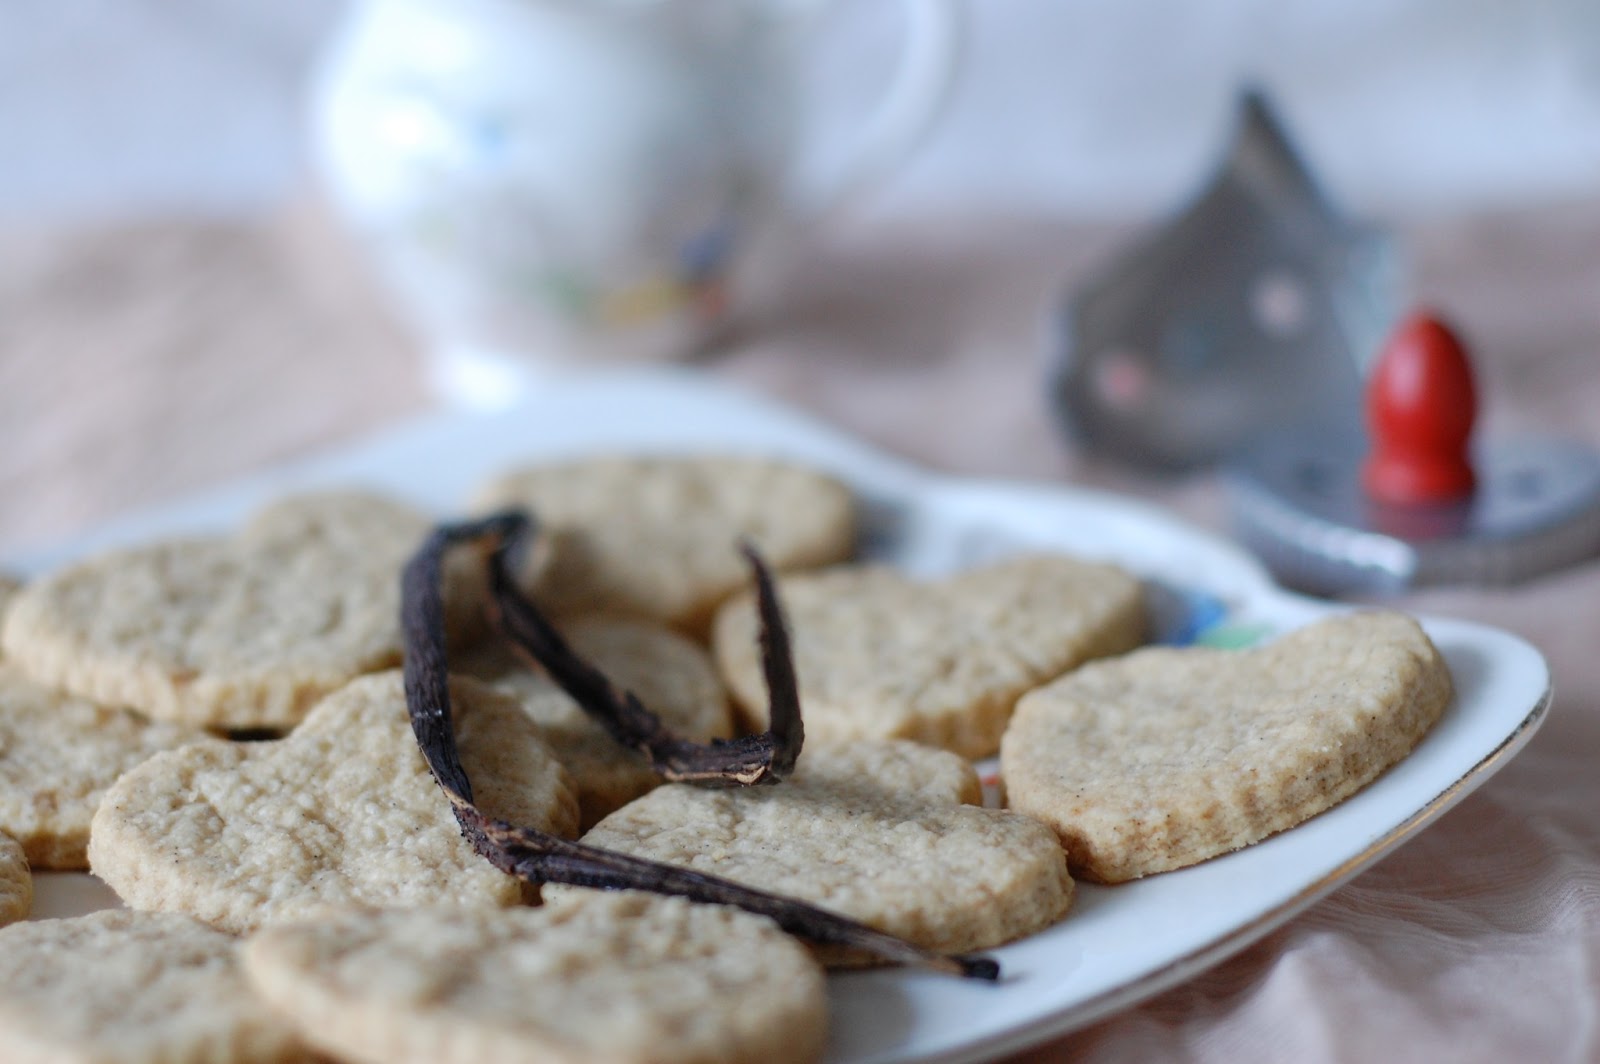
Vanilla, Brown Sugar and Brandy Shortbread.

A few notes:
  • If you don't have any brandy, and I wouldn't necessarily suggest that you buy some especially for this recipe, just replace it with the same amount of water.
  • Of course, the heart situation is optional; feel free to make them any shape you fancy.
  • As usual with things like this, I prefer to use my food processor, but this is not a necessity...you can just as easily combine the dry ingredients in a bowl, rub the butter in with your finger tips and bring together to a dough by hand when you add the liquid.
Should make around 20 biscuits
You will need

2xbaking sheets, well greased

200g plain flour
100g cornflour
100g soft brown sugar
1 vanilla pod, split and seed removed
200g butter
1 tbsp vanilla extract
2 tbsp brandy

  • Pulse the two types of flour and sugar in your food processor to combine.
  • Add the vanilla seeds and butter and whizz until the mixture has the consistency of fine breadcrumbs.
  • Add the vanilla extract and brandy and pulse until the mix starts to come together to form a dough.
  • Roll the dough out on a clean, floured surface to the thickness of a pound coin.
  • Cut out your shapes, using a 5cm cutter, and lay them on the baking sheets with a few cm gap in between each one.
  • Chill the biscuits in the fridge while the oven preheats to 170°c.
  • Bake for 12-15 minutes, swapping the baking sheets around halfway through, so that they both get a turn at the top of the oven where it's probably hottest.
  • They're done when they only JUST start to bronze around the edge.
  • Leave the biscuits to firm up on the baking sheet for 5 minutes, then transfer them to a wire rack to cool completely.

Friday 25 January 2013

Chocolate and Peanut Butter Cheesecake.


It was my birthday week this week...yes thank you very much I did indeed get your card. I am a birthday person and while there wasn't a big party or any drinking til dawn, it did mean that I was allowed to buy new clothes without feeling bad, it meant that I let myself watch a whole afternoon of Sex and the City and Little Women (for the balance, you know) without making myself get up and fold the washing or clean the bath and it meant that I made the most gluttonous cheesecake you can possibly imagine even though only 50% of my household (me) will eat it.


I've been meaning and wanting to make this cake for aaaaaaaaages, but being that the other 50% of my household is not a peanut butter lover, which yes indeed would be a deal braker were he not so very lovely in all other ways, plus he takes car of all the car duties (phew), it doesn't make sense. And...being able to see exactly how much peanut butter chocoalte cheesecake you and only you have eaten, as represented in pie-chart (cheesecake-chart) form, is not good for your self-esteem...especially when meany physios tell you not to run more than 2 miles.


So I decided that birthday week was an excuse to be selfish and make it anyway and eat it anyway...even if it means having to have people round to dinner so I can force a slice down them so I don't feel so greedy (jokesjokes...I really DO enjoy being sociable...sometimes).


I hope fop your sake that you are surrounded by peanut butter lovers and therefore don't have to wait so long to make this cake, because it is WAY easier than it would have you believe and oh my DAYS so wonderfully peanut buttery and chocolatey and all the things you'd imagine a PEANUT BUTTER and CHOCOLATE CHEESECAKE (I just thought I should reiterate the genius of the collaboration we've got going on here) to be.


Chocolate and Peanut Butter Cheesecake
From Nigella's Kitchen.

A few notes:
  • You need to make this the day before you eat it; always good to know before you start.
  • The easiest and most hassle free way of making this will be with a food processor. If you are without one however, don't fret...you will have to tweak the base; leaving out the chocolate and peanuts because I'm not sure how you'd bash them to a powder without a processor, and you could use chocolate chip cookies instead of digestives to compensate...just pop them in a plastic food bag and bashbashbash them with a rolling pin. The filling would just need an extended beating with a hand whisk.  
  • The cream cheese absolutely 100% MUST be at room temperature before you start...do NOT think you'll be able to get away with using it straight from the fridge. Sorry for the firmness....but I've told you about my mistakes in this area before and wish someone was as demanding with me at the time.
Makes one beast of a cheesecake
You will need

1x23cm cake tin (spring-form will be easiest), greased

For the base
200g digestive biscuits
100g dark chocolate, chips or chopped from a bar
50g salted peanuts
50g soft butter

For the filling
500g cream cheese, at room temp
3 eggs, plus 3 egg yolks
200g caster sugar
125ml sour cream
250g smooth peanut butter

For the topping
250ml sour cream
100g milk chocolate
30g soft brown sugar

  • First job, as ever, preheat the oven to 170°c.
  • Process the base ingredients to a powder and press into the bottom of you cake tin using your fist or a spatula. Pop in the fridge.
  • Wash up your processor bowl and blade and process all your filling ingredients to a smooth, glossy, manila coloured gloop.
  • Pour the filling over the base in the cake tin and bake in the centre of your oven for around about 1 hour, though I would check after 45 minutes; what you're looking for is a mostly set cake with just a hint of wibblyness in the middle, or as Nigella so fabulously puts it...inner thigh wobble.
  • Make the topping by putting all the ingredients in a small saucepan and heating gently until the chocolate has melted and you have a glossy sauce.
  • Pour the topping over the top of the cake and put back in the oven for a final 10 minutes.
  • Leave the cake to cool completely in the tin and then leave to chill in the fridge overnight.
  • Let it sit out of the fridge for a while before you serve the cake, without letting it fully come to room temperature,


Tuesday 22 January 2013

Florentines.


These dainty, pretty little treats don't really communicate the journey that I traveled in their production. Florentines are sweet and lady-like and conjure up images of 'tea-time' and lace gloves...in me anyway.
But lady-like and dainty was not the sort of day I was having when I made them. It was one of those days when all was going wrong, not in a major disaster, soup-all-over-the-walls type fashion, just in a oh-I-miscalculated-the water-that's-why-the-marmalade-isn't-setting-oh-great-apparently-you-can't-substitute-butter-for-suet-my-sponge-is-all-wrong-ah-so-that's-what-happens-when-it's-too-hot sort of way.


A series of minor incidents which lead you believe that dressing them up in pretty pictures means that you're adding to the conning of all the people that believe that life really can be like the super-stylised photos that make Pinterest so addictive... usually I believe I can make it happen. But not on the Florentine day, there were no lace gloves in sight.


Some people argue that this idealised notion of life that we're subjected to constantly is badbadbad for us...but I'm not sure, it's fun to aspire...as long as you remember that even Martha Stewart has bad hair-days....and a million people around her whose specific job it is to make you jealous of her life.


So the Florentine day is over now and I'm currently sipping tea and have hairspray in my hair like a good wannabe lady and will most likely spend the rest of the day arranging flowers and holding out my little finger as a swoon through my life of pastels....at least in my head. With Love and Cake.


Florentines.
Adapted from Nigella's recipe in How to be a Domestic Goddess.

A few notes:
  • Nigella called for whole blanched almonds, chopped, but I took the easy route and used flaked; feel free to do either. In fact I was kind of blasé about following the stipulated ratio of the fruit as well, making up the whole amount of peel and cherries required with more cherries and less peel than Nig asks for....you do what you fancy, I know not everyone is a peel fan so cut it down or out if you like and replace with more cherries or perhaps another chopped nut.
  • I followed Nigella's lead and covered half my Florentines in dark chocolate and half in white; you do as you please.
Makes 30-ish
You will need

several baking sheets, greased

100g flaked almonds
90g mixed candied peel, chopped fairly small
40g glacé cherries, chopped fairly small
25g unsalted butter
90g caster sugar
15g plain flour
150ml double cream
100g dark chocolate
100g white chocolate

  • Preheat the oven to 190°c.
  • Mix together the nuts and fruit in a bowl.
  • Melt the butter in a saucepan and stir in the sugar.
  • Add the flour to the saucepan, which should leave you with a thick paste.
  • Take the pan off the heat and whisk in the cream.
  • Stir in the fruit and nut mix.
  • Drop heaped teaspoons of the mixture onto your baking sheets leaving plenty of space for each biscuit to spread out.
  • Bake for 10-12 minutes, by which point they should be bronzed round the edges and nice and thin.
  • Leave the Florentines to cool and firm on the baking sheet for a couple of minutes.
  • When the biscuits are robust enough to handle,  gently lift them off the baking sheet with a metal spatula or palette knife and leave them to cool completely on a wire wrack.
  • Melt the two types of chocolate separately, either in a bain Marie or in the microwave  and spread over the flat side of each Florentine; half the batch white, and half dark.
  • After a while, when the chocolate is starting to firm (this takes longer than you think, maybe a good 15 minutes), use the prongs of a fork to make wiggly lines in the chocolate...or don't. Feel proud either way.

Friday 18 January 2013

Proper Custard.


This Christmas, from Santa, I got 2 of the biggest, plumpest, shiniest  vanilla pods you have ever seen. Yes, I get excited by vanilla pods and yes SANTA UNDERSTANDS ME...he understands that it’s not every day that you get treated to such fancy baking treats because when it’s just a normal rainy Wednesday and you’re traipsing round Morrisons, it just doesn’t seem quite appropriate to spend £5 on something that you TOTALLY don’t need and that you can get in a jar for the same price and get manyMANY more uses from it.


Santa understands that however delicious smelling the jar stuff is, it doesn’t leave those tiny-beyond-belief black dots behind, and it doesn’t require you to split and run your knife along anything; there’s no cheffy and fancy pants feeling. So he understands that I will squeal actual squeals if he leaves these for me and I get to use them just once a year.


I had to use them soon because there is something most dissatisfying about a dried up old vanilla pod and I had to use them in something that would be ‘all about them’, spoil them and make them the star of the show....they are worth it.


So here is the destiny of pod number one. He is basically the whole point of custard and makes a rather dull egg sauce something special and mmm-inducing. Plus, I thought a recipe for proper custard that is pretty fool proof (you can thank the cornflour) would never be amiss. Expect pod number two to be here soon. With Love and Cake.


Proper Custard.
Adapted from Delia's Complete Cookery Course.

A few notes:
  • Of course if you don't get excited by such things or Santa doesn't understand you, you could definitely replace the vanilla pod with a splash of extract (not essence)...or in fact flavour the custard any way you fancy; maybe with a splash of Cointreau stirred in at the end or brandy. 
  • Do NOT throw away your scraped out vanilla pod, you could drop it into the custard and leave it to infuse even more deliciousness as it heats and remove it before serving, or immerse in a jar of sugar for your own homemade vanilla sugar. Ooooor post them to me and I will just waste time smelling them.
  • Don't be scared of making custard, just don't leave anything unattended and if there's a hint of scrambled eggs, pop the custard in a bowl standing in cold water in your sink to cool it down quickly and whiskwhiskwhisk.
Serves 4
You will need

275ml double cream
3 egg yolks
1 tsp cornflour
1 tbsp caster sugar
1 vanilla pod, split and seeds removed (like they do on the telly)

  • Pour the cream into a medium sized saucepan and heat gently.
  • In a bowl, whisk together the egg yolks, cornflour sugar and vanilla seeds until well combined.
  • When the cream has juuuuuust come to the boil, pour it into a jug that will allow you to pour it in a little trickle onto the egg yolk mixture, whisking constantly.
  • Pour the mixture back into the saucepan and heat very gently, stirring all the time.
  • After just a few minutes the sauce will be thickened and ready. 
  • Pour out of the saucepan into your serving vessel as soon as it's ready to stop any overcooking.
  • Eat hot or chilled (in which case cover the top of the custard with clingfilm to stop a skin forming), poured over something equally delicious. 

Tuesday 15 January 2013

Panettone and Blood Orange French Toast.


It’s that weird time of year when people start lots of talk about extra special oranges being ‘in season’. Now I’m not sure about you but I have never ever seen a nice round orange tree bursting to life in January’s dankness; boughs heavy with fruit. And I haven’t always lived north of the border, where the snow is currently falling...this didn’t even happen in the balmy climes of Somerset when I lived there.


Ok yes....I knooooow that’s not what these chatty orange folk mean. They mean somewhere beautiful and Spanish, where it isn’t dark for 19 hour stretches and summer holidays are never soggy, those lovely fruit are ripe and ready. It is just kind of a bit odd. We don’t go ‘hey...I hear the asparagus is ready for picking in Chile, quick we must get it over here immediately’. People who eat asparagus in January are frowned upon by foodie folk, plus are disappointed by skinny, tasteless spears.


I guess Spain is a tad closer than Chile though, and we’ve been doing the marmalade thing for gazzillions of years...the tradition and oranges even made it all the way up to Dundee! I guess we need all the vitamins we can get our hands on up here. 


So who am I to argue with the citrus based excitement, especially considering how well it suits being paired with by ‘big as a dog’ leftover panettone. This really is a lovely breakfast...not heavy at all, and sweet and sour like fizzy sweets. Now I'm off to make marmalade. With Love and Cake. 


Panettone and Blood Orange French Toast.

A few notes:
  • Of course you could absolutely use a normal orange for this, in which case leave out the sugar from the syrup, but maybe replace with a spoonful of marmalade.
  • Equally, you could happily use normal bread...a few days stale.
  • If you were feeling extra Italian, you could use mascarpone in the place of the double cream...I would have but didn't have any. It will just need a good and proper whisk to be fully incorporated into the egg, but don't stress too much.
Serves 2
You will need

1 eggs
zest and juice of 1 blood orange
2 tbsp double cream
2 slices panettone
1 tbsp caster sugar
1 tbsp butter

  • Whisk together the egg, orange zest and cream in a shallow dish.
  • Dunk the panettone slices in the mixture, leaving each slice to soak up the eggyness for around 1 minute a side.
  • Pop a frying pan on the heat and mix together the orange juice and sugar in a small saucepan.
  • Heat the juice and sugar and let it bubble to a syrup; let it reduce by about half.
  • Melt the butter in the frying pan and fry the panettone slices for a few minutes a side, until dabbled bronze.
  • Serve drizzled with the orange syrup and a dusting of icing sugar.


Friday 11 January 2013

Malteser Cups.


This recipe was meant to save me from sinking under a sea of hanger-on-er Christmas treats. I mean I LOVE being surrounded by abundent, indulgent foodstuffs as much as the next kitchen based obsessive, but it seems kind of improper for half of my kitchen surfaces to be unusable as a result of an extensive panettone and gold coin collection past the first week on January.


Wheeeen will I have a kitchen big enough to pile food highhighigh...yet still have enough space to cook?

It turns out I have quiiiite a lot more than 60g of chocolate left, and that a sprinkling of Maltesers does not an empty box make. I know I know...life is hard.


I guess I'll just have to keep ploughing through it, mouthful after glorious mouthful. The only tricky bit is that I'm a teensy bit injured...which means running is a no, so I maaaaay just about turn into a gold coin, all shiny and round. Ah well, soomeone's got to do it. With Love and Cake.


Malteser Cups.
A product of inspiration from Nigella and Bourbonnatrix Bakes

A few notes:
  • While I've said these serve 4, if you're one of the (crazy) people that says things like 'mm it's delicious but very rich', then I'd suggest using espresso cups or littler ramekins and splitting the mixture between 6 or 8.
  • If you don't fancy the malty element here, just replace the 15g Ovaltine with the same amount of cocoa and use dark chocolate.

Serves 4
You will need

4 x cups or ramekins, each about 150ml in capacity 

250ml milk
125ml double cream
30g caster sugar
1tbsp cornflour
20g cocoa
15g Original Ovaltine
2 tbsp boiling water
2 egg yolks
1 tsp vanilla extract
60g milk chocolate, finely chopped

  • Pop the kettle on and pour the milk and cream into a small saucepan.
  • Heat the milk and cream gently while you get on with the other steps.
  • Pop the sugar and cornflour in another saucepan, and sieve in the cocoa and Ovaltine.
  • Add the 2 tbsp of boiling water and whisk to a paste.
  • Whisk in the egg yolks one at a time, followed by the milk mixture, which should be just about to boil, and the vanilla.
  • Heat the chocolatey mixture gently, whisking constantly for 4-ish minutes, until it thickens to the consistency of mayonnaise.
  • Remove from the heat and whisk in the chopped chocolate until smooooooth and shiny.
  • Divide the mixture between your cups and cover with clingfilm, so that it actually sits on the surface of the pudding, to stop a skin forming.
  • Leave to cool and then chill in the fridge.
  • Serve as they are or top with whipped cream (you'll need about 200ml, pre-whipping) and maltesers...


Tuesday 8 January 2013

Cider Caramel Apples.


Hiiiiiiiiii. I’m back, after what feels like aaaaages. Sorry about that. You see, I was planning on not doing this bloggy malarky for the week over Christmas, I mean who wants to read about cake and stuff when you’re all cosied up watching the Downton spesh with a tummy full of mince pies and pud anyway? But then bad things happened which meant any time that wasn’t spent trying not to sneeze on colleagues and customers was spent perpetually horizontal, being able to muster up just enough energy to lift the life-giving Dr Pepper to my lips. Yep, my New Years Eve was a glam fest.


So anyway, here I am, happy to be healthy and ready for muchmuch cake. I even might need mooore cake than usually because that horizontal thing meant that I don’t feel like I got my fair share of Christmas fun and food and cocktails....so I can see that I might have to spend the next year making up for it.


I’ll start off slow though, because I know some of you might still be clinging on to those New Year Must. Be. A. Better. Person. hopes and I wouldn’t want to get in the way of your will power (but here is a lovely post about why NY resolutions can be silly).


So yes, there is caramel, but it’s made of, like, 1 spoon of sugar and there’s FRUIT, and I will NOT let ANyone say a bad word about FRUIT (yes it has sugar, but it has a whole lot of good stuff too). Put the apples on pancakes for a weekend treat, or maybe on porridge for breakfast on a day that requires Big Fuel. Do you know....you could even serve them with a sharp, strong blue cheese in a tastytasty salad or as an alternative to dessert. And if you want to be reeeeeeeally naughty...get a bit of this heavenly salted caramel sauce involved and repeat after me...resolution shmesolution. With Love and Cake.


Cider Caramel Apples.

A few notes:
  • Pleaseplease don't be scared off by the word caramel...it's not what you thing think, honest.
  • The cider you need here is the traditional flat, scrumpy stuff. If you don't have any, you could substitute apple juice, in which case I would cut back on the sugar a bit, or you could use another appropriate alcohol; calvados would be dreamy.
  • Serve on ice cream, on crêpes, with blue cheese on toast...the possibilities are extensive ...see above for more ideas.
Serves 2
You will need

drizzle of flavourless oil
knob butter
1 crisp, sharp apple, Granny Smiths work well, cut into slim wedges
1 tbsp cider
1 dessert spoon soft brown sugar

  • Heat the oil and butter in a large frying pan.
  • Add the apple and fry for a few minutes until the underside is burnished and bronzed.
  • Flip the wedges over and cook for a few more minutes so the other side colours as well.
  • Add the cider and sugar, swirl around the pan and then leave for just a few moments for the cider to bubble away and the sugar to dissolve to a deep bronze sticky sauce.
  • Remove from the heat and serve as you wish.