Friday 21 December 2012

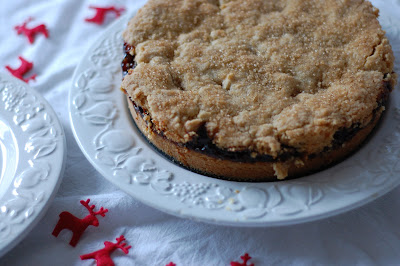
World Saving Mincemeat and Cinnamon Slice.


OmGeeeee...there has mean a Fife based apocalypse. Either that or the earth has been sucked into a black hole and you are having the same ‘WHERE HAS ALL THE DAYLIGHT GONE?’ experience as me. Seriously...where is it? Will be ever see the sun light again? Will my photos ever look bright? Be I able to do yoga in the front room with the light on without feeling like some sort of crazy exhibitionist? I fear not.


Quick, we must eat shortbread...I’m pretty sure that’s official government advise; ‘In end of world situations....butter and sugar must be relied upon for solace and salvation’....that sounds about right doesn’t it? The Queen, at least, would deffo go along with that.


If you’re reading this tomorrow and it’s beautiful and sunny and you’re thinking I probably feel awfully silly about my panic, well you would be wrong, because this recipe is a saviour in more ways than one...even if it doesn’t save the world from doom, at least it will save that half jar of mincemeat that you’ve kept in your fridge because you definitely, probably, might, perhaps do something with it soon.


Here make THIS. It might save your life, it might save you from mould...either way you’d be silly not to, just to be on the safe side. Merry Christmas. With Love and Cake.


Cinnamon and Mincemeat Slice.

A few notes:
  • If you don't have a food processor, just sieve the dry ingredients to combine, and rub the butter in with your fingertips.
  • You could make this is a bigger tin and have a thinner slice if you fancied.
Serves 8-10
You will need

1 x 18cm loose bottomed cake tin, buttered and floured

300g plain flour
pinch salt
2 tsp ground cinnamon
50g cornflour
100g caster sugar
300g butter, cold from the fridge and cubed
1 x small jar mincemeat
1 tbsp demerara sugar

  • Preheat the oven to 160°c.
  • Pop the flour, salt, cinnamon, cornflour and caster sugar in the bowl of your food processor and pulse to combine.
  • Add the butter and whizz until the mixture starts to clump together.
  • Tip half the mixture into your prepared cake tin and press it down with your fist or the back of a smoon to create a dense, even layer.
  • Bake for 15 minutes, until the shortbread base is just starting to turn golden.
  • After the bottom layer has cooled for a few minutes, spread over the mincemeat.
  • Now tumble over the remaining shortbread mixture and spread and press into an even a layer as possible, though this is harder to do than the bottom layer, so don't be sad if it ends up a bit nubbly, it'll still taste lovely.
  • Sprinkle the demerara sugar over the top and bake for 40 minutes, when the top should be golden and firm.
  • When cooked, remove the sides of the tin as soon as possible; before the mincemeat has a chance to cool and cause a sticking disaster, by standing the cake tin on a mug and sliding the sides of the tin down.
  • Leave to cool completely before slicing and feeling like a world saviour.


Tuesday 18 December 2012

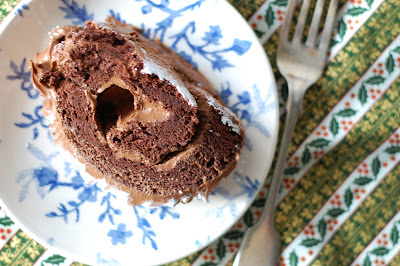
Yule Log.


Yule Log. Bûche de Noël. What more is there to say....other than MAKE IT. It is one of those recipes that looks complicated and so people are all "Wowzas, you made a Yule Log, you must be some sort of baking fiend"....and you can be all "well yes, ahem, *humble smile*, I do bake a lot", but on the inside you'll be like "Yule Log is easy fool"....but only on the inside.


If you are of the 'cake doesn't really count without inches and inches of icing'-school, it is the peeeerfect cake for you. It's basically not much cake held together and prettied up with SHED-LOADS of icing. Helllooooo it's Christmas, eating butter by the spoonful is practically mandatory.


And if you like brownies (hi, er, everyone), you will lovelovelove this. The sponge is all light and airy but then sinks as it cools so ends up being dense and fudgy. Dense and fudgy people...LIKE BROWNIES.


So I hope I've made myself clear...you can make this cake, you should make this cake, you will LOVE this cake, and those that come a visitin' with loads of presents for you to put under your tree (yeah?) will provide you with enough ooohs and aaaahs to give your soul a glow long enough to stave off the January blues. Now gooooo...bake. With Love and Cake.


Bûche de Noël.
From Nigella Christmas

A few notes:
  • This recipe requires a fair amount of egg beating, so unless you want a major upper-body work out, use an electric hand whisk or free standing mixer.
  • I made the icing in my food processor, as Nigella does. If you don't have one, simply sieve the icing sugar into a bowl, and instead of the 'whizzing' that is required, you'll need to beat with an electric hand whisk or plain old wooden spoon.


Makes 1 yule log
You will need

1 x swiss roll tin, they are usually 13x9 inches, lined with plenty of greaseproof

For the cake
6 eggs separated
150g caster sugar
1 tsp vanilla extract
50g cocoa
icing sugar to dust

For the icing
175g dark chocolate
200g icing sugar
225g butter, at room temperature
1 tbsp vanilla extract

  • Preheat your oven to 180°c.
  • In a medium bowl, whisk the egg whites until just starting to stiffen.
  • Whisk in 50g of the caster sugar and continue to whisk the whites until they form stiff peaks but don't look too dry.
  • In another, nice and large, bowl, whisk together the egg yolks with the rest of the caster sugar until thick and pale.
  • Add the vanilla and whisk a bit more.
  • Sieve in the cocoa and fold in gently until well combined.
  • Briskly stir a tablespoon of the egg whites into the yolks to combine well.
  • Then, in 3 batches, gently fold in the rest of the whites.
  • Pour the moussy batter into the lined Swiss roll tin and bake for 20 minutes until puffed up and set.
  • Let cool in the tin for a while; it will sink a bit but that's fine.
  • Prepare a sheet of greaseproof paper on your work surface by sprinkling it with plenty of icing sugar.
  • Turn out the sheet of sponge onto the dusted paper.
  • Now to make the icing...melt the chocolate gently, either in a microwave or over a pan of hot water.
  • In a food processor, pulse the icing sugar to remove any lumps.
  • Add the butter to the processor and whizz until smooth and well combined.
  • Add the cooled melted chocolate and vanilla extract and whizz again until you have a smooth and shiny paste.
  • Now to assemble. Spread a few tablespoons of the icing over the flat sponge; be liberal, you have a made a LOT of icing.
  • Using the greaseproof paper on which the sponge sits, roll the sponge into a Swiss roll; you will need to pick up the long side of the greaseproof paper close to you and use it to press the sponge into a spiral.
  • When you have a fairly tight roll, cut off one of the ends at an angle; this will make one of the twigs coming of the main log.
  • Transfer the main log onto your serving dish and sit the 'cut off end' somewhere along one of the sides as I have in the pictures.
  • Cover the whole thing with icing, filling in cracks and covering the exposed ends.
  • Clean any messy bits you've made on the serving dish with a piece of kitchen roll.
  • Make the woody effects by dragging something like a cocktail stick or little knife along the length of the log, and make swirls on any ends.
  • Sprinkle with lots and lots of snow (icing sugar) and make whichever cutesysute scene you fancy.


Saturday 15 December 2012

Egg Nog.


I have been meaning to make Egg Nog for foooorevvvver. I never really knew what it was, what was in it or how to make it....I just knew that I wanted it. Turns out....it's boozy custard. It's custard AND YOU DRINK IT. Even as I write this, having made it and drank it, I'm not sure if I'm over-excited because obviously drinkable, alcoholic custard is the most genius invention ever or that I'm actually a bit aggitated because boozy drinkable custard is an insane idea and the thought of it is a teeny bit gross.


I think maybe it's a mixture of the two. It is indeed delicious and the brandy and nutmeg make it wholey festive feeling; I really do feel very 'Little Women' at just the thought of the words Egg Nog, but the fact that I watched myself whisk eggs and cook them and pour them into glasses gives it an ever so slight yuck factor.


Ahhh so the answer is to get someone else to make fooor you. Thaaaaat's what you should do. Because I wouldn't want you to miss out, it is a massive treat after all....and if you're a creamy, after-dinner cocktail fan, I'm thinking Brandy Alexanders or the infamous White Russian, then this is RIGHT up your street.


With the rest of mine I'll probably use it as actual custard over mince pies and such like...because that makes total sense, brandy cream is an actual thing people make. But lets be honest, tis the season for things not to make sense really....a fat man fitting down chimneys, flying reindeer, little elves making X-Boxes...and if we can believe all that then should be able to embrace drinkable custard right? With Love and Cake.


Egg Nog.

A few notes:
  • When doing my research for this recipe I find millions and trillions of different versions...some that separated the eggs, some with bourbon, some cold some hot etcetcetc. This is an emalgumation of several that I think feels like the most traditional and is definitely the least expensive in terms of shelling out for loads of different bottles of spirits.
  • If you don'y have brandy maybe you have whisky and could use that instead, or maybe Bailey's would work too....eveeevery one has baileys.
  • You can serve egg nog freshly warm out the pan or chill it and serve cold...I guss it just depends how warm you want your cockles to be.
  • If the idea of drinking custard doesn't appeal, this would be perfect in the place of regular custard over Christmassy delights like mince pies or Christmas pudding.


Makes 4 small servings
You will need

1 pint milk
25g caster sugar
good splash vanilla extract
3 eggs
100ml brandy
good pour of double cream
freshly grated nutmeg

  • In a medium sized heavy based saucepan, heat the milk and sugar gently until just starting to boil.
  • Whisk the eggs gently in a bowl with the vanilla and slowly pour over the milk, whisking constantly.
  • Give the saucepan a quick wipe around so it's pretty much clean and pour the eggy milk back into the pan.
  • Return the pan to a very gently heat, stir fairly often until the mixture is thickens slightly and a good coating sticks to the back of a wooden spoon.
  • Remove the mixture from the hot pan or it will continue to cook.
  • Once it has cooled slightly, whisk in the brandy and cream.
  • You can serve as it is, toasty warm, or chill and serve cold. Either way dust with plenty of nutmeg.


Tuesday 11 December 2012

Mincemeat Ravioli: The Gin Lover's Mince Pie.


Have you made mince pies yet? Do you keep meaning to but don’t quite get round to it? Do you love the idea of having a constantly restocked pile to greet you when you arrive home but can’t quite be bothered because you keep going out for cocktails and gin always wins? Do you not intend to ever because, HELLO, you can buy them from M&S and the oven is where you store your shoes?


Well if the latter is true, then I don’t think you’re in the market to have your mind changed, and apparently M&S mince pies are in fact very lovely, so go ahead and keep being fabulous and ‘flour in your hair’-free. But if you’re in the other camps, and you just need to carve out that extra half an hour or don’t have the right shaped tin...then YeY, here comes Delia to our rescue.


These are genius; puffy, caramelised, mincemeat filled mouthfuls that you can literal have done, from start to finish, in 30 minutes. I remember making them several years in a row when I was pretty young, probably before I’d ever made a real mince pie, when all I had in my cookbook collection was Delia’s How to Cook Part 1, in which these delights feature. As with all the best recipes, its page is very messy.


Buy in the pastry and mincemeat...honestly, absolutely no one will care, and you can tick ‘make mince pies’ off you list without even breaking a sweat and still having time for gin. With Love and Cake.

(WHY yes, that IS a Christmas tree on my plate.)

Mincemeat Ravioli.
From Delia's How to Cook Part 1

A few notes:
  • Make sure to check that your mincemeat is vegetarian, if you care about such things.
  • If you have a bit more time, maybe you'd like to make your own pastry. Find the recipe HERE.
  • These are so easypeasy that it would be no bother at all to double the recipe or make tweaks here and there. How about a crunchy dusting of demerara sugar before baking, or the addition of a few crumbles chestnuts to the filling?
Makes 15-20
You will need

a large baking sheet, greased

1x320g packet ready rolled puff pastry
1 egg, lightly beaten
1 medium jar mincemeat
icing sugar for dusting

  • First things first, preheat the oven to 200°c.
  • Spread out your pastry on a clean and lightly floured surface and roll it out so it is just a bit thinner than in arrives out of the packet.
  • Then you want to cut it almost in half, but not quite. Basically you want 2 rectangles, with one just slightly bigger than the other; aim for one being about 30x25cm and the other being 32x 28 cm.
  • Now brush the smaller rectangle all over with egg.
  • Spoon teaspoonfuls of mincemeat evenly along one edge of the smaller rectangle, leaving a border of about 1 cm between each spoonful and between the edge of the pastry. 
  • Continue row after row of mincemeat, evenly across the pastry.
  • Lay the larger rectangle of pastry, gently over the top of the mincemeat.
  • Press down the pastry to seal each parcel of mincemeat and brush the top with more egg.
  • Cut along each gap to separate the parcels from each other; you can use a fluted pastry wheel for this if you want a frilly edge.
  • Transfer each parcel to your prepared baking sheet and if you're worried that the edges might not be sealed enough, press down around the outsides with a fork.
  • Bake for 15 minutes or until the pastry is puffed up and golden. Don't worry about any mincemeat leakages, just make sure you remove the parcels to a wire rack before the sugar in the mincemeat cools and sticks to the baking tray.
  • You could either just sprinkle with lots of icing sugar and serve as they are, or when they have cooled and you're ready to serve, you could transfer them back to a backing tray, sprinkle liberally with icing sugar and stick under a hot grill for a few moments. The sugar with caramelise and turn golden. Sprinkle with more icing sugar and serve.
  • Merrrrrry Christmas.

Friday 7 December 2012

Stollen: A Christmas Twinkle for a Dreary Day.


It is DARK, it is COLD, it is BLOWY and just generally rather horrid up here in the frozen wastelands of the north. It’s ok really, I don’t have to go anywhere, and yesterday, when I did, it was a beaut of day. But I just thought we should try extra hard to shine some light into this dreeeeary Friday...and what better light is there than sparkly, twinkly, oh so heart warming CHRISTMAS LIGHT.


Yesyes, I admit it, I’m there now, I’ve unleashed the Christmas beast and it’s all the way down the glitter hill from here. I am going to spend the next week crafting my socks off. There will be lanterns, there will be bunting, there will be cards and there will be lights, even mooore lights than usual and it will smell GREAT.


However, here I should calm down, slow down and clarify that I am indeed aware that it is still too early for some and that glitter is excluded from some peoples’ agenda, eeeeven at Christmas (though I’d keep that to yourself around here if you don’t want to be struck off numerous Christmas card lists).


So yes, I started gently, no gold or stars or fairy lights. Just a lovely understated loaf with a surprise treat inside; something that looks and feels wholly impressive without being showy and without tantrum inducing effort. You can buy them sure, you can even eat little slices for free at your local German market (probably) but homemade will taste better and look better...and you can avoid marzipan stinginess....everybody wins. With Love and Cake.


Stollen.
From Delia's Complete Cookery Collection

A few notes:
  • You don'y have to do the glaze thing if you don't fancy.....how about a giant avalanche of icing sugar instead?
  • Feel free to chop and change the types and quantities of the dried fruit...keep the overall quantity about equal but do tweak proportions according to your taste. 
  • When the stollen has gotten a bit old and stale, it if WONderful toasted and spread with butter.
Makes 1 large loaf
You will need

150ml milk, warm
50g caster sugar
2 tsp yeast
300g strong white bread flour
pinch salt
110g soft butter
1 egg, beaten
40g currants
50g sultanas
50g glacé cherries, rinsed, dried and quartered
25g candied peel
25g almonds, chopped
zest 1/2 lemon
175g marzipan
110g icing sugar
juice 1/2 lemon

  • Mix the milk with 1 tsp of the caster sugar and the 2 tsps of yeast and set aside.
  • Combine the flour and salt in a large bowl and rub in the butter with your fingertips until it is only present in fine grains.
  • Stir in the egg and the milk mixture and bring it all togther to form a dough.
  • Knead until stretchy and shiny and then form it into a tight ball and pop it back in its bowl.
  • Leave somewhere cosy to rise for around 1 hour.
  • Work the dried fruit, almonds and lemon zest into the dough until evenly distributed.
  • Roll out the dough to a 25x20cm rectangle.
  • Using your hands, roll the marzipan into a sausage shape, about the length of the rectangle of dough.
  • Place the marzian in the centre of the dough and fold it over the marzipan so it gets wrapped and transfer your log to a baking sheet; flipping it over so the join is underneath.
  • Leave to rise again for another hour.
  • Preheat the oven to 190°c.
  • Bake your stollen for 35-40 minutes until golden and filled out.
  • Remove to a wire rack to cool.
  • Meanwhile, mix up the glaze be sifting the icing sugar into a bowl and stirring in as much lemon juice as it takes, starting off with 1 tablespoon, to make a smooth, fairly stiff paste.
  • While the stollen is still warm, pour the glaze over the log and let it dribble down the side as it pleases.
  • CLose the curtains, light some candles and tuck in.


Tuesday 4 December 2012

Ensaimada: a Mallorcan Breakfast Treat.


Picture this ok: You lace up your trainers and off you trot for a nice easy 9 miler...it’s your current favourite route, there’s a pretty epic hill about 3 miles in so when you’ve passed that, you feel like you’re home and dry. It’s grey and rainy and you get splashed by the odd truck but you’re not a fair weather runner so trottrottrot you go. You make it up your ‘Everest’, you’re high up in Fife’s heavens, the wind is behind you, all is good.


AND THEN. You change direction, and some weather God decides that no, today is not meant for a nice satisfying run but that it’s time for some suffering. The wind is now in your face, like actually IN your face and it brings little needles of frozen rain, not snow, or hail, frozen rain, into your skin so you have to squint and your thighs are not quite numb enough to not feel the needles soaking your tights and your skin and it stings. Your hands are wet and so cold you can’t grab your tights to readjust and you are suffering. It is the coldest and wettest run that perhaps there ever was. Don’t call me a hero (ok just whisper it), I’m no Nansen , and I’m not telling you this so you think I’m amazingly hardcore and brilliant (though if that happens to be your concluding opinion then who am I to argue).


No...I’m telling you so you can understand what it was that kept one foot in front of the other and prevented a major tantrum. It was this poofy, buttery bread that was my whirlywhirly ‘carrot’ and the thought of it sitting next to ‘too hot for purists’ coffee meant that I made it home in record time. If you’ve perhaps not heard of ensaimada before, I will tell you that it is in fact a Mallorcan breakfast treat, probably traditionally made with lots of lards.


I will admit that it’s not meant to be quite this shape, but more of a flat spiral that fits into a sort of large Camembert type box. I am, however, chalking my superduper spiral explosion down to my recent bready endeavors and the fact that I have evidently got just too good at the yeasty thing for my own good. I’m off to continue patting myself on the back...you go and make this, the running thing is not a mandatory part of the recipe, in fact, I’d advise against it. With Love and Cake.


Ensaimada

A few notes:
  • While it is true that from start to finish this recipe takes a good while, you are not involved very much at all, so don't be intimidated by all the restings and risings.
  • You can add fillings when you do the rolling out and brushing with butter. A sprinkling of sugar would be nice, maybe some cinnamon or a ground almond fondant. This is the most traditional version though.


Makes one big one
You will need

A large baking sheet,lined

1.5 tsp dried yeast
150ml milk, warmed 
375g strong white bread flour
pinch salt
90g caster sugar
2 eggs
1 tbsp olive oil, plus extra 
a good knob of melted butter, plus extra for glazing
icing sugar

  • First little job....mix together the yeast and milk and set aside.
  • In a nice large bowl combine the flour, salt and sugar.
  • Make a well in the centre of the four and add the eggs and olive and whisk together, starting to incorporate into the flour.
  • Add the milk and yeast mixture to the flour and mix everything to a sticky dough.
  • Turn the dough out onto a well floured surface and have lots more flour handy so you can keep flouring the surface and your hands; it's a very sticky and wet dough at this stage.
  • Knead until the dough has become stretchy and shiny.
  • Oil the bowl that you mixed the dough in, pop the dough back in it, oil the top of the dough, cover with a tea towel and set aside in a cosy place for around 1 hour.
  • Roll the dough out on a well floured surface to a large rectangle and just a few millimetres thickness.
  • Brush all over with melted butter and roll up, starting from one of the longer edges, like you would roll up a poster.
  • Leave the dough to rise in its sausage shape for at least another hour, or more if you've got the time.
  • Coil the dough up into a spiral and transfer to your baking sheet, leaving it alone for one last hour.
  • Preheat the oven to 190°c.
  • Bake the ensiamada for 30-40 minutes, until puffed up and golden.
  • As soon as it's out of the oven, brush all over with melted butter and sprinkle over lots of icing sugar  through a sieve.
  • Eat with coffee or hot chocolate and feel like a hero.