Showing posts with label Tea-time Treats. Show all posts

Friday, 4 October 2013

Lemon Sour Cream Pound Cake.


Oo helloooo. I'm sorry it's all been a bit sporadic around here lately... I've been so good and organised with my 2 posts a week over the past couple of years and now I keep being silly and forgetting to press publish or having a little holiday and getting all the posts prepared but not actually telling you about them. What a wally.


And I'll be starting a new job next week, in a new town with a new schedule and having not started yet it's hard to see how it'll all work out...when will I bake, when will I run, when will I tell you how excited about my latest peanut butter discovery??


Plus, it's winter now, or at least it felt like it when i walked home yesterday... battling through the wind and rain, mascara more on my cheeks than my lashes... which means it's dark, which means I am SO much less productive at either end of the day.


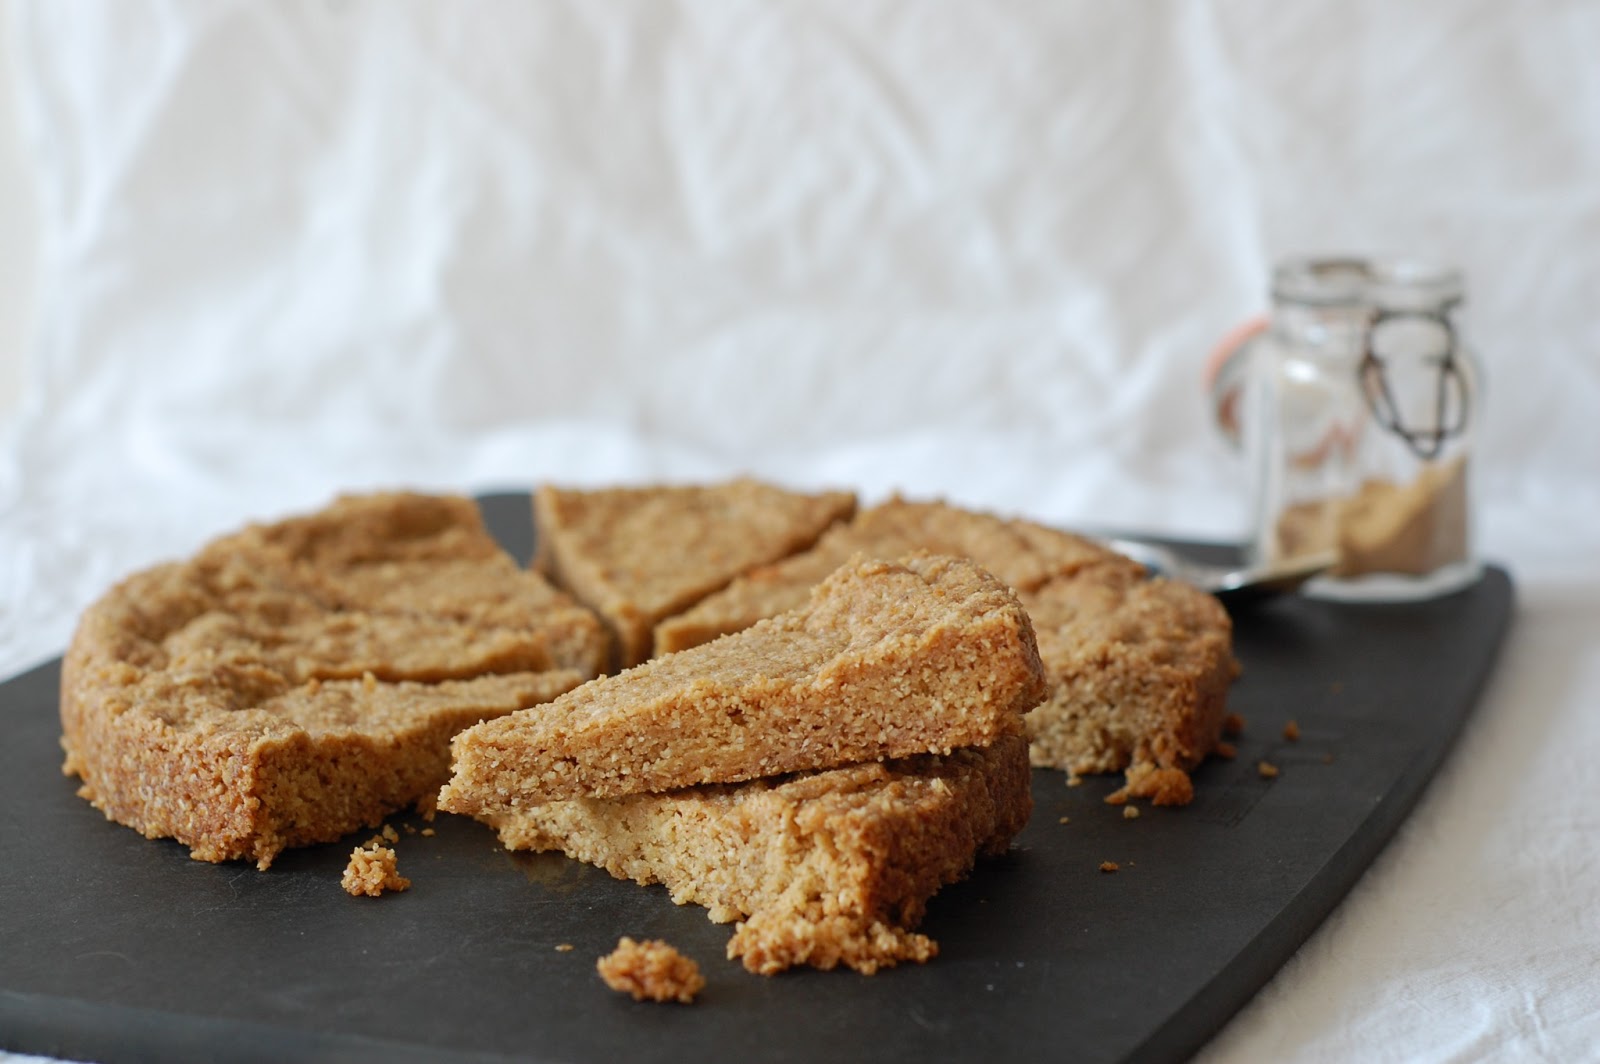
So I hope you don't mind but I'm just going to see how I go and work it out along the way. It'll work out I'm sure. In the mean time, here's some cake, to say thanks for coming back and fingers crossed for lots more peanut butter excitement.


Lemon Sour Cream Pound Cake.
Adapted from a Life Made Simple Recipe

A few notes:
  • You could change the citrus here, orange would be lovely.
  • The recipe below is for a 2lb cake tin... but I like my 1lb one better for cakes so I used about 2/3 of the mixture in that and the rest as muffins (baking for 20 minutes after the cake was done so I didn't have to open the oven door part way through the cooking time). You do as you will.
Makes a 2lb loaf cake
You will need

1 x 2lb loaf tin, greased and lined

For the cake
190g caster sugar
60g soft brown sugar
225g butter, at room temperature
Zest 3 lemons
3 tbsp lemon juice
5 tbsp sour cream
5 eggs
225g plain flour
1/2 tsp baking powder
3 tbsp poppy seeds
Pinch salt

For the syrup
2 tbsp caster sugar
2 tbsp lemon juice

For the glaze
50g icing sugar
lemon juice

  • Preheat the oven to 160c.
  • Beat the 2 types of sugar and the butter together until light and fluffy.
  • Beat in the zest, juice and sour cream, followed by the eggs, one at a time.
  • Gently fold in the flour, baking powder, poppy seeds and salt until everything is well combined.
  • Pour the mixture into your prepared loaf tin and bake for 45 minutes...I wouldn't expect it to be ready at this point but you want to check if the top is browning too quickly and you need to cover it with foil. 
  • Name for a further 15 minute or until firm and a skewer comes out clean.
  • Leave the cake to cool for a while in the tin while you get on with the syrup.
  • Pop the sugar and lemon juice in a small saucepan and heat until the sugar is dissolved.
  • Prick the cake all over with a skewer or cocktail stick and then spoon over the syrup so it soaks into all the holes.
  • Remove the cake from the tin to cool completely.
  • When it's cooled, make the glaze by mixing just enough lemon juice to make a smooth paste with a dropping consistency.
  • Spoon over the cake and let it dribble down the sides...mmmm.


Sunday, 22 September 2013

Coconut Oil Chocolate Chip Cookies.


I'm having one of those annoying days today where I feel tired and grumpy for absolutely no reason whatsoever...I slept good and I just did a clever internet thing where I downloaded an update for my digital radio which I've been meaning to do for aaaaaaages....you see, life is good, but all I really want to do is sit in a ball and watch Gilmore Girls all day long with a hot water bottle on my knee (though I won't lie I am doing the hot water bottle thing right now anyway).


It's probs because of the poopey weather we've had this week which has got in the way of my total denial that summer is over. HOWEVER, I've just realised that I've already waffled on about the weather for multiple posts already and it's still only September so I really should just shut up and accept that I live in Scotland or move to somewhere in the Indian Ocean.....I'll decide later.


In the mean time I think the answer is cookies. Chocolate chip cookies of course because what else is more cheering? And please don't get me wrong with the whole coconut oil thing...I am nooooooot putting it in biscuits because I've decided it's time to join a commune and grow my own hemp...I'm using it because I bought a big jar of it a while ago to play with and I've mostly been slathering it on my poorly feet when they're angry at me for making them run too far....turns out that doesn't actually use a huge amount, so I thought I'd give it a go in the kitchen. Using it as a butter substitute, as in spreading on toast, doesn't seem right because I LOVE BUTTER and why would you want to meddle with the alchemy of melty butter on toast, but I did fancy having a go at adding the subtle coconutty scent to a spot of baking.


Turns out it's not so subtle and those who are lucky enough to get offered one of these delights will know your ploy before they've even tasted it...but I like it...and if it helps you to go down the hemp route you can definitely convince yourself that you're saving our health by eating the cookies. So if you've got the blues, weather induced or not, make these...or move to Mauritius. With Love and Cake.


Coconut Oil Chocolate Chip Cookies.
adapted from lots o' different recipes for the internets

A few notes:
  • If you don't have any coconut oil and don't fancy purchasing then just replace it with butter or hop over to this recipe which are the best chocolate chip recipes evs.
  • You could also twiddle and fiddle with the chocolate here...I use chopped chocolate rather than chocolate chips because it's better chocolate but you use what ever you fancy...white chocolate would be fabby I'm sure.
Makes about 15
You will need

2 x baking sheets, greased

150g coconut oil
190g soft brown sugar
90g caster sugar
2 eggs
1 tsp vanilla
295g plain flour
pinch salt
200g dark chocolate, roughly chopped

  • Preheat the oven to 180˚c.
  • Beat the coconut oil and two types of sugar until fluffy.
  • Beat in the eggs one at a time followed by the vanilla.
  • Fold in the flour, salt and chocolate so you have a stiff dough.
  • Dollop tablespoonfuls of dough onto your baking sheet, leaving a good couple of centimetres between each one for the cookies to expand.
  • Bake for 15-20 minutes, until bronze around the edges but still soft in the centre; don't worry about them being underdone, it'll mean they're nice and soft.
  • Leave the cookies to firm up on the baking sheet for 10 minutes before transferring to a wire rack to cool completely.  


Thursday, 19 September 2013

Caramel Apple Cake.


Uh oh...here come the apples. It's all over. I love apples, I do, but what I don't love is how they signal that it's all down hill from here....no more strawbs, no more watermelon, raspberries are just a figment of the imagination....until it's time for rhubarb kicks in in spring....and I don't even like rhubarb.


Yes, of course, there's pears too, which are yummers, and all the sticky dried fruits of the festive season, but I proper LOVE fruit, and having no choice for half the year is not my fav.


The cheer up answer? Caaaake...OBVS. I'll just have to spend the dark months concocting all sorts of non-boring apple delights to keep the fruit excitement....seems like a plan. And here seems like a good place to start...and it's not just cake, ohnono...here we have appley sponge, plus buttery apples, plus creamy yoghurt PLUSPLUPLUS the most velvety caramel there ever was. Perhaps we'll make it through the apple season after all. With Love and Cake.


Caramel Apple Cake.
Adapted from a delicious. magazine recipe

A few notes:
  • This recipe is for a THREE LAYERED CAKE. I stole away one of the layers to take to a friend and kept the too other layers to show all you lovely peeps (thought she wouldn't appreciate a slice already hacked out of the cake I was to hand over), but I will keep the recipe written as for 3 layers because that's how I made it and you don't want to be faffing around dividing eggs and such malarky. 
  • Here's how the cake is layered (I sometimes find it easier to comprehend a recipe when you know basically what your making....)
caramel
sponge
caramel
apples
yoghurt
sponge
caramel
apples
yoghurt
sponge

You will need

3 x 20cm loose based cake tins, greased and bottoms lined

For the sponges
4 eating apples (I used cox), peeled, cored and chopped roughly
390g caster sugar
375g butter, at room temp
5 eggs
385g self raising flour
1 tsp baking powder
pinch salt

For the filling
4 eating apples (again, I used cox), peeled, cored and sliced
50g caster sugar
70g butter
350ml thick yoghurt

For the caramel
75g butter 
50g soft light brown sugar 
50g caster sugar
50g golden syrup
20g icing sugar
220ml double cream
big pinch salt

  • First we'll make the sponges, and to start off we make a purée out of the apples. Pop the chopped apples in a small saucepan with 50g of the caster sugar and 100ml of water.
  • Heat over a high heat until they've broken down to a fairly smooth purée, hopefully this'll take about 15 minutes.
  • Remove the apples from the pan and leave to cool completely.
  • Preheat the oven to 170˚c.
  • In a mixing bowl, beat the butter and sugar with an electric hand whisk until pale and creamy.
  • Beat in the eggs one at a time followed by the cooked apple.
  • Sift over the flour, baking powder and salt then fold in gently.
  • Divide the mixture evenly between your cake tins and bake for 30 minutes or until they are bronzed and firm in the centre.
  • Leave to cool in the tins until cool enough to handle, then turn them out and leave to cool completely...and I mean completely.
  • Now we make the filling. Heat a frying pan over a medium heat and throw in the apples, sugar and butter.
  • Cook, stirring regularly, for around 15 minutes, or until the apples are soft and shiny and just starting to properly caramelise around the edges.
  • When they're done, remove the apples from the pan with a slotted spoon and set aside to cool.
  • Now we make the caramel. Put all the ingredients in a saucepan and heat gently to melt the butter and dissolve the sugar. 
  • Bring to a simmer and let lightly bubble away for 7-8 minutes so it turn a proper toffee colour.
  • Pour the caramel into a bowl to allow to cool.
  • When everything is at room temperature, it's assembly time. Place one sponge layer on your serving dish and top with half of the yoghurt, then half of the apples, then drizzle over a tablespoon or so of caramel.
  • Set the next sponge layer on top and top that with the rest of the yoghurt, apples and another drizzle of caramel.
  • Finally add the last sponge layer and pour over the rest of the caramel, allowing to to dribble down the sides. 
  • Oh My....


Sunday, 8 September 2013

Hearty Tart.


This isn't officially called Hearty Tart...it's just the title of the article that I got the recipe from and I've been calling it that in my head ever since I've been meaning to make it. Apparently it's really called 'North Country Tart' which is a ruuuuubbish name is you ask me...it sounds a bit north-racist and I'm pretty sure the people who invented the Bakewell would contest the fact that this is the one and only north country tart. So yes, I renamed it. 


Not that it's actually very hearty...I think of 'hearty' as meaning a bit stodge and stick to your ribs, which while great in its place, is not the right description here...this tart is actually a tad more elegant than that thank you very much. 


But not too elegant don't worry, I mean, there's jam and coconut for goodness sake...very much a kids party kind of vibe...in the best of way of course.


Also....it's actually a bit of a doddle to put together; as long as you've got your pastry situation down then you're covered, there's not even any blind baking. Plus, I don't think you even have to be a tart to make it. With Love and Cake.


Hearty Tart.
recipe adapted from delicious. magazine

A few notes:
  • Apparently the original type of jam used here is raspberry, but I like strawberry better so that's what I used, like the rebel that I am....not...but you use whatever you fancy...I think blueberry might be really yummers with the coconut.
  • Having coconut in the pastry is extra lovely if you're a fan, but if you have a tried and tested pastry recipe that you love do feel free to use that instead.
  • Yep...pastry = food processor but, as ever, you can definitely make it by hand if that's what works for you. Just rub in the butter with your finger tips and bring the dough together by hand.
Serves 8
You will need

1 x 20cm tart tin, greased

For the pastry
150g plain flour
75g butter
30g desiccated coconut
1 1/2 tbsp icing sugar
1 egg yolk (save the white for the filling)

For the filling
100g butter 
50g caster sugar
50g golden syrup
175g desiccated coconut
25g ground almonds
1 egg
about 1/2 jar strawberry jam

  • First things first let's make the pastry. Chuck the flour and butter into your food processor and whixx to the texture of breadcrumbs. 
  • Add the coconut and icing sugar and pulse to combine.
  • Whisk the egg yolk with 2 tbsp of water and add about half the mixture to the food processor. Pulse and add enough of the rest of the yolk to allow the mixture to start to clump together into a smooth dough.
  • Form the dough into a disc, wrap in clingfilm and chill in the fridge for about half an hour.
  • Roll the pastry out to a size big enough to line your tart tin with a fairly big overhang.
  • Line the tart tin, leaving the overhang as it is, and prick the base all over with a fork. Set the tart tin on a baking sheet and pop in the fridge while you get on with the filling.
  • Preheat the oven to 180˚c.
  • Put the butter, caster sugar and golden syrup in a saucepan and heat gently so the butter melts and sugar dissolves.
  • Stir in the coconut, egg, left over egg white and set aside to cool.
  • Spread the jam over the bottom of the pastry case and top that with the coconut filling.
  • Bake for 30-40 minutes until the top is bronze and firm.
  • Leave until cool enough to handle before trimming the excess pastry off and turning out of the tin.


Sunday, 18 August 2013

Coconut Macaroons.


We've gone over the macaron/macaroon divide before...and here's some more confusion to throw on the fire. You see in Scotland a macaroon is more of a confection than a baked good...with a fondant centre (made of left over potato in times of yore) covered in chocolate and coconut (I knoooow but don't blame them, it's faaar to here, they didn't get the 'macaroon memo' in time).


THIS...is not that, but is perhaps, no definitely, my favourite incarnation of the M-word. A big puffy ball of damp coconut help together by magic and prayers....ok egg whites and rye flour, in this instance.


They're very old school English and would fit perfectly in an Enid Blyton tea time and while they look all pretty and delicate, they are actually fairly robust and therefore perfect picnic fayre.


I used rye flour because I'm a health nut and want to make everything gluten free I'd run out of ground almonds and thought I'd give it a go...it works darn well, and makes me feel very 'health food shop'. So there you have it, a biscuit to make you feel like you're wearing a hessian shirt to an Edwardian tea party and tasting bloomin' lovely...what more could you ask for. With Love and Cake.


Rye and Coconut Macaroons.
Adapted from a Nigella recipe; from How to Be A Domestic Goddess.

A few notes:
  • If you don't have rye flour and don't fancy investing, replace with the same amount of ground almonds.
  • If you happen to have it (and if you do, I LOVE you), replace the vanilla extract with coconut essence.
  • Nige was very specific about using shredded coconut here, which you'll often see in American recipes and is much damper that dessiccated, but I neeeever see it, and you can make your own by faffing about with soaking the dessiccated stuff but I just used it as is and relative to the ease the macaroons don't suffer I think.
Makes 8
You will need

1 x baking sheet, lined

2 egg whites
1/4 tsp cream of tartar
100g caster sugar
30g rye flour
pinch salt
1 tsp vanilla extract
250g dessiccated coconut

  • Preheat that oven to 170°c.
  • Beat the egg whites until they start to froth before adding the cream of tartar and continuing to beat until the soft peak stage is reached.
  • Continue to beat as you add the sugar, teaspoonful by teaspoonful until all is added and the egg whites are stiff and shiny.
  • Now fold in the rest of the ingredients gently.
  • Using 2 spoons, divide the mixture into 8 and make round clementine shape balls on your baking sheet out of each 8th.
  • Bake for 15-20 minutes, until they have turned a few shades darker and begin to turn deep golden in parts.
  • Leave to cool and firm up on the baking sheet for half an hour or so before transferring to a wire rack to cool completely...if you can wait that long.


Wednesday, 24 July 2013

Double Salted White Chocolate and Oat Cookies.


You may not think it from just a glance, but these, I think, are mighty fancy cookies. Like Coco Chanel, they've taken off their extra accessories at the door to allow their understated chic-ness to do all the talking. That's right...I just compared Coco Chanel to cookies.


Think of the salt ('double' because there's table salt IN the cookies and sea salt ON them) as diamonds and the white chocolate as pearls tumbling down their back a la Coco. And all the rest is a little black dress. Nothing frilly...just taste.


They're the sort of biscuits, no sorry cookies...because they're big and bendy...that you could serve for a dessert with coffee. If you're a dinner party type that is. 


Or if you're feeling less fancy you could do what I did last night and use them to make ice cream sandwiches...can't quite imagine a Parisian fashion Goddess doing as such but I live in Fife, it's not quite the same. With Love and Cake.


Salted White Chocolate and Oat Cookies.
From a smittenkitchen.com recipe

A few notes:
  • You could very happily change the chocolate here...super dark would be fab.
  • This makes a fair amount of cookies, and they spread out a lot on baking, so you'll need lots of space on your baking sheet. I therefore find it easiest to bake in batches...but you could use multiple baking sheets and swap their positions in the oven around half way through baking.
  • Use the best white chocolate you can justify...Green and Blacks is my fav.
Makes 20-24
You will need

a baking sheet, greased

200g butter, at room temperature
200g caster sugar

1 egg
1 tsp vanilla extract
130g plain flour
3/4 tsp baking powder
1/2 tsp bicarbonate of soda
1/4 tsp table salt
55g soft brown sugar
210g oats
180g best white chocolate, roughly chopped
sea salt

  • Preheat your oven to 180°c.
  • Cream together the butter and caster sugar until pale and fluffy.
  • Beat in the egg and vanilla extract.
  • Gently stir in the flour, baking powder, bicarbonate of soda, table salt and brown sugar until fairly well combined.
  • Tumble in the oats and and chocolate and stir in until evenly distributed....it will look like you're adding loads and that you'll never stir it all in, but keep going and you will.
  • Pull off pieces of dough, about 1 tablespoon at a time, and roll it into a ball in your palms.
  • Flatten a little as you place them on your baking sheet, leaving enough space for each one to at least double in size...for me this means baking in batches (see note).
  • Sprinkle each little patty with a good pinch of sea salt before baking for 13-16 minutes....look for them to reach a pale gold colour if you want them to remain a bit bendy when cooled. This will mean they are very soft straight out of the oven so leave them to firm up for a few minutes on the baking tray before carefully transferring to a wire rack to cool completely.


Wednesday, 26 June 2013

Sour Cream Pound Cake.


This is my 'OMG Wimbledon is here, it must be officially summer, let's get excited' cake. This cake, strawbs and a bottle of elderflower bubbly was combined with a whole afternoon of tennis joy in celebration of the Monday kick-off. I LOVE it...the whole thing. 


However I know there are numerous mentalists out there who realllllllly are not bat and ball fans so I shall shhh for the time being and go back to the cake talk. So yes, cake. DO you know, I've never actually made a bundt cake before...ever. I'll let wikipepants explain properly but it is a pretty standard American shape of cake tin, filled with a cake dense and sturdy enough to hold it's holey shape when turned out.


Now, usually in my little corner of this blog world I try and keep the recipes ultra accessible and only really needing equipment that even the most basicest of bakers will have or that I suggest you aspire to having. So I'm sorry about this one. Not that I consider a bundt pan in ANY way a gimmicky piece of cookware...I mean, it's no Flexiado...but if you were in the market for a start up set of cake pans, I wouldn't include a bundt pan in the list.


However, I also must assume that people that read my ramblings must care about baking...it's not the genius prose that draws them in let's be honest, and I am excited about bundt pans and therefore think that some peeps out there might be too. They make a super simple and plain cake look fancy enough for Wimbledon and as long as you have a suitable recipe are not at ALL scary to use. So here cake lovers, have a suitable recipe. With Love and Cake.


Sour Cream Pound Cake.
Adapted from a recipe from The Kitchn

A few notes:
  • To make sure you don't have any disasters, first brush the inside of your cake tin with melted butter, then throw some flour in there and roll it around so that the layer of butter is coated in a layer of flour. This seemed to work fine for me, and it's a sturdy cake, so don't fret.


Makes 1 laaaaarge cake
You will need 

1 x 10" bundt or angel food cake pan, greased and floured (see notes)

385g plain flour
1/4 tsp bicarbonate of soda
pinch salt
225g butter, at room temperature
450g caster sugar
6 eggs
2 tsp vanilla extract
240ml sour cream

  • Preheat your oven to 160°c.
  • Weigh out the flour, bicarb and salt together and a bowl and set aside.
  • In a large mixing bowl, cream together the butter and sugar as best you can, though don't worry if it stays quite granular, there is a fair amount of sugar here.
  • Beat in the eggs one at a time, followed by the vanilla extract.
  • Add the sour cream and then sift over the dry ingredients you weighed out.
  • Using a metal spoon fold everything together gently until it is well combined.
  • Pour the mixture into your cake tin and give it a tap on the kitchen surface to allow any air bubbles to rise to the surface and escape.
  • Bake in the centre of your oven for 1 hour, checking whether it's cooked by inserting a skewer or knife....if it comes out clean, you're done, if there's a bit of uncooked mixture on it, give it another 5 minutes.
  • Let the cake cool in the tin for 10 minutes before turning it out.
  • Leave to cool completely on a wire wrack before slicing and getting the strawbs and Pimms involved.

Wednesday, 12 June 2013

Grasmere Ginger Shortbreads.


So Grasmere, for those that don't know...because that little map thingy that tells me where people are reading this blog from tells me that there's people from quiiiite far away stopping by sometimes...is a very lovely village in the very lovely Lake District of England...a, you know, district of lakes (and mountains).


As well as Wordsworth, the Lakes can lay claim, if somewhat controversially, to Sticky Toffee Pudding and, very un-controversially, Kendal Mint Cake. It's one of those places where each little nook has it's own strong sense of identity......and confectionery.


This Grasmere based chap though, hasn't quite reached the dizzy heights of fame as it's sticky pudding neighbour and it's kind of hard to work to out what it's actually supposed to be. I think, really, it's supposed to just be bought from the very old Grasmere Gingerbread Shop and not questioned any further, but unfortunately that's quite far away from North Fife...so I had to have a bash at creating it for my greedy self. Fingers crossed no one is overly offended.


And if they are, they can blame it on Delia because it is her guidance I followed, despite the fact that her recipe refers to it as a shortbread, which I imagine may be a bit cheeky....not sure if the Cumbrians or the Scots would really enjoy that. So anyway...Delia's version is like a cross between shortbread and flapjack and is very crumbly and buttery. There are other recipes around which I imagine would make for a more chewy and substantial biscuit. Please correct me if I'm talking nonsense...but either way these are very yummy...and go mightily well next to a mug of coffee. With Love and Cake.


Grasmere Ginger Shortbreads.
Adapted from a Delia recipe found in Delia's Cakes

A few notes:
  • So I am lazy and got my food processor out for this one. If you don't have one, Delia says you should coarsely grate the butter into the dry ingredients and then get your hands in there to run it all together so you get a sandy mixture before putting in your tin.


Makes 8-10 wedges
You will need

1 x 20cm loose based round cake tin, greased and base lined

110g plain flour
110g fine oatmeal
110g soft brown sugar
1 heaped tsp ground ginger
1/4 tsp baking powder
150g butter, chilled

  • Preheat your oven to 180°c.
  • Pop the dry ingredients into your food possessor (see note if you don't have one) and pulse to combine.
  • Cut the butter into small cubes and whizz into the dry ingredients until you have a consistent sandy texture.
  • Tumble the mixture into your cake tin and press it down lightly with your fingers or a spatula.
  • Bake for 35-45 minutes until deep gold all over.
  • Leave to cool in the tin for 5 minutes before gently removing the sides of the cake tin.
  • Leave to cool completely on the base of the cake tin before turning out and cutting into wedges.


Tuesday, 4 June 2013

Spiced Coffee Loaf.


This is the PERFECT cake for a Sunday when you have a million things you want to get done; most of them fun, but including the time consuming task of painting your living room, lots of washing and a run because it's too sunny not to....and you want to not have to get up at 5am.


I wouldn't usually factor baking in on a day like that but I needed a cake for a coffee morning (yes, I woke up one day and I had turned 65) the next day, so I scoured my book shelf for a super speedy low maintenance sort of recipe.


This one turned out to be just the thing, and I made it even easier by chucking everything in my wondrous Magimix and letting that do all the work. It honestly came together in moments...and I'd so much rather make a super easy, unfancypants cake than not make a cake at all.


 It's also a cake rather well suited to the whole coffee morning thing...not a dessert thing that feels wrong at 11 in the morning, not too flavour packed to sit next to coffee and nice and sturdily easy to transport. SO I'd thoroughly recommend it for a busy day that still requires cake, and I'd definitely recommend coffee mornings...coffee, cake and conversation? Winner. With Love and Cake.


Cinnamon Coffee Loaf.
Adpted from a recipe in The Hamlyn All Colour Teatime Favourites

A few notes:
  • You could add a whole manner of scrummy things to this...dried fruit, chopped walnuts, different spices. 
  • I didn't try it this time round but I'm sure this would be lovely a few days old, toasted, so the butter goes alllllll melty. Yum.
  • I'm afraid I whizzed everything up in my food processor to make it extra easy, however, if you don't have one, run the butter into the flour with your finger tips, and stir in the rest of the ingredients with a wooden spoon....still pretty easy.
Makes 1 loaf
You will need

a medium loaf pan (1 lb), greased and lined

225g self-raising flour
100g butter
100g dark muscovado sugar
3 tbsp strong black coffee
2 eggs
1 tsp ground cinnamon
grated zest 1 lemon

  • Preheat your oven to 180°.
  • Put the flour and butter in your food processor and whizz until the mixture has the look of fine breadcrumbs.
  • Add the rest of the ingredients and whizz to combine.
  • Pour the mixture into your prepared loaf tin and bake for about 1 hour, though check after 45 minutes to see how it's getting on....you want it risen and firm and deep bronze.
  • Remove from the tin as soon as it's cool enough to handle and cool on a wire rack.....or slice and spread with too much butter.


Wednesday, 1 May 2013

Carmelitas.


Oooookaaaay, who's the sneaky one that decided not to tell me about these bad boys. Who decided that it would probably be best if Carmelitas were to remain hidden from my radar? I am nooooot impressed with you. Google knows about it, Google knows exactly what you're on about and gives you lots of answers to your Carmelita related question. 


But I don't think I'm alone in my lack of insight; no one I've asked (yes, I question strangers on the street about baking, it's called research) has had a clue what I've been twaddling on about. So since finding out about them through one of my very fav bloggys , I have considered it my duty to spread the word....because people, your life will be better if you add Carmelitas to it.


This, my research tells me, is an American native, along the lines of a flapjack but with added buttery goodness. They might be mental when it comes to guns, but those chaps across the pond know what they are talking about when it comes to seriously good snacks. It's a floury, so a bit more cakey, layer of flapjack, topped with caramel, topped with more flapjacky-ness.


And...AND...I have added my own English genius to the mix in the form of SALTED CARAMEL. Mmmmmmhummmmm. This makes them sound fancy, which, in fact, they are not. They are easypeasy-pants. So please bake them now, and serve them with ice cream and put 'make an American friend' on your to do list, who knoooows what else they've been hiding from us. With Love and Cake.  


Salted Carmelitas

A few notes:
  • Of course you don't have to do the salted thing, just leave the salt out of the caramel sauce and you have a regular ol' Caramelita....well as regular as such a thing can be.
  • Don't worry if, when you take the Caramelita out of the oven, it looks a bit wobbly and under cooked in the middle; it will firm up as it cools.
  • I've directed you to make this salted caramel sauce, which I've told you about before. It takes moments to make, but if you can't quite be bothered, use any shop bought caramel sauce or dulce de leche that you fancy and add a teaspoon or so of salt to taste.
Serves 8ish
You will need

a medium sized brownie ban, about 13x8 inch like this one, lined with greaseproof paper

255g plain flour
170g oats
200g soft brown sugar
1 tsp bicarbonate of soda
300g butter, melted

  • First job: preheat your oven to 160°c.
  • Mix the flour, oats, sugar and bicarb together in a big mixing bowl.
  • Stir in the melted butter until well combined.
  • Tip half the mixture into your prepared baking tin and press it into a nice firm, even layer.
  • Bake for 20 minutes.
  • When removed from the oven, spread the caramel sauce over the baked oat layer and sprinkle over the rest of the oat mixture.
  • Bake for a further 25-30 minutes until a little bit risen and just starting to go golden around the edges.
  • Leave to cool completely in the tin before turning out and cutting into squares.


Wednesday, 17 April 2013

Marmalade Roll...Third Time Lucky.


If I were a real proper food blogger, like all those good ones that write actual books and Tweet all day and the likes, I would test all the recipes I show you again and again and then I would write it and get someone else to test it to make sure I wasn't talking a lot of twaddle.


I don't really doooooooo that. I think of this as more of a window looking in on to the journeys I undertake in my little kitchen and things tend, on the whole, to work out well and then I tell you about it, and if I think I could make them work out even better, I tell you how I think YOU should do things instead of how I actually did them.


This time I did though, oooow this time...three whole times. First try = diAAAAAASTer daaaaarling...didn't even bother getting it in the oven. And I'm not about to give you a recipe that makes me sad. Second try = perfectly edible, nice and tasty in fact but definitely not a looker and a recipe not worthy of repeating. Third try = pheeeeeew, made it. I learned my lessons and I can tell you about them....this is surely the main appeal of bloggys; the whole 'I make mistakes so you don't have to' thing, in a real life kitchen with real life, non-professional mistakes. Plus my genius prose of course.


So, lessons. You deffo need suet here, butter will not do. If you are making your own marmalade, DO NOT use it to make the roll on the same day, it will be TOO HOT. And don't be a div and make the wrong (actually really easy) calculations. Hope that helps. With Love and Cake.


Marmalade Roll.
Recipe from the wonderful Jane Brocket's book; Cherry Cake and Ginger Beer.

A few notes:
  • DO NOT use hot marmalade fresh out of the pan and DO NOT substitute butter for the suet. I have made the mistakes so you don't have to.
  • You could, of course, replace the marmalade with you fav jam or conserve or compote or nut spread or whatever you fancy really.
Serves 6
You will need

1 baking sheet, lined

250g self raising flour
pinch salt
125g shredded suit (beef or vegetarian)
50g light brown sugar
1 jar or your favourite marmalade
milk, for brushing
1 tbsp demerara

  • Preheat your oven to 200°c.
  • In a nice big bowl combine the flour, salt, suet and sugar.
  • Add 100ml of water and start to bring everything together with your hands. Add more water if you need to, I used around 200ml in all; you're looking for a fairly stiff dough with no stickiness.
  • Gather the dough into a tight ball and turn out onto a clean, floured surface.
  • Roll it out into a rectangle, about 30 x 15 cm with a depth of 1cm.
  • Spread your lovely marmalade over the dough, leaving a border of 1cm.
  • Brush water over the border.
  • Roll up the dough from one long side to the other; don't worry about a bit of leakage.
  • Transfer the roll to your baking sheet and tuck the ends under to create as much as a seal as poss.
  • Brush all over with milk and sprinkle with demerara sugar.
  • Bake for 30 to 40 minutes until golden and firm. Don't worry about it splitting a bit or leaking, it's hooomely. Do, however, try and carefully remove the roll from the baking sheet before too long, you don't want any leaked marmalade to cool and stick the paper to the roll.
  • Serve hot, in slices, with custard or double or clotted cream.