Thursday 29 March 2012

Outside Eating Sausage Rolls.


Here we are, another use for this super special homemade pastry I told you about the other day and it’s picnic tiiiiime! Or at least it’s time to stop thinking that popping outside for 5 minutes on your lunch break is the craziest thing in the world.


Now I’m not of the “heck it’s 15°c, it must be shorts and flip flops weather” school. It takes a good additional 10 degrees for sandals to even remotely be considered. But on sunshiney days early on in the year when hats and scarves and double, triple layer socks are not a distant memory and not out of the question for next week, it feels like every minute that can be squeezed out of the great outdoors, should be. And that means nibbles outside as well as walks and runs and sitting and chats.


Not barbeques or big banquets with bunting and candelabras like you see in foodie magazines- someday, but snacks on a picnic bench, or a weekend lunch in the park or a break from a walk on the beach. And theeeese sausageysausage rolls are perfect for all such occasions as well as packed lunches and parties. Being a veggie I tend to delegate the squishing up sausages bit, but the rest is easypeasy. Aaaand these is a delicious veggie version which I will have to tell you about sometime soon, should you feel that way inclined, which, little Sis, I know you are.


Both this recipe and the veggie one have never feeled to be met with praise and mmmmms, in my experience, out of proportion with the effort you are required to invest...always a bonus. With Love and Cake.


Sausage Roll
Adapted from Delia's recipe (deliaonline.com)

A few notes:
  • These are great to have in the freezer, made up but not cooked, because you can just whack them in the oven, cook from frozen, and you have homemade sausage rolls in half an hour.
  • As I said here, using good, shop bought butter puff pastry should not really be considered a cheat, so feel free to do that...and these will come together in no time at all. 
  • You can make these as big or as bite sized as you wish, just tweaking the cooking time a bit to suit. Really the recipe in terms of amounts is not important, just as long as the amount of meat you have matches the amount of pastry. 
Makes 10ish, depending on how big you make them
You will need 

1 quantity of this homemade flaky pastry or a 375g-ish packet of shop puff pastry, chilled 
4-6 your favourite sausages 
A few spring onions, finely chopped 
Pinch cayenne pepper 
1 egg, lightly beaten 

  • Preheat the oven to 200°c. 
  • Right let’s go, squidge the sausage meat out of their skins and mash it up a bit with the onions and pepper. 
  • Now for the pastry. On a clean floured surface, roll out your chilled pastry into a long rectangle, with a width of around 3 times the width you want your sausage rolls. You might find it easier to work with it in 2 halves or thirds so you have to work with less at a time. 
  • Go back to your meat and roll it back into sausage shapes, which I tend to keep a bit skinnier than the nice fat sausages I use. 
  • Then lay the meet down the centre of the pastry, as in the picture above and brush some egg down one side. 
  • Fold the un-egged side up and around the meat and meet it with the eggy side so it overlaps a little, and press down to seal. 
  • Turn your big sausage roll over so that the seam is underneath and slice into individual sausage rolls. I tend to go for ones that are around 2 inches long. 
  • Now carefully move them over to a greased baking sheet and snip little slits into the top of each one, then brush all over with egg. 
  • Time to bake in the oven for 20-25 minutes until golden and shiny and then cool on a wire rack until it’s time to head out into the sunshine (hopefully).


Tuesday 27 March 2012

Make at Home Flaky Pastry: If You Want.


If you’re a pastry lover, eeer sorry, what am I saying –if? As a pastry lover, you will know that the really puffypuff stuff, all buttery and flaky and lightlightlight, is hard to beat. A vehicle to such a vast number of treats, both sweet and savoury and often ever so speedily too, it is a very handy standby to have ready and waiting in your fridge or freezer.


Relying on some good shop bought stuff is not in the least bit shameful, all the big telly chefs say so, and I’m sure James Martin has never lied in his life, probably, so whenever it’s a bargain (and I have room in the freezer-not always) I stock up.


Of course though, I’m going to give you a recipe so you can make it yourself, not to make you feel like you should, but because sometimes, the glow of self satisfaction is worth a bit of extra effort. And the recipe, not being strictly proper puff pastry, takes 5% of the effort of the real stuff (which takes daysanddaysanddays-ish) but delivers 100% when it comes to results.


When it comes to uses for this lovely stuff, hop over here to see the treat of a supper dish for which today’s pastry is destined, or hold on to your hats as I have a party/picnic food staple coming up in the next few days. Shop bought of crafted with your own fair hands...enjoy. With Love and Cake.


Homemade Flaky Pastry

A few notes:
  • As with all pastry, the MOST important thing is to get the mixing and kneading and rolling done and dusted in as quick a time and with as little input from your too warm hands as possible. You will be able to see little streaks of butter not mixed in, but that’s good, it means flakes. Also keeping all equipment involved in the process as chilled as poss is good. Really that means only making it on a cold day in a cold room, but as pastry requirements are not restricted to such occasions, we’ll just have to do what we can. 
  • This freezes really well, just keep wrapped up snugly and defrost in the fridge when the times comes.
Makes a similar amount to a 375g packet (which many recipes ask for)

You will need

110g butter
175g plain flour
pinch salt

  • First job is to weigh out your butter, leaving as much as possible in one block. Then wrap it back up in its packet and pop in the freezer for about half an hour.
  • Meanwhile, weigh out the flour and sift, with the salt, into a large bowl.
  • When the butter has had it's time and is nice and firm, unwrap the packet to halfway so there's one exposed end and you can hold on to the other, wrapped end.
  • Dip the buttery end in the flour and grate, with a coarse grater, so big chunky ribbons of butter tumble into a mound on top the flour. You might want to keep dipping the butter in the flour to make grating easier.
  • When it's all grated, use a metal spoon or pallet knife to toss the butter ribbons in the flour so it all gets a good coating.
  • To bring it together and form a dough you need to add some water. Add 2 tablespoons of cold water at a time, stirring it in first with the metal spoon or knife and eventually, when it needs a little help in the final stages, with your hands, bringing it gently together to one lump of dough. It wont be smooth and shiny but that's absolutely fine.
  • Now to shape it into a disc and wrap up tightly in cling film and leave it to chill in the fridge for half an hour until you're ready whip up some pastry delight, or pop it in the freezer for another day, and feel all smug and prepared. Look you make pastry, good work.


Friday 23 March 2012

My Favourite 'Breakfast Out' Strawberry and White Chocolate Muffins.


Hellohello. I like going out for breakfast. With friends and chatter or just my book (Anna Karenina at the mo, FYI) for company, it feels as indulgent as 'lunching' while being miles cheaper aaaand with a nice strong emphasis on cake.


The trouble is, recently I've been treating it as more of a right than a treat. On days when I have to get up crazy early to catch a crazy early train to work which doesn't even start until after crazy early and I therefore have an hour to kill, I sort of feel like I deserve to indulge and have a coffee fueled sit down.


Fine...sometimes, but now that it's light nice and early and aaaalmost warm enough to sit outside, packing up my own treat of a breakfast and pretending not to be freezing while I sit in the sun with my Thermos mug, saving pennies, seems much more appropriate. Especially given that the only places open at such an hour on a Sunday (my most frequent breakfast treat day) are big dirty chains, which have sucked the life out of far toooo many of Edinburgh's indie haunts recently.


So here is my attempt at my favourite coffee shop breakfast: an outlandishly oversized strawberry and white chocolate muffin, and a supersweet, also giant coffee, preferably vanilla flavoured (sorry coffee purists). I'm not at aaaall saying that you wont ever again find me in a squishy (warm) seat in Costa, waving my points card and ordering exactly the same thing as last time, but it will most definitely be for a treat that I really deserve do. With Love and Cake.


Strawberry and White Chocolate Muffins

A few notes:
  • Feel free to leave off the crumbs if you want to save yourself a step, I was just going for full on coffee shop authenticity. If you do make them you may have a bit left over. No worries, just pop them in the freezer until you make your next batch of muffins, whatever type they may be, and sprinkle the crumbs over, no need to even defrost.
  • You can of course mix this recipe up a bit depending on your fancy...change the chocolate or the jam or both, dark chocolate and raspberry would be fab. You could even replace the tsp of jam with a fresh strawberry...divine.
Makes 6 large muffins
You will need

a 6 hole muffin pan, lined with muffin cases

For the crumbs
25g butter, melted
30g soft light brown sugar
20g caster sugar
1/2 tsp vanilla extract
50g plain flour

For the muffins
200g self raisng flour
100g caster sugar
100g white chocolate, chopped into chunks
125ml milk
75ml flavourless oil, e.g. groundnut or sunflower
25g butter, melted
1/2 tsp vanilla extract
1 egg
6 tsps strawberry jam
  • First job, as usual, preheat your oven to 190˚c.
  • Now make the crumbs by mixing the sugars and vanilla into the melted butter until you get a nice smooth-ish paste.
  • Then stir in the flour and you should have a good stiff dough. Press it down into your bowl with the back of a spoon and pop in the fridge while you get on with the muffins.
  • Now in a large bowl bowl, sift the flour and stir in the sugar and chocolate.
  • In another bowl whisk together the milk, oil, melted butter, vanilla and egg.
  • Next we're ready to pour the liquid mix onto the dry ingredients and whisk just enough to most combine, don't worry about lumps too much, there should be no dillydallying at this point, no time to faff. 
  • As soon as your ingredients are combined, half fill all the muffin cases with mixture.
  • Pop a teaspoon of jam on top in each case and divide the rest of the muffin mix between the cases to cover the jam.
  • Now run and grab the crumb dough out of the fridge and break it into rubble.
  • Sprinkle the rubble over the muffins and get them straight in the oven.
  • Leave them alone in there for 20-25 minutes until risen and golden and firm to touch.
  • Leave the muffins to cool in the tin for 10 minutes or so, then transfer them to a wire wrack to cool completely.
  • Now feast, you probably deserve it.


Wednesday 21 March 2012

Salted Caramel Sauce: Heaven in a Jar.


Salted Caramel Sauce: Hellooooo Heaven, I didn't realise you could fit inside a jar.


I'm going to keep this one short in terms of words, because these ones, written by Nigella and my starting point for whipping up this dream, say everything there is to say on the matter of salted caramel and how, quite simply, it is divine beyond belief.


Just know that #1: it is a doddle to make, don't be scared. #2: the consumption of this liquid gold will make any day, no matter how bleak seeming, infinitely more enjoyable and #3 it can be used to anoint any number of treats, helping you out in times when only the speediest gratification will do.


Salted caramel sauce....dolloped on ice cream, with whipped cream and meringue, drizzled over a squidgy brownie, on top of a cream laden hot chocolate....I'll leave you dreaming. With Love and Cake.


Salted Caramel Sauce

A few notes:
  • The sauce might seem a bit runny at first but will cool to be thick and fudgy.
  • I don't usually tell you what butter to use because I think it's a taste thing, but go for unsalted here so you are totally in charge of the salt quantities.
  • The salt you add needs to be GOOD. Do not even think about using that fine table salt that you've had in your cupboard for 5 years. I like Cornish Sea Salt, or you could go with Nige and the French tradition and use Fleur de Sel. The recipe says to test and add and test and add so you get just the right taste, but here's my thoughts...1 tsp gives a beautifully light seasoning, 1.5 tsp is full on salty salted caramel, either is outrageously delicious...see how you get on.
Makes 1 large jar (or 1 and a half small ones)
You will need

75g unsalted butter
50g soft light brown sugar
50g caster sugar
50g golden syrup
125ml double cream
1-1.5 tsp best salt

  • Melt the butter, both sugars and syrup in a small, heavy based sauce pan.
  • When the sugars are just about dissolved let it come to the boil and bubble away for around 3 minutes, swirling around every now and again.
  • Stir through the cream and 1 tsp of salt then remove from the heat and leave to cool for a bit so you don't burn your tongue as you take a taste.
  • If it's delicious, leave to bubble for a minute more and there you have your sauce. If you think a tad more salt would add only more deliciousness then go ahead; stir it in and bubble again and there yooou are. Heaven on a spoon.


Friday 16 March 2012

Glamorous Miss Meringue.


So here we are, as promised, the perfect recipe for leftover egg whites, that old classic; the meringue. It's perfect because it's super easy and quick in terms of your involvement, yet you end up with something really rather fancy.


Aaand they keep for ages, meaning just a teeny bit of whisking saves you throwing away precious nourishment and allows you to bask in the knowledge that you've got the wherewithal to whip up a guest worthy pud at the drop of a hat. You domestic goddess you.


Meringues are so versatile, one batch leaves you with almost endless options. Pick and choose from countless combinations depending on the season and your fancy. How about with some 'super seasonal right now' rhubarb and custard? Or mashed up with strawberries in summer for meltingly lovely Eton Mess. A scrummy chocolate and pear concoction suits autumn and something chestnutty would be perfect for Christmas.


Ooooor pretty much any time, any day, maybe even right now, smashed and dolloped with softly whipped double cream and a healthy splodge of homemade salted caramel sauce, which I shall tell you about another day. Because right now it's Miss Meringue and her crispy coat and marshmallowey middle that is the star of the show. Who'd have thought that leftovers could be so glam. With Love and Cake.


Meringues

A few notes:
  • You can use this recipe for any number of egg whites; another bonus for leftover situations. Just use 60g of sugar for every egg white.
  • You can make these as daintily small or large and pillowey as you like, I guess mine are sort of medium size. You'll just have to be vigilant with the cooking time and decrease a bit for small ones and vice versa. 
  • Despite the stress that seems to be induced by meringue making, I've never had any major problems. The most important thing is that your bowl and whisks are sparkly clean.
  • I always use my little electric hand whisk for such whisk intensive undertakings. By hand is possible to though if you fancy testing your endurance, or use a standing mixer if you're lucky enough to own one.
Makes 10-15
You will need

1 or 2 large baking sheet, lined

4 egg whites
240g caster sugar

  • First job, preheat the oven to 140˚c. 
  • Pop your egg whites in a nice big bowl and start to whisk on a medium speed. First they will get frothy and foamy and then they will grow into a lovely voluminous and bright white cloud.
  • Now at this stage, keep whisking, while adding and combining a few tablespoons of the sugar at a time until it's all used up and the mixture is beautifully smooth and shiny.
  • So next step, get them ready for the oven Blob 1-2 tablespoonfuls of the mixture onto you baking sheets, leaving a good few centimetres between each one, and shape as you desire. I just gave mine a swirl on top but you could make nests by making a little hollow in the centre.
  • Get straight in the oven and leave for 50 minutes. 
  • When the timer pings, check that the meringues look cooked, crisp and eeeeever so slightly starting to tinge golden, and then turn the oven off and leave the meringues inside it, undisturbed, to cool completely, which should stop any major cracks forming.
  • When cooked and cooled you can either tuck the meringues away for a rainy day of anoint immediately with cream and whatever other goodies that you fancy.


Tuesday 13 March 2012

Problem Solving Gateau Breton.


Oh hiiiiiiiii. Isn't going over to a friend's house for dinner one of the funnest things in the world? Whether it's for fancy food and celebratory merriment, gossipy chats with constant nibbling, or simply laid back shared silence  and take away in front of the TV, it's one of my favourite things.


But turn that into a 'dinner party', grown up style, and involve people you haven't known and laughed with long enough to call friends, and the whole thing can be fraught with questions of etiquette and potential awkwardness. One of the most pressing unknowns for me is 'what to bring'?? Wine. Tick, can't go wrong. But I hate turning up at a 'thing' without a tin of something. If it's a friend's 'thing' I'll just make it clear that I have pud under control or will at least be contributing to it, but for a proper grown up 'thing' what do you do? You can't turn up with proper dessert fayre because the host might have made it themselves, and I don't want to do the buying chocolates thing, that's not me....I bake.


So here it is; the solution to that particular dilemma. Not pudding, more like a bite to serve with coffee, and if your hard working host has that sorted too, it would make the most diviiiiine breakfast for them the next day (and you if you're the sneaky type and snaffle some away (did that, obvs)).


Aaaand to top it all, you don't have to worry about pleasing multiple unknown tastes; 1/4 cakey, 3/4 shortbready and 250g butter, what's not to like? What's not to like is anyone that doesn't like cake and shortbread and butter. The host this particular batch was destined for told me, post grown up dinner, that he isn't a cake person but pretty much munched the whole lot. Enough said. With Love and Cake.


Gateau Breton
From Nigella's How to be a Domestic Goddess, what else?

A few notes:
  • The taste of this is unapologetically butterbutterbutter, so use the very best you can.
  • You'll end up with 6 egg whites leftover, but don't fret, I'll hit you with the perfect recipe to use them up later in the week, requiring 4, and you can freeze the rest, or all of them, for another day.
Makes enough for a gift and extra for snaffling
You will need

a 23cm loose bottomed or Springform tin, buttered really well

6 egg yolks 
225g plain flour
250g caster sugar
250g unsalted butter, nice and soft


  • Preheat your oven to 190˚c and first job, take a tsp of egg yolk out of those ready for the cake and mix with 1 tbsp water and save for later.
  • Now sieve your flour into a bowl and stir through the sugar.
  • Then tip in the butter and yolks and mix with your hands or a wooden spoon to a sticky dough. 
  • Press the dough into your cake tin and smooth over the top.
  • Now brush with the egg yolk/water mixture for a nice glaze.
  • Pop him straight in the oven and bake for 15 minutes before turning the temperature down to 180˚c and cooking for a further 25 minutes. It will be golden and firm.
  • Let it cool 100% before removing from the tin and cutting into slices of whatever shape you fancy, I went for a lattice but there's squares and wedges at your disposal also.
  • Happy dining.

Friday 9 March 2012

Smug White Bread.


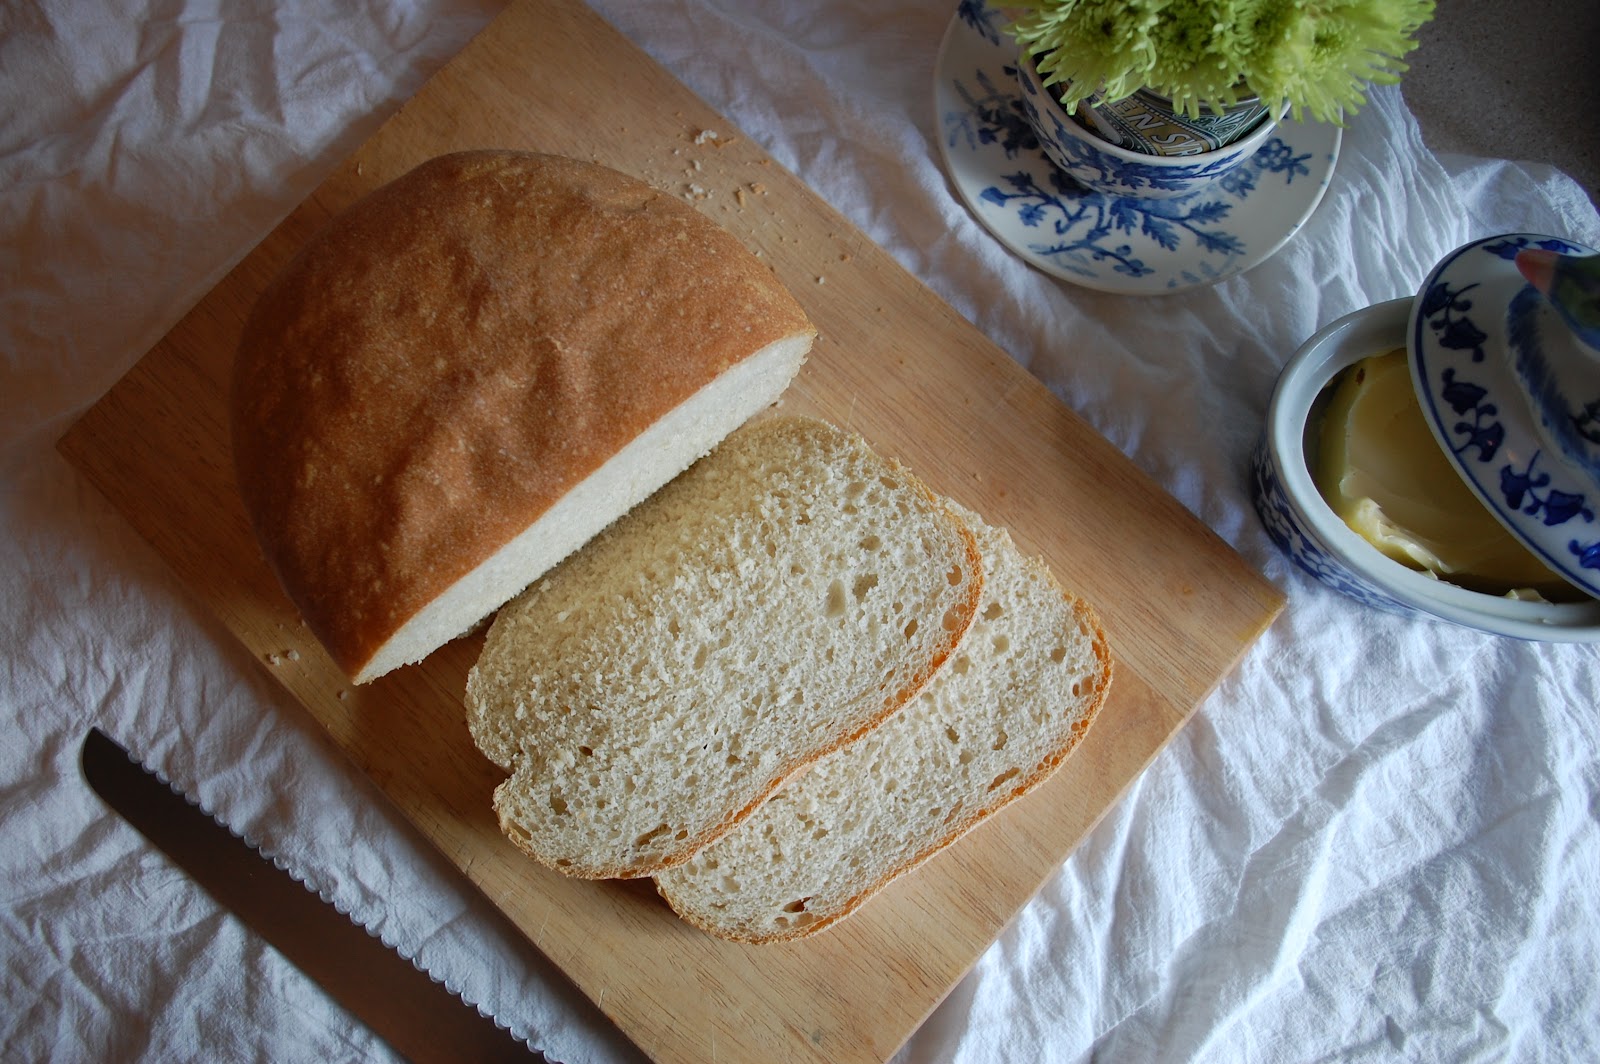
I think I could easily be persuaded to buy a house by the fact that it smells of freshly baked bread, isn’t it just one of the best smells EVEer? Aaand if it comes from your owwwn oven as a result of the work of your own fair hands, well, it’s pretty much the warmest glowiest feeling there is. Oh dear, I have a feeling that this post is going to quickly spiral into twee-upon-smug-dom, but hey, I am pretty much Mrs Twee and happen to think that there’s absolutely nothing wrong with feeling a bit smug now and again, why else do you think I ran around outside like a loony for 5 miles this morning, braving Scottish winds and fighter jets (not lying, they are looooud), befoooore breakfast? For the good of my health? Naaaaaah, smugsmugsmug. So let’s just go with it for now.


The next thing to say though is so smug sounding that you might hate me a teensy (huge) bit. That’s the problem with smugness; it makes your own insides feel all glowy and lovely but can really make other people’s insides feel the opposite. But anyway, here goes...in the last year and a half I’ve bought less than 5 loaves of bread, and that’s not through lack of eating. I live with a hungryhungry boy. Now I don’t tell you this as a bid to persuade you to immediately reassess your bread buying practices or to convince you to run out right now and buy a fancy loaf tin.


I know that I care a LOT more about what goes in my tummy than most normal people and making bread is something I love to do...but it is just a testament to how easy and non-time consuming it is. So what I’m saying is, you should do it, if only once, so that you can tick it off the list of ‘things to do before you die’ list; ‘make your own bread and eat it fresh from the oven’ is definitely up there. We all need days when we can pat ourselves on the back with rosy cheeks of self made glee and eat something delicious. It’s one of those things which delivers rewards infinitely greater than the sum of its parts. So go forth and knead, I’ll talk you through it. With Love and Cake.


P.S. I’m sorry that the ‘notes’ are leaning towards essay length, but I’ve made soooo many loaves in so many ovens on so many different days in all the seasons that I’ve accidentally learnt what little tweaks you can make to turn a homemade loaf good for toast into a ‘knock your socks off brill’ homemade loaf perfect for supersoft sarnies. Lots of little things make lots of difference, some of which you can control, some you can’t, so getting a handle on the things you can is worth a bit of reading.


White Bread 
A few notes:
  • If I want to feel like a healthy bean I leave the salt out, but its addition really is priceless when it comes to flavour. Also, fine textured salt is best because courser grains or flakes need dissolving in the yeasty water if they are to be properly incorporated and yeast and salt are not best buds. 
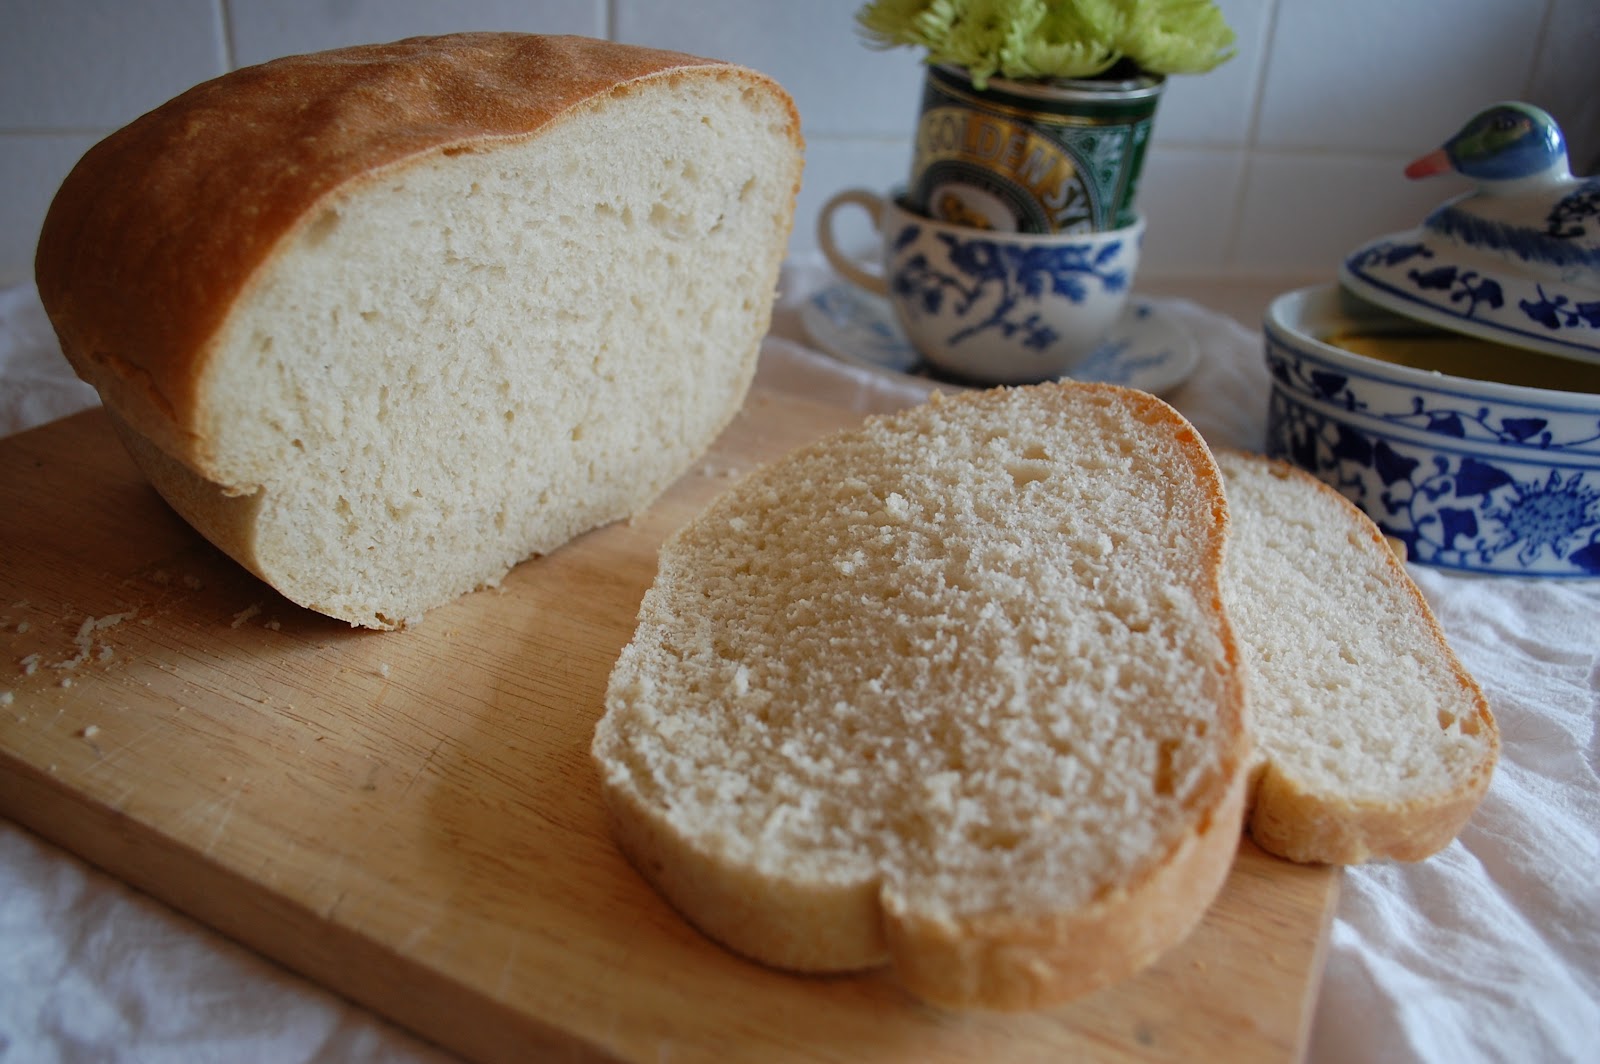
  •  If, by chance, you’re boiling up some potatoes any time soon, save the water and use it in this recipe. You can even put it in the freezer and defrost it when you’re in the bread making mood. The extra starch in the water keeps the bread softer and springier for longer...perfect for sandwiches. 
  • The temperature of the dough when it’s trying to rise is one of the things I’ve found makes the most difference. On a hot summer’s day all is hunky doory, but most days in Scotland the dough needs a little help. If you have a roasytoasty airing cupboard, brill, if not you’ll need to improvise. I like to turn my (electric) hob on for just half a minute or so, so it is juuust warm, never too hot to hold your hand against, and set the bowl on it for its rising time. I’ve also seen people put the oven on and set the bowl on a chair next to it, or you could get creative with your radiators. Either or...just make sure it’s a cosy temperate that you would enjoy. 
  • Unlike with cake baking, when baking bread there is leeway in terms of tins. I use a silicone loaf tin because it is what I have and works. But you could also use a metal loaf tin, greased and floured, or you could just leave it as a nice round on a lined baking sheet. If you do the latter, just before you pop it in the oven, give it a few slashes on top with as sharp a knife as poss to give it lots of room to grow. 
Makes one nice big loaf

You will need

A large-ish loaf tin or baking sheet, greased and lined 

500g strong white bread flour 
½ tsp fine salt 
2 tsps ‘Easy-Blend’ or ‘Active’ dried yeast 
300ml-ish of warm water 
Splosh flavourless oil (olive or veg or groundnut, whatever) 

  • First job...weigh out the flour into a big bowl and sprinkle over the salt. 
  • Next, add the yeast to the water and give it a mix around to let the yeast dissolve a little. 
  • Now pour around 2/3 of the yeasty water over the dough and with a spread out hand, start to churn it up and mix it in. Then keep adding the rest of the water, or even a little more if you need, until it all comes together and you have a ball of soft dough and a mostly clean bowl. It’s best to err on the ‘too sticky’ side, rather than the ‘too dry’ if you’re in doubt. 
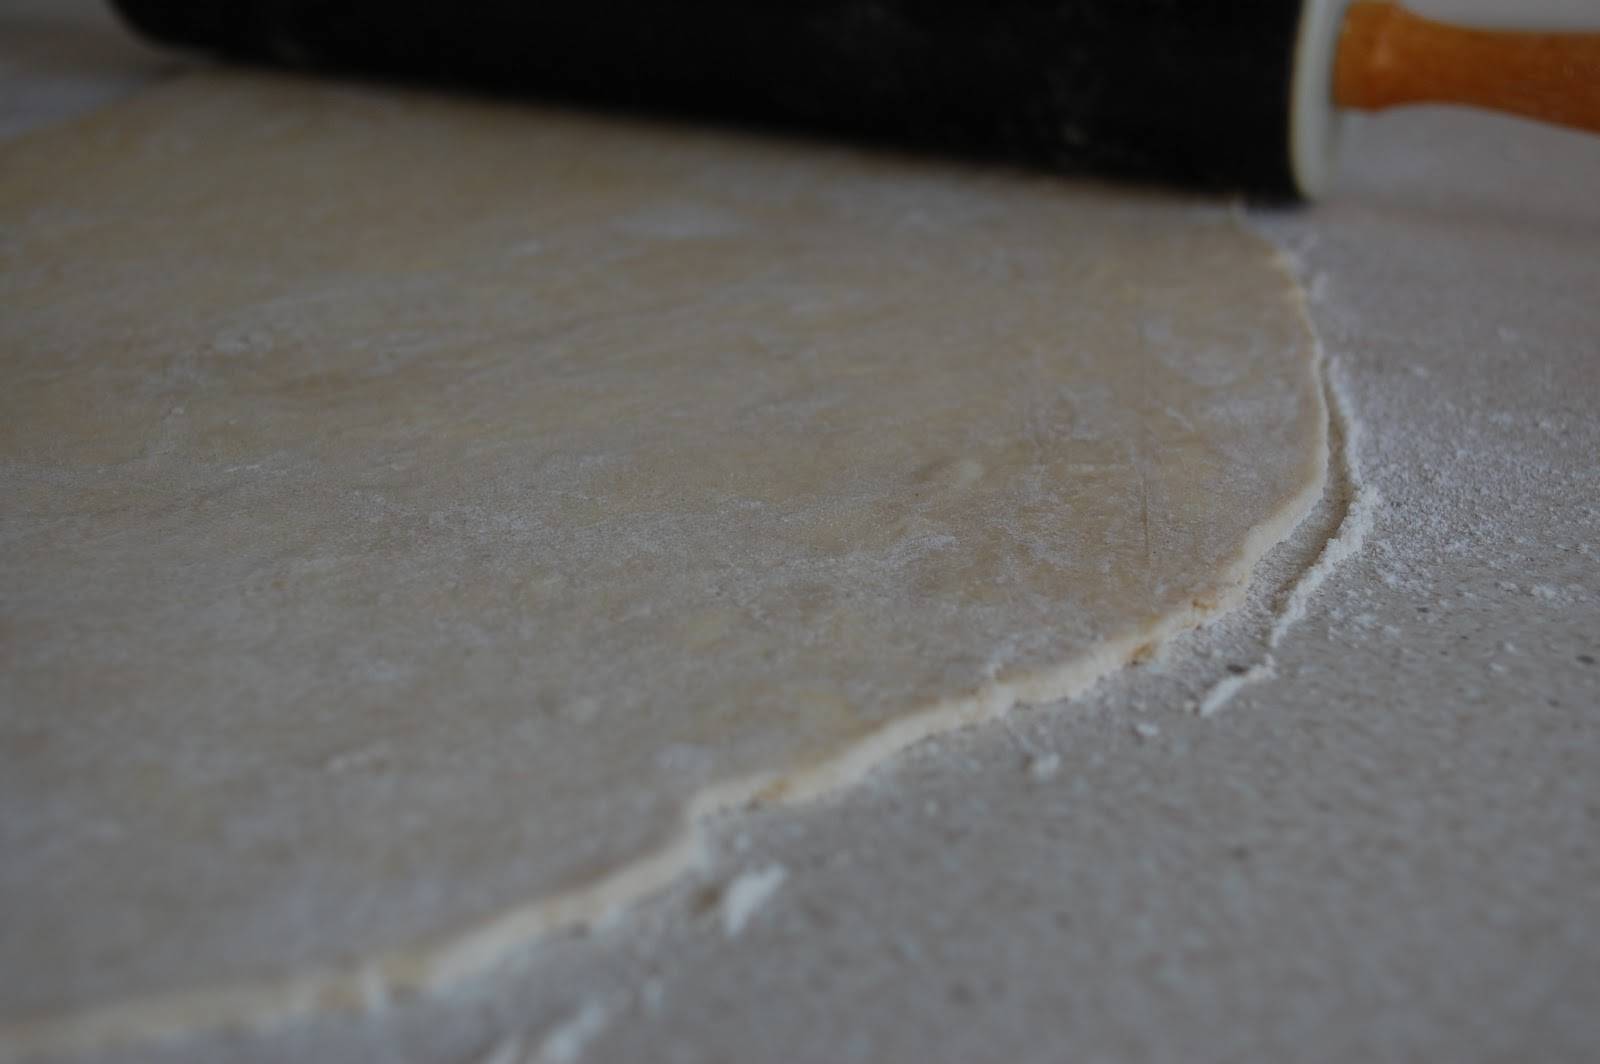
  • Put a fairly big blob of oil on a clean, dry surface and spread it out a bit with your hands. 
  • Turn the dough out on top of the oil and fold the dough around in it so it is covered all over. 
  • Knead for around 5 minutes; pushing and pulling it around and folding it on top of itself until it looks shiny and feels stretchy. Don’t worry if it sticks to the surface you are working on, it probably will a bit, just keep going and it will recollect any bits it leaves behind. 
  • Now time to pop your ball of shiny dough back into the bowl and cover with a tea towel or Clingfilm...or you could put a plastic bag over the top of the bowl like I do...or use a shower cap like the Hairy Bakers do. 
  • Leave it in a cosy place for 1 to 1.5 hours; until it looks big and airy. 
  • Meanwhile, time to prep your tin/baking tray. 
  • When risen and proud, scrape the dough out of the bowl with a big metal spoon, and flop it onto a floured surface. Fold it up a few times to knock the air out and the shape appropriately for your tin. 
  • Now gently pop the dough in your tin or onto your baking sheet and leave for about 1 more hour, until it puffs up and looks proud. Do NOT forget about it at this point, I have, and what happens is that it gets big enough to burst, and then does and then siiiiiiiiinks. Booooo. 
  • Preheat the oven to 220˚c. 
  • Now you’re ready to bake. Pop your lovely loaf in the middle of the oven and leave for around 20-25 mins, until nice and golden and crusty looking. 
  • Now remove the loaf from its tin and place, upside down on the oven shelves, or turn it upside down on the baking tray, so its squidgy bottom can become crispy and tanned. Leave for another 10 minutes. 
  • It’s ready when knocking it on its bottom, like knocking on a door, makes it sound nice and hollow.
  • Cool on a wire rack or tear up right away and eat with too much butter. 


Monday 5 March 2012

Forgotten Blueberry, White Chocolate and Coconut Flapjack.


Hello...sorry for kind of being a tad incommunicado, moved in and all, just having a little internet trouble. But heyho, instead of wallowing I'll just talk about cake instead. I always forget how much I like coconut. I don't forget that I like it at all; I don't leave the blue quality street until last (pink!), but I would never really choooooose them. But turns out, I am stoopid and need to start renumbering important things better. Important things like how tropical and sunshiney tasting coconut is. Oo and it's wonderful, waxy texture.  


Another vitally important piece of info to store is how sweet and almost toffee tasting blueberries become when baked into things. Maybe I'll have to get rid of all my knowledge of...say...Boyzone, that would leave a whole lot of room spare. But no, that's silly. I'll go with geography knowledge, how useful is knowing where Birmingham is!


Anyway. Of course I never forget my love of white chocolate, that fact is probably taking the place of some big chunk of knowledge like understanding the stock exchange, but isn't going anywhere fast. Something about a foot? So I remembered that white chocolate on top of flapjack would be a big thumbs up, but the inclusion of the other two was more guided by my need to empty the kitchen than any culinary decision. But my oh my, what a turn up for the books.


Like one of those chemistry experiments where you put a few inconspicuous looking liquids in a test tube and all hell, smoke and colour breaks loose. Moving and unpacking is alllllllmost done with, but there are still lots of things in lots of boxes, so we'll have to see if any other experiments turn good. Happy Monday. With Love and Cake.


Blueberry, White Chocolate and Coconut Flapjack

A few notes:
  • If you don't like coconut, and I know there are a few crazies out there that don't, just leave it out.
  • In fact, you could totally mix it up here, different fruit, different chocolate- go mad.
  • As with the Cherry Flapjack, I used part oats and part oatmeal, just for 'using up' purposes, but normal flapjack would just use oats for the total amount.
Makes an 18cm round
You will need

a 18cm round, loose bottomed tin, greased and lined

100g butter
100g soft brown sugar
3 tbsp golden syrup
110g oats
110g oatmeal
150g blueberries
100g white chocolate. chopped into chunks 
2 tbsp dessicated coconut

  • First as usual preheat your oven to 180°c.
  • Now gently heat you butter, sugar and syrup in a nice big pan, stirringstirring until the butter has melted and the sugar mostly dissolved.
  • Stir in the oats until really well combined then gently stir through your berries.
  • Tumble the mixture into your prepared tin and smooth and press the top of the oats down to fill every nook and cranny of your tin and to get a nice shiny surface.
  • Bake for around 30 minutes until bronzed all over.
  • As soon as the tin is out the oven, tumble the chopped chocolate over the top of the flapjack. What will happen is the heat from the oats will melt the chocolate and after a few minutes you will be able to spread it out all nice and smooth.
  • Then sprinkle over the coconut.
  • While still warm run a knife around the edge of the tin so you don't get your edges stuck and then leave it all to cool completely in the tin.
  • When cooled, turn out and slice and remember all the important things.