Sunday 30 June 2013

Chocolate and Peanut Butter Lollys.


So here we are, turns out I'm not a total div and can actually work lolly makers...yes I KNOW they're made for kids and 5 year olds can do it....I worked it out in the end OK.


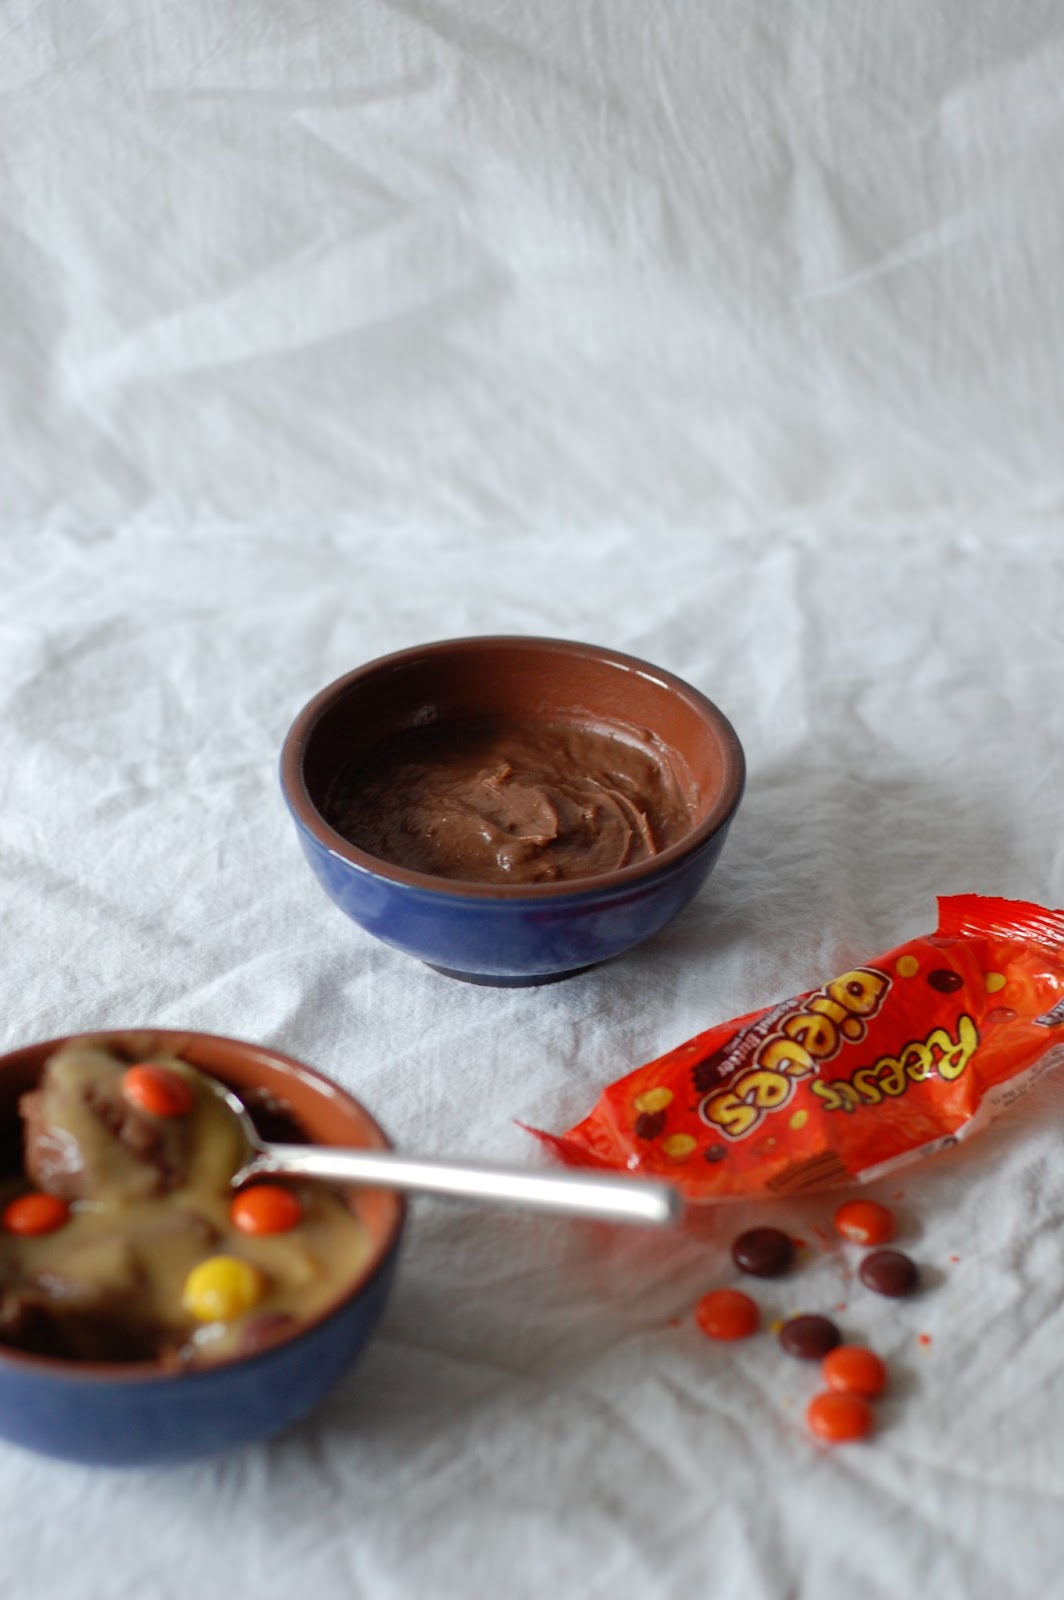
You see I thought that maybe if I let them sit too long in boiling water that I'd be left with Chocolate and Peanut Butter puddles, so i didn't soak them long enough. Turns out no, it's fine, the boiling water trick works perfectly, especially because even when these chaps do melt, there's no puddleyness, they just kind of soften while holding their shape.


So I suggest you go and make these now, eeeeeven if it's not sunny. Actually I think 'especially' if it's not sunny, because you don't want to be kitchen bound and freezer waiting on those days, you want to be one of those cool folks that just causally offers homemade lollys, all prepared and smug like. Well that's my version of cool anyway...NO I'm NOT listening to The Backstreet Boys right now...I don't even know why you ask. Ahem, back to being cool.


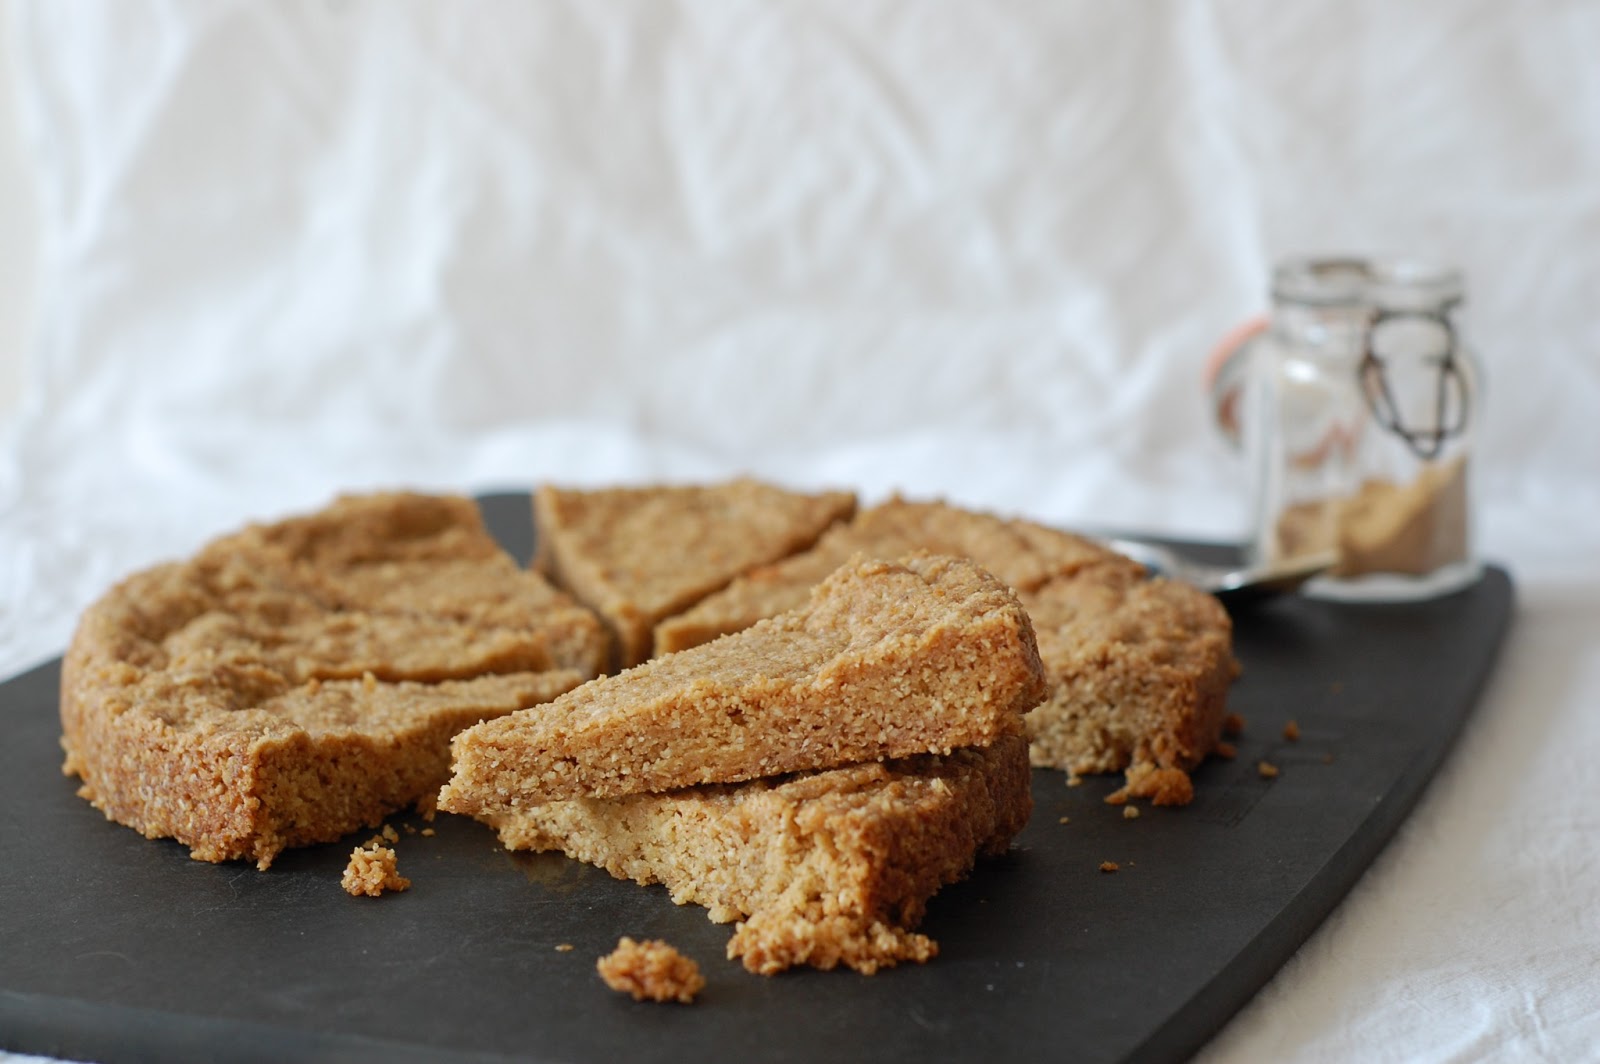
Sorry about the whole 'two posts in a row that require specialist equipment' thing. In my defense, I have already demonstrated that you can make these without freezing them in lolly makers...in fact you could freeze them in ramekins and eat them with a spoon...but also, lolly makers are a super bargain and you probably should buy some anyway, you know, for the smug thing. With Love and Cake.


Chocolate and Peanut Butter Lollys.

So it's simple really, just head on over to this recipe, make as described and instead of pouring the mixture into ramekins, divide between your lolly maker and get in the freezer for a day of so.

To remove them from your lolly maker, which is where I struggled, stand them in a bowl of freshly boiled water. Honestly don't worry about them melting, you can leave them in for a good few minutes or so. Then pull them gently out. Voila. 

Wednesday 26 June 2013

Sour Cream Pound Cake.


This is my 'OMG Wimbledon is here, it must be officially summer, let's get excited' cake. This cake, strawbs and a bottle of elderflower bubbly was combined with a whole afternoon of tennis joy in celebration of the Monday kick-off. I LOVE it...the whole thing. 


However I know there are numerous mentalists out there who realllllllly are not bat and ball fans so I shall shhh for the time being and go back to the cake talk. So yes, cake. DO you know, I've never actually made a bundt cake before...ever. I'll let wikipepants explain properly but it is a pretty standard American shape of cake tin, filled with a cake dense and sturdy enough to hold it's holey shape when turned out.


Now, usually in my little corner of this blog world I try and keep the recipes ultra accessible and only really needing equipment that even the most basicest of bakers will have or that I suggest you aspire to having. So I'm sorry about this one. Not that I consider a bundt pan in ANY way a gimmicky piece of cookware...I mean, it's no Flexiado...but if you were in the market for a start up set of cake pans, I wouldn't include a bundt pan in the list.


However, I also must assume that people that read my ramblings must care about baking...it's not the genius prose that draws them in let's be honest, and I am excited about bundt pans and therefore think that some peeps out there might be too. They make a super simple and plain cake look fancy enough for Wimbledon and as long as you have a suitable recipe are not at ALL scary to use. So here cake lovers, have a suitable recipe. With Love and Cake.


Sour Cream Pound Cake.
Adapted from a recipe from The Kitchn

A few notes:
  • To make sure you don't have any disasters, first brush the inside of your cake tin with melted butter, then throw some flour in there and roll it around so that the layer of butter is coated in a layer of flour. This seemed to work fine for me, and it's a sturdy cake, so don't fret.


Makes 1 laaaaarge cake
You will need 

1 x 10" bundt or angel food cake pan, greased and floured (see notes)

385g plain flour
1/4 tsp bicarbonate of soda
pinch salt
225g butter, at room temperature
450g caster sugar
6 eggs
2 tsp vanilla extract
240ml sour cream

  • Preheat your oven to 160°c.
  • Weigh out the flour, bicarb and salt together and a bowl and set aside.
  • In a large mixing bowl, cream together the butter and sugar as best you can, though don't worry if it stays quite granular, there is a fair amount of sugar here.
  • Beat in the eggs one at a time, followed by the vanilla extract.
  • Add the sour cream and then sift over the dry ingredients you weighed out.
  • Using a metal spoon fold everything together gently until it is well combined.
  • Pour the mixture into your cake tin and give it a tap on the kitchen surface to allow any air bubbles to rise to the surface and escape.
  • Bake in the centre of your oven for 1 hour, checking whether it's cooked by inserting a skewer or knife....if it comes out clean, you're done, if there's a bit of uncooked mixture on it, give it another 5 minutes.
  • Let the cake cool in the tin for 10 minutes before turning it out.
  • Leave to cool completely on a wire wrack before slicing and getting the strawbs and Pimms involved.

Sunday 23 June 2013

Chocolate and Peanut Butter Cups.


This was one of those things that I didn't see coming. I had not planned on making anything like peanut butter cups...though now I come to think of it this seems to be a foolish stance. What was happening you see was that I was getting full on into this summer malarkey and making lollys in my lolly maker.


The thing is, I haven't actually done that for several millions of years because the Scottish summer has not exactly warranted such cool aids. This year I'm excited though, I feel like the North East of Fife is aaaaalmost winning at the weather (South East England is in a different league so I'm not competing with them).


 So yes, I filled my lolly maker with the delicious mix you see before you but then forgot how to get the lollys out when they are frozen. HOW do you DO THIS? I did the whole dunking in warm water thing, the waitingwaiting until it softens and releases but in the end I just pulled out the middle stick thing so I'm left with frozen chocolate goo that I'm going to have to eat out of the lolly maker with a spoon (throw it away you say? What? I don't understand you?).


Happily I made waaaay too much mixture and am clever enough to realise that it would make a yummy little dessert not frozen...similar to what those American folks would call pudding or Italians call budino di cioccolato, so I wasn't stuck for a dessert. Phew. Now help me....how to I get them out...I can't have a lolly-less summer. With Love and Cake.


Peanut Butter and Chocolate Cups
Adapted recipe from Craft, Bake, Sew, Create.

A few notes:
  • You can top these with whatever you like really. Pictured is a topping of salted caramel sauce and Reese's Pieces...pretty darn good, but a spot of whipped cream would be nice and 80s American diner style should you be feeling that way inclined.
Serves 4
You will need

75g granulated sugar
15g cocoa
1 1/2 tbsp corn flour
300ml milk
1 tsp vanilla
35g butter
1 heaped dessert spoon smooth peanut butter

  • Whisk together the sugar, cocoa and cornflour in a medium saucepan.
  • Gradually whisk in the milk and set over a medium heat.
  • Bring to the boil and let bubble for about 1 minute, whisking fairly continuously.
  • Remove from the heat and whisk in the vanilla, butter and peanut butter; at this point you should have a thick, shiny mixture.
  • Pour into 4 ramekins and top each one with clingfilm, allowing it to touch the surface of the mixture all over.
  • Allow to cool completely before chilling in the fridge and topping with something yummy.

Wednesday 19 June 2013

Lemon, Olive Oil and Poppy Seed Muffins.


I LOVE olive oil a lot. It is one of the many reasons I am 100% sure that something went majorly wrong with the whole being born in England thing. The other major one being my love of the sun and being hothot, as in the sweat drippy kind. Yep the Med calls to me and my misplaced genes really very loudly....especially in February.


So to make up for my very British and sub 20°c existence, I immerse myself (not literally...unless I'm on some particularly extreme beauty kick) in the green grassy liquor. I love it so much that I would not be disappointed if my last meal were a bottle of the good stuff, some fresh bread, proper tomatoey tomatoes and salt and pepper....ow and cheese, got to have cheese.


It's really just a happy coincidence that it's all good for you and whatnot...it's one of those good fats that I think of as giving my insides a wash. Useful, given that those unhealthy buttery fats would be included in most other versions of my last meal.


You can replace butter with a healthier fat consistently in baking, but that's not what's going on here. Here the olive oil and fresh lemonyness is the point...for deliciousness, not anything else. If you were a real connoisseur you could seek out a particularly lemony olive oil, because they do vary greatly in flavour notes and all that jazz, though I used a cheap, not overly flavourful extra virgin here because it's what I had (read: I am not a connoisseur). I hope you make them so you can accompany on my imaginary trips to the sparkling sea-ed home land. 

What would your last meal be? 


Lemon, Olive Oil and Poppy Seed Muffins.

A few notes:
  • The secret to good muffins is speed; have everything ready so that as soon as the mixture is ready...bosh, in the oven.
  • If you want to get fancy, you know, like me, you can make your own muffin cases out of greaseproof paper. It's simple, cut 15cm-ish squares, fold in half, fold in half again, then make a final fold by bringing the two folded sides together making a point with the centre of the square. Open in out and squodge into your muffin tray. If that makes no sense at all maybe have a look at how these overly cute kids do it.
  • I LOVE olive oil and so was happy to use extra virgin to get as much flavour as poss, but if you're less of a fan, do feel free to substitute virgin which will be a less distinct taste.
Makes 12
You will need

a 12 hole muffin tray, lined with cupcake cases

200g plain flour
2 tsp baking powder
1/2 tsp bicarbonate of soda
150g caster sugar
pinch salt
1 tbsp poppy seeds
juice and zest 1 lemon 
about 120ml milk
1 egg
60g olive oil (see note)

For the syrup
2 tbsp lemon juice
2 tbsp caster sugar
  • Preheat that old oven of yours to 200°c.
  • In a large mixing bowl combine the flour, baking powder, bicarb, caster sugar, salt, poppy seeds and lemon zest.
  • Pour the lemon juice into a mixing jug, then pour in milk until the combined mixture reaches the 200ml mark....it will look disgustingly curdled but that's ok.
  • Whisk in the egg and olive oil followed by the dry ingredients and mix until just combined.
  • Divide the mix equally between your cupcake cases and get in the oven asap.
  • Bake for 20-25 minutes, or until gold and firm.
  • Meanwhile make the syrup by gently heating the lemon juice and sugar in a small saucepan until the sugar has dissolved, then let it bubble for a minute or 2 before removing from the heat.
  • When the muffins are baked, let them cool for a few minutes in the tin before moving to a wire rack.
  • Poke the muffins all over with a skewer or piece of uncooked spaghetti to make little holes for the syrup to soak down into.
  • Pour spoonfuls of syrup over the muffins and let it soak it while the muffins cool.
  • Breakfast sorted.


Sunday 16 June 2013

Peanut Butter Cinnamon Swirls.


I don't really have anything much to say today, apart from OH MY GOOD GRACIOUS ME DROP EVERYTHING (unless maybe you're holding a baby or something) AND MAKE THESE IMMMMEDIATELY. 


Unless you're a peanut butter hater, in which case, I think you've taken a wrong turn somewhere, there is NOTHING to not LOVE about these swirly chaps. It might sound a bit weird having PB IN your bread, but oh no, weird is so far wrong.


But maybe you've never made anything bready or yeasty before and you're thinking, 'hang on now, this all looks a bit too extreme for me'. Well it's a good job I'm here to tell you...WRONG, you're WRONG. They're easy as long as you follow along, step by step, and you don't really need anything (HA, geddit, KNEAD joke), no loaf pans or extract of parrot or whatever some actual hard and extreme recipes require.


So pleaseplease make these, if only so that you can actually see how incredibly off the charts yumsters they are in real life and you'll realise that I'm really not a raving loony, they are just that good. Please. With Love and Cake.


Peanut Butter Cinnamon Whirls.

A few notes:
Makes about 10
You will need

2 tsp dried, fast acting, yeast
200ml milk, luke warm
350g strong white bread flour
2 tbsp caster sugar
pinch salt
1 egg, lightly whisked
1 tbsp smooth peanut butter

For the filling
2 tsp cinnamon
2 tbsp caster sugar
2 tbsp smooth peanut butter

For the icing
1 tbsp cream cheese
1 tbsp smooth peanut butter
150g icing sugar
2 tbsp milk


  • Firstly, mix together the yeast and the milk and let them get acquainted for 5 minutes or so.
  • In a large mixing bowl combine the flour, sugar and salt and make a well in the centre.
  • Add the egg and peanut butter to the well, followed for about 3/4 of the milk/yeast mix.
  • Time to get your hands in there and bring everything together to a soft dough, adding more of the milk if you need.
  • Turn out onto an oiled surface and knead for 5 minutes, or until the dough is shiny and springy.
  • Pop the dough back in his bowl and leave somewhere cosy for an hour or until just about doubled in size.
  • Meanwhile make the filling by mixing the cinnamon and sugar together.
  • Turn the dough out onto a clean floured surface and roll or press out to a rectangle of about 40 x 25 cm.
  • Spread peanut butter over the rectangle and roll up from one of the long ends, like a Swiss roll.
  • Cut, with a nice sharp bread knife, every 2.5 cm and lay each bun, swirl side up/down onto the baking tray with a couple of cm gap between each one.
  • Now leave them to rise back in the cosy place for another 30-45 minutes while you preheat the oven to 200°c.
  • When the buns have puffed up a bit, pop them in the oven for 15 minutes, until they look golden and beautiful.
  • Allow to cool completely while you make the icing.
  • Beat together the cream cheese and peanut butter until well combined and smooth.
  • Add the icing sugar and beat gently so that when everything's well mixed, you have a fairly loose and oh so delicious paste.
  • Slather over your buns and thank me after devouring. 

Wednesday 12 June 2013

Grasmere Ginger Shortbreads.


So Grasmere, for those that don't know...because that little map thingy that tells me where people are reading this blog from tells me that there's people from quiiiite far away stopping by sometimes...is a very lovely village in the very lovely Lake District of England...a, you know, district of lakes (and mountains).


As well as Wordsworth, the Lakes can lay claim, if somewhat controversially, to Sticky Toffee Pudding and, very un-controversially, Kendal Mint Cake. It's one of those places where each little nook has it's own strong sense of identity......and confectionery.


This Grasmere based chap though, hasn't quite reached the dizzy heights of fame as it's sticky pudding neighbour and it's kind of hard to work to out what it's actually supposed to be. I think, really, it's supposed to just be bought from the very old Grasmere Gingerbread Shop and not questioned any further, but unfortunately that's quite far away from North Fife...so I had to have a bash at creating it for my greedy self. Fingers crossed no one is overly offended.


And if they are, they can blame it on Delia because it is her guidance I followed, despite the fact that her recipe refers to it as a shortbread, which I imagine may be a bit cheeky....not sure if the Cumbrians or the Scots would really enjoy that. So anyway...Delia's version is like a cross between shortbread and flapjack and is very crumbly and buttery. There are other recipes around which I imagine would make for a more chewy and substantial biscuit. Please correct me if I'm talking nonsense...but either way these are very yummy...and go mightily well next to a mug of coffee. With Love and Cake.


Grasmere Ginger Shortbreads.
Adapted from a Delia recipe found in Delia's Cakes

A few notes:
  • So I am lazy and got my food processor out for this one. If you don't have one, Delia says you should coarsely grate the butter into the dry ingredients and then get your hands in there to run it all together so you get a sandy mixture before putting in your tin.


Makes 8-10 wedges
You will need

1 x 20cm loose based round cake tin, greased and base lined

110g plain flour
110g fine oatmeal
110g soft brown sugar
1 heaped tsp ground ginger
1/4 tsp baking powder
150g butter, chilled

  • Preheat your oven to 180°c.
  • Pop the dry ingredients into your food possessor (see note if you don't have one) and pulse to combine.
  • Cut the butter into small cubes and whizz into the dry ingredients until you have a consistent sandy texture.
  • Tumble the mixture into your cake tin and press it down lightly with your fingers or a spatula.
  • Bake for 35-45 minutes until deep gold all over.
  • Leave to cool in the tin for 5 minutes before gently removing the sides of the cake tin.
  • Leave to cool completely on the base of the cake tin before turning out and cutting into wedges.


Sunday 9 June 2013

London Cheesecake


Is cheesecake a summery thing? It definitely feels like it. Not that I don't love a crazy rich, super indulgent cheesecake in January, but there's something about a plain white cheesecake, all sharp and creamy, that seems to sit well with summer.


The oooonly thing about this one was, I made it to take to a barbecue. A barbecue on the beach which a friend and I had planned while we were sat in the garden in superdooper hot afternoon sun the day before.
It was going to be soooo hot we would probably swim in the (North) sea.


Turns out though, we chose the worst day of the week to do the actual bbq. It didn't help that I didn't change my weather checking info from Somerset to Scotland after I tool a little trip there last week, 20° it told me....WINNNN. In actual Scotland though, it was prrrrettty chilly and my bikini remained firmly in my bag. Good job the sun came out in force the next day, you know, when no bbq was on the horizon.


But while a steaming hot sponge pudding and custard may have felt more appropriate, the cheesecake did go down a storm, and added to the illusion that we didn't in fact have freezing toes in St Andrews, Fife, but were on some balmy coast of, I don't know, the Riviera. Ahhh next time. With Love and Cake. 


London Cheesecake.
A recipe from Nigella's How to be a Domestic Godess

A few notes:
  •  As with most cheesecakes, I have specified the use of a springform tin, you know, one of those ones that you clip open. This is just so you don't have to drag the sides of a normal loose bottomed tin down the sides of your cheesecake which will probably muss it all up a bit. However, if it's only a loose bottomed one that you have, don't be put off, it will cook just as yummily.
  • You could of course dress this up to the nines, it would look fabby covered in a tumble of summery berries and a good sprinkling of icing sugar.
Serves 8-10
You will need

1 x 20cm springform tin
foil
a roasting tray, large enough to hold the cake tin

For the base
150g digestive biscuits
75g butter, melted

For the filling
600g cream cheese
150g caster sugar
3 eggs
3 egg yolks
1 1/2 tbsp vanilla extract
1 1/2 tbsp lemon juice

For the topping
145ml sour cream
1 tbsp caster sugar
1/2 tsp vanilla extract

  • First we make the base by processing the biscuits in a food processor until they look nice and sandy (or you can put them in a double layer of plastic bags and bash them with a rolling pin, then transfer to a bowl).
  • Add the butter and pulse (or stir) in.
  • Press the mixture into the bottom of your cake tin to create a firm, even layer and transfer to the fridge to set.
  • Preheat the oven to 180°c.
  • Now to make the filling. Beat the cream cheese lightly so it becomes smooth, then beat in the sugar.
  • Next beat in the eggs and egg yolks, followed by the vanilla and lemon juice.
  • Fill the kettle and turn it on to boil.
  • Now we have to wrap the base of the cake tin in foil to stop any water leaking in as we bake, so sit the tin in the middle of a big piece of foil and scrunch it up the sides of the tin.
  • Do this a second time, so you're double layered.
  • Put the cake tin into the roasting tray and pour the cream cheese mixture over the biscuit base.
  • Pour water from the recently boiled kettle into the roasting tray, so it comes about half way up the side of the cake tin.
  • Carefully transfer everything to the oven and bake for 45 minutes, or until the cake is set but maintains a bit of healthy wobble.
  • Whisk together the topping ingredients.
  • Pour the topping over the cake and spread out evenly.
  • Bake the cake for a further 10 minutes.
  • Take everything out of the oven, remove the cake tin from the roasting tin, take off the foil and carefully remove the edges of the tin.
  • Leave to cool completely before chilling in the fridge. 


Tuesday 4 June 2013

Spiced Coffee Loaf.


This is the PERFECT cake for a Sunday when you have a million things you want to get done; most of them fun, but including the time consuming task of painting your living room, lots of washing and a run because it's too sunny not to....and you want to not have to get up at 5am.


I wouldn't usually factor baking in on a day like that but I needed a cake for a coffee morning (yes, I woke up one day and I had turned 65) the next day, so I scoured my book shelf for a super speedy low maintenance sort of recipe.


This one turned out to be just the thing, and I made it even easier by chucking everything in my wondrous Magimix and letting that do all the work. It honestly came together in moments...and I'd so much rather make a super easy, unfancypants cake than not make a cake at all.


 It's also a cake rather well suited to the whole coffee morning thing...not a dessert thing that feels wrong at 11 in the morning, not too flavour packed to sit next to coffee and nice and sturdily easy to transport. SO I'd thoroughly recommend it for a busy day that still requires cake, and I'd definitely recommend coffee mornings...coffee, cake and conversation? Winner. With Love and Cake.


Cinnamon Coffee Loaf.
Adpted from a recipe in The Hamlyn All Colour Teatime Favourites

A few notes:
  • You could add a whole manner of scrummy things to this...dried fruit, chopped walnuts, different spices. 
  • I didn't try it this time round but I'm sure this would be lovely a few days old, toasted, so the butter goes alllllll melty. Yum.
  • I'm afraid I whizzed everything up in my food processor to make it extra easy, however, if you don't have one, run the butter into the flour with your finger tips, and stir in the rest of the ingredients with a wooden spoon....still pretty easy.
Makes 1 loaf
You will need

a medium loaf pan (1 lb), greased and lined

225g self-raising flour
100g butter
100g dark muscovado sugar
3 tbsp strong black coffee
2 eggs
1 tsp ground cinnamon
grated zest 1 lemon

  • Preheat your oven to 180°.
  • Put the flour and butter in your food processor and whizz until the mixture has the look of fine breadcrumbs.
  • Add the rest of the ingredients and whizz to combine.
  • Pour the mixture into your prepared loaf tin and bake for about 1 hour, though check after 45 minutes to see how it's getting on....you want it risen and firm and deep bronze.
  • Remove from the tin as soon as it's cool enough to handle and cool on a wire rack.....or slice and spread with too much butter.