Showing posts with label Peanut Butter. Show all posts

Wednesday, 25 September 2013

Peanut Butter Cup Pancakes.


PEANUT BUTTER CUP PANCAKES. Mmmmmhummmm. That's right. And not Reese's Cups IN pancakes...actual peanut butter cup pancakes. Like...a layer of chocolate pancake and a layer of peanut butter pancake IN ONE PANCAKE. I'm quite excited about this discovery...can you tell?


I can't really claim it as my very own discovery...like Christopher Columbus, someone had been there before me. But also like Christopher Columbus, I'm going to pretend like I've discovered the best thing ever and I should get allll the credit. 


I think these would make really great dessert pancakes with ice cream and chocolate sauce...otherwise make sure you've got a realllllly busy day of running around ahead of you so as to feel justified in sprinkling chopped up actual Reese's Cups on the pancakes.....


Or maybe you had a really busy day yesterday and you need a reward today, or perhaps you've got a hardcore day tomorrow and you need sustenance in preparation, or maybe it's your birthday, or your friends birthday....whatever, just make sure you make these, chuck chocolate at them and have a bloomin' good time. With Love and Cake.


Peanut Butter Pancakes
A few notes:
  • This is just my recipe for peanut butter pancakes split in half and cocoa added to one half. You could add cocoa to the whole thing and just have chocolate peanut butter pancakes without the layering and save a bowl.
  • I served mine with butter and the chopped Reese's Cups but I can imagine they would be scrumptious with Nutella or even chocolate sauce and ice cream.

Makes about 10, depending on how big you want them
You will need

A non-stick frying pan

250g self-raising Flour
2 tbsp sugar
1 tsp baking powder
1 cup milk
1 egg
2 heaped tbsp peanut butter
2 tbsp cocoa

  • Get your pan on a medium heat.
  • Pop the flour, sugar and baking powder into a bowl and give everything a stir.
  • Now whisk in the milk and egg, followed by the p. butter. You'll have quite a thick, stiff batter.
  • Now add half the batter to another bowl and stir the cocoa into one of the halves...adding a little milk if it gets too stiff to manage.
  • If you want a little help with non-stickness, grease your pan with a bit of butter.
  • Now spoon heaped tablespoons of the chocolate batter into the pan and on top of each add about the same amount of peanut butter batter.
  • Cook for a few minutes and when bubbles start to show on the up-facing surface, give the pancake a flip and cook for another few mins.
  • Keep in a warm oven while you get on with the rest.

Sunday, 4 August 2013

Peanut Butter and Pretzel Squares.


You know in my last post I was all 'really must remember to chill the things that need to firm up before photo-ing'? Well I was...and this time I did...look how nice and set they are...


What I diiiiidn't do however was leave them to set before sampling them. You see I made them because I was all gross and headachey. Do you ever get it when your limbs feel all empty and heavy, like basically you're bod is an empty suit of armour. Well that...and these just seemed like THE thing for max calories and goodness to fill up all the gaps.


My lack of a proper body when making these should show you how easypants they are...less easy though was to make them for an emergency and let them do the chilling thing....so yeaah, I ate some, all gooey, with a spoon and had to straighten out the edges when they were actually ready for their close up.


They worked though and I'm back to being full on sparky-pants again...maybs I should let the British Medical Association in on the secret...they could give them out on prescription. With Love and Cake.


Salty Peanut Butter and Chocolate Bars.
Adapted from a Cookies and Cups recipe

A few notes:
  • Without pretzels...these are basically these, so check them out if you're not a pretzel person.
  • I think these would be a tad more annoying to make without a food processor but definitely not impossible...use an electric whisk or mixer or just a good old wooden spoon to do the beating.
  • You could make this in any receptacle really...I used a square tin, about 20 x 20 cm, but round would work too, then you could cut wedges rather than squares.
Serves 1 empty person plus a few others
You will need

300g smooth peanut butter
100g unsalted butter, at room temperature
225g icing sugar
50g pretzels, crushed up a bit, plus extra for the top
100g dark chocolate, broken into pieces

  • Line your receptacle (see notes) with foil.
  • Pop the peanut butter, minus 50g which you want to save for later, and butter in the food processor and whizz to combine.
  • Add the icing sugar and whizz to a sandy mixture.
  • The mixture into a big bowl and stir in the broken up pretzels.
  • Press into your foil lined tin.
  • Melt together the chocolate and remaining 50g of peanut butter, either in a saucepan over a low heat or in the microwave, until smooth and shiny.
  • Pour over the peanut butter layer and scatter over a few whole pretzels.
  • Chill until the chocolate is set before turning out and cutting as you fancy.


Sunday, 30 June 2013

Chocolate and Peanut Butter Lollys.


So here we are, turns out I'm not a total div and can actually work lolly makers...yes I KNOW they're made for kids and 5 year olds can do it....I worked it out in the end OK.


You see I thought that maybe if I let them sit too long in boiling water that I'd be left with Chocolate and Peanut Butter puddles, so i didn't soak them long enough. Turns out no, it's fine, the boiling water trick works perfectly, especially because even when these chaps do melt, there's no puddleyness, they just kind of soften while holding their shape.


So I suggest you go and make these now, eeeeeven if it's not sunny. Actually I think 'especially' if it's not sunny, because you don't want to be kitchen bound and freezer waiting on those days, you want to be one of those cool folks that just causally offers homemade lollys, all prepared and smug like. Well that's my version of cool anyway...NO I'm NOT listening to The Backstreet Boys right now...I don't even know why you ask. Ahem, back to being cool.


Sorry about the whole 'two posts in a row that require specialist equipment' thing. In my defense, I have already demonstrated that you can make these without freezing them in lolly makers...in fact you could freeze them in ramekins and eat them with a spoon...but also, lolly makers are a super bargain and you probably should buy some anyway, you know, for the smug thing. With Love and Cake.


Chocolate and Peanut Butter Lollys.

So it's simple really, just head on over to this recipe, make as described and instead of pouring the mixture into ramekins, divide between your lolly maker and get in the freezer for a day of so.

To remove them from your lolly maker, which is where I struggled, stand them in a bowl of freshly boiled water. Honestly don't worry about them melting, you can leave them in for a good few minutes or so. Then pull them gently out. Voila. 

Sunday, 23 June 2013

Chocolate and Peanut Butter Cups.


This was one of those things that I didn't see coming. I had not planned on making anything like peanut butter cups...though now I come to think of it this seems to be a foolish stance. What was happening you see was that I was getting full on into this summer malarkey and making lollys in my lolly maker.


The thing is, I haven't actually done that for several millions of years because the Scottish summer has not exactly warranted such cool aids. This year I'm excited though, I feel like the North East of Fife is aaaaalmost winning at the weather (South East England is in a different league so I'm not competing with them).


 So yes, I filled my lolly maker with the delicious mix you see before you but then forgot how to get the lollys out when they are frozen. HOW do you DO THIS? I did the whole dunking in warm water thing, the waitingwaiting until it softens and releases but in the end I just pulled out the middle stick thing so I'm left with frozen chocolate goo that I'm going to have to eat out of the lolly maker with a spoon (throw it away you say? What? I don't understand you?).


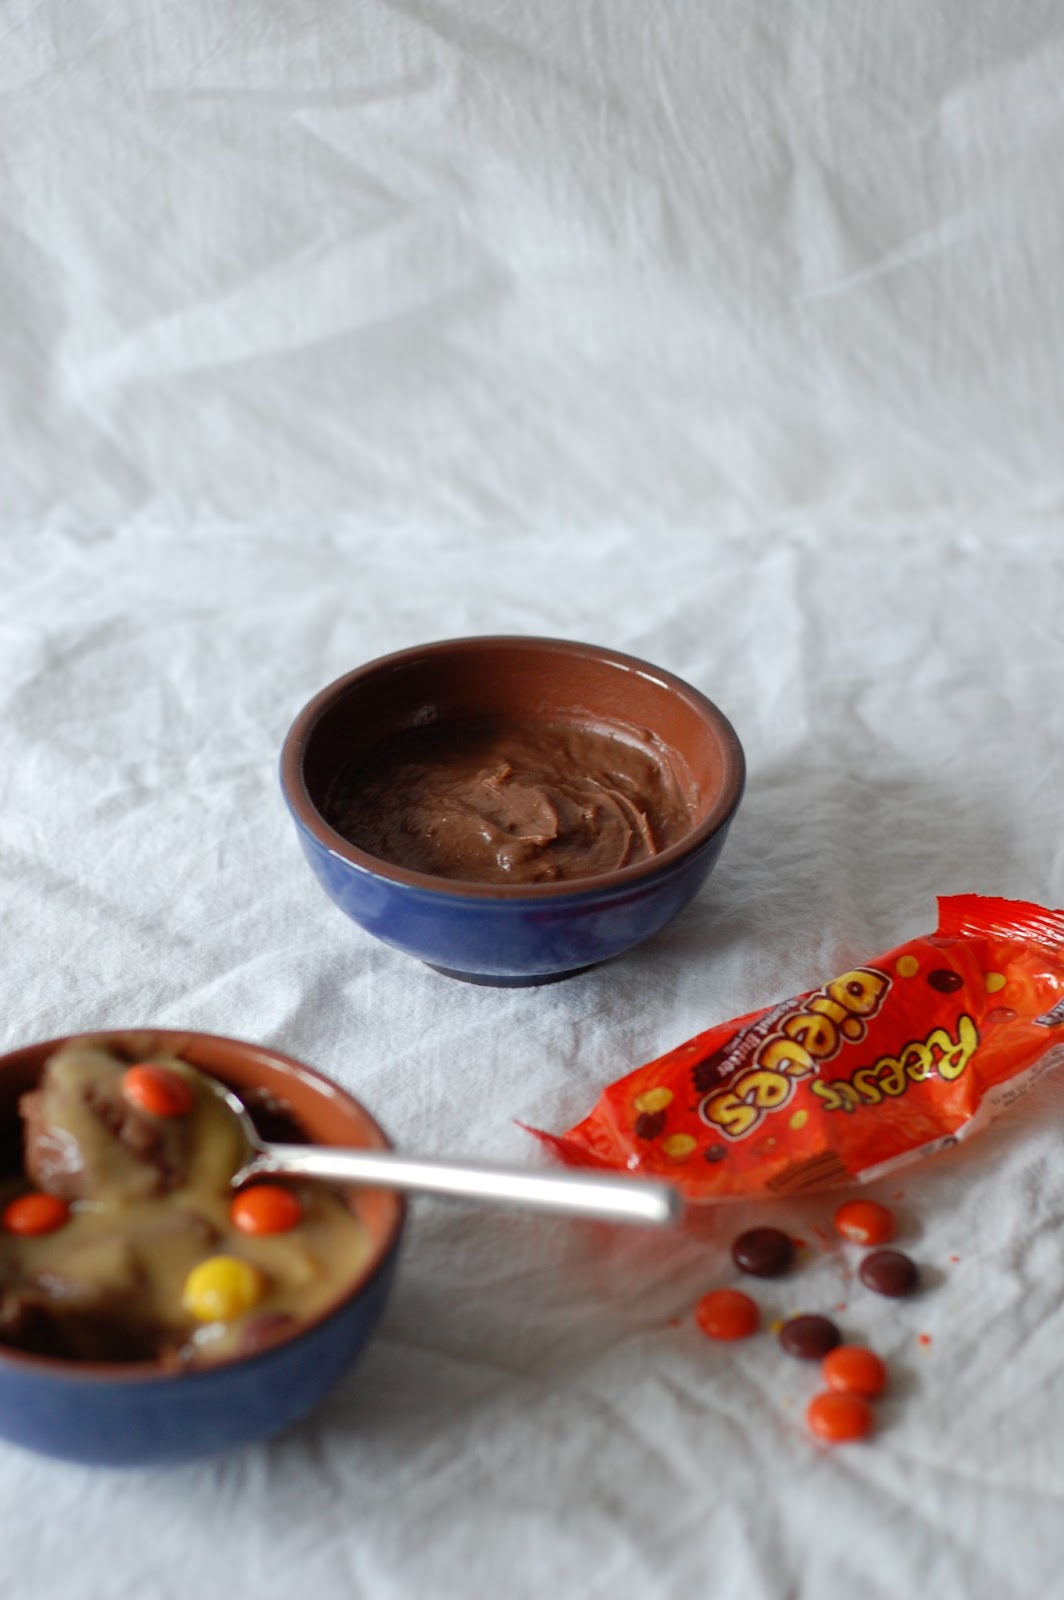
Happily I made waaaay too much mixture and am clever enough to realise that it would make a yummy little dessert not frozen...similar to what those American folks would call pudding or Italians call budino di cioccolato, so I wasn't stuck for a dessert. Phew. Now help me....how to I get them out...I can't have a lolly-less summer. With Love and Cake.


Peanut Butter and Chocolate Cups
Adapted recipe from Craft, Bake, Sew, Create.

A few notes:
  • You can top these with whatever you like really. Pictured is a topping of salted caramel sauce and Reese's Pieces...pretty darn good, but a spot of whipped cream would be nice and 80s American diner style should you be feeling that way inclined.
Serves 4
You will need

75g granulated sugar
15g cocoa
1 1/2 tbsp corn flour
300ml milk
1 tsp vanilla
35g butter
1 heaped dessert spoon smooth peanut butter

  • Whisk together the sugar, cocoa and cornflour in a medium saucepan.
  • Gradually whisk in the milk and set over a medium heat.
  • Bring to the boil and let bubble for about 1 minute, whisking fairly continuously.
  • Remove from the heat and whisk in the vanilla, butter and peanut butter; at this point you should have a thick, shiny mixture.
  • Pour into 4 ramekins and top each one with clingfilm, allowing it to touch the surface of the mixture all over.
  • Allow to cool completely before chilling in the fridge and topping with something yummy.

Sunday, 26 May 2013

Peanut Putter Granola.


Feeling preeeeetty proud of myself with this one. I didn't really mean it to be anything fancy or 'write home' worthy. I just saw the words 'peanut butter granola' on Pinterest and knew I had to get me some of that....asap.


In fact it isn't fancy at all; a handful of store cupboard ingredients and a bit of stirring and you honestly can have this come together in less than 30 minutes, and not in a Jamie Oliver way. It's one of those recipes that you want to show people that don't cook and can't be bothered to learn and go "LOOK, it's SOSO easy". As well as easy, it's also soso good; one of those recipes whose equation doesn't make sense; you get WAY more pleasure out than the amount of effort and resources you put in.


Turns out it's also pretty great in terms of being something useful to eat...you're bod needs pretty much all of the things that it has to offer, and you can definitely count it as a contribution to my answer to your healthy snacks question (and my rant).


And one more thing to tell you...it's not all that sweet; sweet enough for me (sugar fiend), but I think lots of people are put off cereal type things like this because they think they are sugar laden and aren't ready for such a sweet hit first thing in the morning (WHY??). This is not like that; just mellow and peanut buttery. YUM. With Love and Cake.  


Peanut Butter Granola.

A few notes:
  • If you don't have maple syrup, honey would work just as well I should think.
  • As with all cereal thingys, add whatever you want to the final mix; dried fruit, nuts, spices, and serve with whatever you fancy. I love it plain and simple with milk though.
Makes 4 large servings or more snacky sizes
You will need

1 x baking sheet, greased

2 tbsp your fav peanut butter
2 tbsp maple syrup
1/2 tsp cinnamon
1/2 tsp vanilla extract
pinch salt
1 tbsp flavourless oil, like groundnut or vegetable

  • Get that oven going at 150°c.
  • Pop the peanut butter and maple syrup in a bowl and blast in the microwave for about 30 seconds; until the pb kind of melts and is easy to stir.
  • Add the cinnamon, vanilla and salt and whisk to combine.
  • Stir the mixture into the oats and give everything a really good mix to combine as best you can, though don't worry if you have a few dry oats floating around.
  • Spread out on a baking sheet and bake for 20 minutes, redistributing about halfway through the cooking time.
  • Leave to cool completely on the baking tray so it crisps up and you're left with some bigger clusters and smaller rubble.
  • Store in a air tight jar and munch as desired.


Wednesday, 8 May 2013

PB&J French Toast.


So how was your bank holiday weekend? I'm guessing it went something like "oo SUN, lets play outside, lets have a picnic, lets go to the beach, lets go to the fair, lets take loads of of pictures and put them all over the internet and share the joy that summer is HERE".


Well I am very happy for you and hope you had a lovely time and basked and baked in the warmth that we've been missing for so long. The only sliiiiiight problem is that mine didn't quite go like that...it went more like "Oh this is a lot of snow, haha, Scotland you're funny and very beautiful, oh no, it's raining a lot, oh no it's REALLY windy, oh no our tent is broken, mmm is wearing 76 layers too much, nope, I'm still cold.....whhhhy is everyone talking about how summery it is???"


Yep. I decided to accompany the Mr and his pals on a little dive trip to Skye (I don't dive let's be clear, I was just along for the views), and while the views were really very wonderful, I would have enjoyed them more if I wasn't concentrating quite hard on keep both feet on the floor and being sad that I wouldn't get to sleep in an actual bed later that night.


On the plus side however, the terrible weather caused an early homecoming (thank the LORD) and therefore excess supplies of PB&J sarnies which I had lovingly packed, imagining I would enjoy them snuggled on a beach after a bracing run around (reality = devoured in a car being buffeted by the wind with my socks and gloves draped over the heaters). And how better to enjoy stale PB&Js than dunked in vanilla-ey egg, fried in butter and curled up on a squishy sofa on a day when I am clean and dry and there is even actual sun. You don't need to suffer an epic trip to enjoy them, though it does make you more appreciative.


PB&J French Toast.

A few notes:
  • This is easy; make a sandwich and fry it, and therefore lends itself well to many variations....Nutella and PB perhaps?
  • If you're not using a sandwich that has been carted across the country for days, it would work best if you were able to use quite stale bread.
Serves 1
You will need

2 x slices white bread
1 tbsp your fav peanut butter
1 tbsp your fav jam, I went for black cherry
1 egg
1 tsp vanilla extract
2 tsp caster sugar
1 big knob butter
icing sugar for dusting

  • Make a generous sandwich out of the bread, peanut butter and jam.
  • Whisk the egg, vanilla and caster sugar in a wide, shallow bowl or plate and dunk the sandwich in it.
  • Leave it to soak up the egg for a minute or two before flipping the sandwich over to let the other side soak up the rest.
  • Meanwhile melt the butter in a frying pan until just starting to bubble and brown.
  • Fry the sandwich for a few minutes a side until bronzed and firm.
  • Remove from the pan, cut in half and sprinkle with lots of icing sugar.
  • Mmmm thank heavens for duvets.


Tuesday, 9 April 2013

Breakfast Smoothie.


My friends quuuuuite often ask who eats all the things that I make....I think they get confused because here I am, documenting all the (fat and sugar laden) treats that do indeed emerge from my oven, and they see me, not exactly obese, and actually quite a health-obsessed-bean. 


And I shall tell you, that I probably eat moooost of what I cook. See I live with a boy who'd rather have a plate of steak than a plate of biscuits and would rather have a second helping of main course than save room for the dessert and only someone obsessed with cake, both the baking and eating, would write a blog all about cake. I like to eat cake.


But because I bake all the time, I don't do the things that I imagine people that don't bake as often, imagine that I do (does that make sense). What I mean is, baking is an everyday thing for me (in the BEST way), so I don't get over excited and eat all the mixture before it's gone in the oven, or nibble away at all the biscuits sitting on the cooling rack. And I am quite often baking foooor something...a birthday, where I can share stuff, or a time of day that I really need to eat and can tailor my baking exactly to it (see my special spinning bars). I have pudding after dinner most days...but because I know that that's what I want to do, I make allowances when it comes to how much of the savoury stuff I eat.


Plus....a day of mine is not complete without a good sweat; mostly in the form of pounding out the miles on two legs. If I'm going somewhere and I can run there, I will. And finally, not eeeeevry day of mine starts with pancakes....and I thought I should show you one of my favourite non-usually-bloggy breakfasts. P-P-P-Packed with good stuff and easy to digest if you've got a hardcore sweating sesh planned. Hope that solves the mystery. With Love and Cake.


My Favourite Breakfast Smoothie.

A few notes:
  • I'm afraid I've made this so many times that I don't really do any weighing, and who wants to get the scales out before breakfast anyway...not me. So I hope you don't mind the vagueness of the quantities here.
  • While this is my fav combination of stuff, think of it as a blue print; change berries, change liquid, change protein...it's up to you.
  • I have decided that I will, from now on, never buy fresh spinach again; I don't love it as a salad leaf anyway and I just end up throwing half the bag away because it's gone bad before I use it....hence the frozen stuff here...and as long as your blender's good and powerful enough to cope with ice, all will be well.
  • If you're blender is sub-par however, I'd suggest partially thawing out the frozen stuff, either by getting it out the freezer half an hour or so before you blend, or by a quick stint in the microwave.
Serves 1
You will need

a blender, definitely a blender

frozen blueberries, a good handful
frozen spinach, 3ish pellets (or a large handful of the fresh stuff)
1/2 frozen banana
milk 
1 tsp honey 
1 heaped dessertspoon smooth, natural peanut butter.

  • Put the berries and spinach in your blender and just about cover with milk.
  • Blend for a few minutes until everything seems pretty smooth.
  • Add the honey and peanut butter and a splash of water if it looks like you'd like the texture a little looser.
  • Blend again to combine.
  • Pour into a big glass and feel suuuuuper.


Friday, 25 January 2013

Chocolate and Peanut Butter Cheesecake.


It was my birthday week this week...yes thank you very much I did indeed get your card. I am a birthday person and while there wasn't a big party or any drinking til dawn, it did mean that I was allowed to buy new clothes without feeling bad, it meant that I let myself watch a whole afternoon of Sex and the City and Little Women (for the balance, you know) without making myself get up and fold the washing or clean the bath and it meant that I made the most gluttonous cheesecake you can possibly imagine even though only 50% of my household (me) will eat it.


I've been meaning and wanting to make this cake for aaaaaaaaages, but being that the other 50% of my household is not a peanut butter lover, which yes indeed would be a deal braker were he not so very lovely in all other ways, plus he takes car of all the car duties (phew), it doesn't make sense. And...being able to see exactly how much peanut butter chocoalte cheesecake you and only you have eaten, as represented in pie-chart (cheesecake-chart) form, is not good for your self-esteem...especially when meany physios tell you not to run more than 2 miles.


So I decided that birthday week was an excuse to be selfish and make it anyway and eat it anyway...even if it means having to have people round to dinner so I can force a slice down them so I don't feel so greedy (jokesjokes...I really DO enjoy being sociable...sometimes).


I hope fop your sake that you are surrounded by peanut butter lovers and therefore don't have to wait so long to make this cake, because it is WAY easier than it would have you believe and oh my DAYS so wonderfully peanut buttery and chocolatey and all the things you'd imagine a PEANUT BUTTER and CHOCOLATE CHEESECAKE (I just thought I should reiterate the genius of the collaboration we've got going on here) to be.


Chocolate and Peanut Butter Cheesecake
From Nigella's Kitchen.

A few notes:
  • You need to make this the day before you eat it; always good to know before you start.
  • The easiest and most hassle free way of making this will be with a food processor. If you are without one however, don't fret...you will have to tweak the base; leaving out the chocolate and peanuts because I'm not sure how you'd bash them to a powder without a processor, and you could use chocolate chip cookies instead of digestives to compensate...just pop them in a plastic food bag and bashbashbash them with a rolling pin. The filling would just need an extended beating with a hand whisk.  
  • The cream cheese absolutely 100% MUST be at room temperature before you start...do NOT think you'll be able to get away with using it straight from the fridge. Sorry for the firmness....but I've told you about my mistakes in this area before and wish someone was as demanding with me at the time.
Makes one beast of a cheesecake
You will need

1x23cm cake tin (spring-form will be easiest), greased

For the base
200g digestive biscuits
100g dark chocolate, chips or chopped from a bar
50g salted peanuts
50g soft butter

For the filling
500g cream cheese, at room temp
3 eggs, plus 3 egg yolks
200g caster sugar
125ml sour cream
250g smooth peanut butter

For the topping
250ml sour cream
100g milk chocolate
30g soft brown sugar

  • First job, as ever, preheat the oven to 170°c.
  • Process the base ingredients to a powder and press into the bottom of you cake tin using your fist or a spatula. Pop in the fridge.
  • Wash up your processor bowl and blade and process all your filling ingredients to a smooth, glossy, manila coloured gloop.
  • Pour the filling over the base in the cake tin and bake in the centre of your oven for around about 1 hour, though I would check after 45 minutes; what you're looking for is a mostly set cake with just a hint of wibblyness in the middle, or as Nigella so fabulously puts it...inner thigh wobble.
  • Make the topping by putting all the ingredients in a small saucepan and heating gently until the chocolate has melted and you have a glossy sauce.
  • Pour the topping over the top of the cake and put back in the oven for a final 10 minutes.
  • Leave the cake to cool completely in the tin and then leave to chill in the fridge overnight.
  • Let it sit out of the fridge for a while before you serve the cake, without letting it fully come to room temperature,


Friday, 14 September 2012

Ice Cream Cake.


So I knooooooow you don't exactly come here for diet food, but this diviiiiine little number goes above and beyond in the unhealthy stakes. Just look at it...in all is sparkly golden topped glory.


I mean, it doooooooes have nuts; mightymighty good for helping to keep us nice and bendy and clever, it has daaairy, good for those bones and veggie muscles of ours aaaaaaand it has chocolate; sscIEntIFically proven to make you happy and give you those nice frinedly antioxidants. WHat am I sAYing, unhealthy? This ice cream cake is positively a health food.  


I mean, they should ship it to Africa and give it to kiddywinkles instead of those weird peanut bars; not only would the poor starving children no longer be poor and starving (yes you can measure richness in cake....didn't you know?) but they would be happy and joyful and therefore much more likely to hug rather than take up arms.


My goodness, why on earth has no one made me 'Queen of the World' yet. I could fix pretty much aaaaalll the problems. Well I'll wait here eating ice cream cake...as soon as word gets out about this marvelous idea I'm sure I'll get a phone call...you know from God, or whoever makes these 'queen of the world' decisions. Oo also, I would make disliking peanut butter illegal...seriously, I have ALL the answers. With Love and Cake.


Ice Cream Cake.
Another one from Nige's Express

A few notes:
  • I made a fairly small cake, to serve 4, because freezer space is fairly limited, but feel free to scale up the ingredients to fit any freezer friendly receptacle. 
  • I used peanut butter chocolate chips because I have genius friends who give me such prezzies but if you cant find them you could use chocolate chips or you could chop up some Reese's Cups which are readily available these days. While you're at it, feel free to make any other tweaks and changes you fancy...maybe you'd prefer chocolate ice cream or you fancy sub-ing the bourbons for ginger nuts...this particular cake, unlike most others, isn't an exact science.
  • I served mine with the salted caramel sauce I've told you about before; leave it salt-less if you wish.
Serves 4
You will need

a small cake tin

500ml vanilla ice cream; that's a Ben and Jerry's sized tub
50g honey roast peanuts
50g peanut butter chips
1 Crunchy, crumbled, plus extra for topping
75g bourbon biscuits, crumbled, plus extra for topping
caramel sauce to serve

  • Get the ice cream out of the freezer and leave to soften for a while.
  • Meanwhile line the cake tine with clingfilm by lying a 2 lengths of cling over the top of the tin in opposite directions; so you have a clingfilm cross, leaving lots of excess so you can wrap the cake up tightly.
  • When the ice cream is soft, gently stir through the peanuts, peanut butter chips, crunchy and biscuits and spoon the ice cream into the lined cake tin.
  • Press the ice cream down into the tin, smooth the top and fold the excess clingfilm up and over the cake so it's all wrapped up.
  • Pop the cake tin in the freezer to harden up again.
  • When you're ready to serve, and the cake will sit happily in the freezer until then, turn in out of the cake tin and invert it onto a pretty plate. Sprinkle extra biscuits and Crunchy over the top, slice into wedges and spoon over lashings of sauce. 


Friday, 13 July 2012

Peanut Butter M&M Peanut Butter Cookies.


Oooow Peanut Butter M&Ms. PEANUT BUTTER M&Mssssss. I think I’ve become a bit renowned for my obsession with these beauties...every time one of my pals goes to the States (ok this isn’t oooften, but is not unheard of, especially from YOU dear gallivanting sister) I inSISt on these being brought back to me (yes yes I knooooow you can get them from Harvey Nicks but that doesn’t have the glamour of ‘oh yes a friend bought them back from her hols for me’).


And I LOVE that every time I’ve had a little visit from an Edinburgh (where Harvey Nicks in not a distant fantasy but actually exists) chum recently they’ve come bearing gifts in the form of all the types of M&Ms on offer....except coconut, mmmm exciting new discovery in store. I’ve had pretzel, I’ve had mint, but helloooo, it’s me and I am a PB fiend and of cooooourse it’s that variety of the snooker ball shiny treat that I hold in the highest esteem.


I haven’t really done any baking with them until now, mainly because...well, why tamper with perfection, but also because, contrary to what you might think, I don’t sit around all day popping M&Ms in to my mouth and my collection had started to swell to the degree that really I could have for many days in a row. Not that this is a negative situation you understand, just one that allows me to combine my love of PB M&Ms and love of baking without sobbing inside because of a suddenly deflated M&M collection....I had enough to act as a buffer you might say.


So yes....here we are...OF COURSE, because what else are you going to do with peanut butter treats apart from surround them with more peanut butter treat in the form of cookies. And these aaare cookies; bendy in the middle, crumbly round the outside cookies, as opposed to our smaller and daintier and a bit more uptigherer British biscuit. Oh look my last post gave love to just that variety of biscuit...you see I am an open minded lover of all flat, sweet, dunkable delights, there will be no biscuit prejudice here. With Love and Cake.


Peanut Butter M&M Peanut Butter Cookies.
Adapted from a bbcgoodfood.com recipe

A few notes:
  • These, of course, don't have to be Peanut Butter M&M Peanut Butter Cookies, they could be just peanut butter cookies with no additions, or perhaps you'd like to use chocolate chips, of any kind, and have peanut butter and chocolate cookies. Up to you. I understand if you're M&M collection is too small for baking to include them.
  • These are excellent with ice cream and would, I'm sure, make an even excellenter ice cream sandwich...just squodge some soft ice cream between 2 cookies and eat quickly before it all drips down your fingers.
Makes around 10
You will need

a baking sheet, lined with greaseproof paper

100g butter, softened
100g peanut butter, smooth or crunchy, your choice
50g demerara sugar
 50g caster sugar
 1 egg
100g plain flour
1/2 tsp baking powder
1/2 tsp bicarbonate of soda
100g Peanut Butter M&Ms

  • As per uuush, preheat the oven to 180°c.
  • Now get the butter, peanut butter and both sugars in a nice big bowl and beat with an electric hand whisk if you have one, or a wooden spoon and some sweat if you don't, until everything in nicely combined and fluffy looking.
  • Then beat in the egg.
  • Sift in the flour, baking powder and bicarb and fold it all together so you have a nice smooth dough.
  • Finally gently stir through the M&Ms so they get nice and evenly distributed.
  • Now for the baking...lay tablespoonfulls of the cookie dough on your lined baking sheet, leaving a good space in between each one for it to grown big and wide, this might mean you need to bake in a couple of batches....better to do that rather than squish them in too close together and get one giant cookie.
  • Bake the cookies for 5 minutes and then take out the tray and give it a good bang on a heat protected surface, like a wooden chopping board. This will make all the air leave the cookies alone and let them get gooey and bendy in the middle.
  • Pop them back in the oven as quick as you can and bake for another 5-7 minutes....try not to let them darken very much, you want them only just to be golden round the edges for optimum gooeyness.
  • When they're done, leave them on the baking tray to firm up for a few minutes before transferring them to a wire rack to cool just a bit more....just enough time for your ice cream to soften.